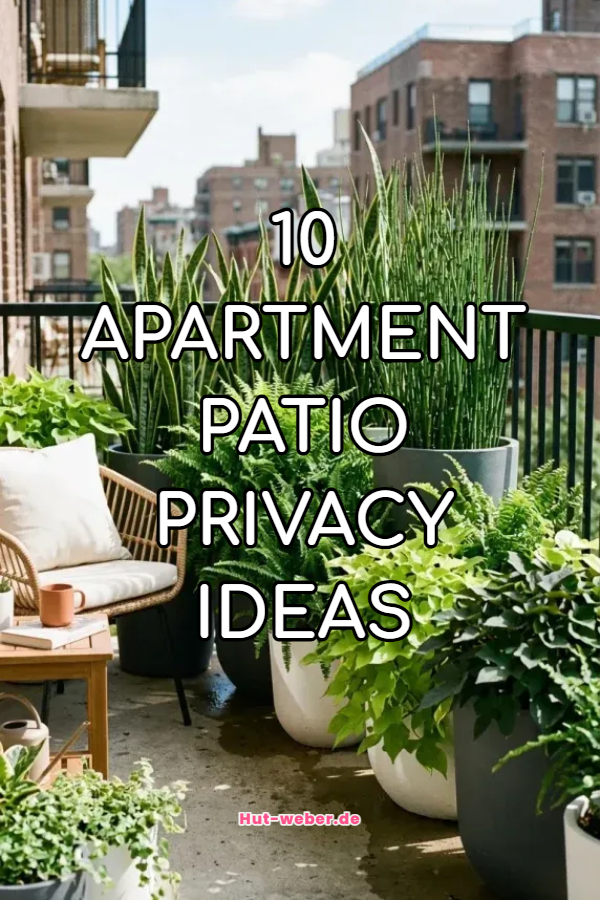
10 Apartment Patio Privacy Ideas

Apartment patios and balconies offer valuable outdoor living space, but their open designs often leave residents exposed to nearby neighbors, street traffic, and upper-level windows. Transforming an exposed apartment patio into a secluded personal retreat requires strategic privacy solutions that balance screening, light diffusion, and structural accessibility. Because most apartment complexes enforce strict HOA or lease guidelines regarding exterior alterations, successful privacy installations must prioritize non-permanent, non-damaging mounting methods.
This guide details 10 creative apartment patio privacy ideas designed to block unwanted sightlines while elevating your outdoor aesthetic. You will learn actionable techniques for selecting renter-friendly privacy screens, hanging vertical greenery, installing weather-resistant drapes, and arranging architectural potted plants without violating lease terms or damaging building property.
Why This Idea Is Trending or Useful
Urban density and open-concept building designs have made apartment patio privacy a top priority for renters and condo owners. Establishing visual boundaries offers immediate practical value: it converts an underutilized, fishbowl-like balcony into an inviting outdoor room for morning coffee, remote work, yoga, or evening relaxation.
Privacy solutions are inherently versatile and accessible across various budget levels. Instead of relying on costly structural additions, renters can use adaptable fixtures—such as zip-tied bamboo rolls, freestanding planter trellises, tension-rod curtains, and faux-ivy privacy mesh—that install quickly and disassemble easily upon moving. Furthermore, privacy screens serve double duty by acting as windbreaks, blocking harsh direct sunlight, and providing vertical structures for climbing plants. Mastering micro-space privacy principles helps you build key interior-exterior design skills, including sightline control, vertical layering, and non-invasive hardware installation.
Materials and Preparation
Achieving an effective, durable, and landlord-approved apartment privacy screen requires checking lease rules, measuring sightlines, and selecting appropriate weather-resistant hardware.
Key Rules & Preparation Steps
- Review Lease & HOA Guidelines: Verify your building’s rules regarding exterior attachments, railing covers, hanging fixtures, and plant box weight limits.
- Map Primary Sightlines: Sit in your primary patio seating position and identify exact angles of exposure (e.g., direct neighbor views, sidewalk traffic, or upper-floor windows) to place privacy elements where they block views most effectively.
- Choose Damage-Free Mounting Hardware: Utilize heavy-duty UV-resistant outdoor zip-ties, adjustable railing clamps, tension rods, or freestanding heavy bases rather than drilling into exterior stucco, brick, or vinyl siding.
+-------------------------------------------------------+
| UPPER NEIGHBOR SIGHTLINE |
+-------------------------------------------------------+
\
\ <- Blocked by Hanging Sheers
v
+-------------------------------------------------------+
| +-----------------------------------------------+ |
| | PATIO PRIVACY SCREEN | |
| +-----------------------------------------------+ |
| |
| [ Seating Zone ] [ Railing Screen ] |
+-------------------------------------------------------+
^
/ <- Blocked by Bamboo Roll
/
+-------------------------------------------------------+
| STREET / SIDEWALK SIGHTLINE |
+-------------------------------------------------------+
Idea 1: Natural Bamboo Pole Screen Zip-Tied to Railings
Concept and Design Overview

The natural bamboo pole screen is one of the most popular, cost-effective, and landlord-friendly privacy upgrades for apartment balconies. A flexible roll of natural bamboo poles or split-reed fencing is unrolled along the interior perimeter of metal balcony railings, instantly blocking low-level views from the street or courtyard below.
The organic texture of natural timber introduces warmth to plain concrete and steel apartment architecture. Bamboo fencing diffuses harsh winds while allowing subtle daylight to filter through small gaps between poles. The color palette pairs natural tan or dark tortoise bamboo with green potted plants and neutral furniture. This durable, budget-friendly setup suits narrow apartment balconies, metal spindle railings, and rented spaces.
+-------------------------------------------------------------+
| [ BALCONY TOP RAILING BEAM ] |
|=============================================================|
| || [ Natural Bamboo Pole Roll ] || |
| || ============================ || |
| || [ Secured with Heavy-Duty Zip-Ties] || |
|=============================================================|
| [ Interlocking Wood Deck Tiles ] |
+-------------------------------------------------------------+
Step-by-Step Creation Method
- Measure Railing Height & Length: Measure the exact height from the balcony deck to the top rail, as well as total perimeter length, purchasing a bamboo roll of matching dimensions.
- Unroll and Position: Unroll the bamboo fencing along the inside edge of your metal railing, keeping the base slightly off the deck floor to prevent water absorption and rot.
- Secure with Heavy-Duty Zip-Ties: Fasten the bamboo screen to vertical railing spindles every 12 to 15 inches using weather-resistant, UV-stabilized heavy-duty zip-ties (matching the bamboo color).
- Trim Excess Wire/Ends: Trim loose zip-tie tails flush with a pair of snips for a clean appearance.
- Softly Frame with Greenery: Place two tall potted plants (such as horsetail reed or bamboo palm) at screen corners to soften structural edges.
Idea 2: Freestanding Wood Planter Box with Integrated Lattice Trellis
Concept and Design Overview

A freestanding wooden planter box with a built-in vertical lattice trellis provides substantial privacy without requiring wall mounts or ceiling anchors. The heavy weight of soil inside the base planter box keeps the tall trellis structure completely stable, even during strong winds.
Climbing vines—such as jasmine, clematis, english ivy, or honeysuckle—grow up the wooden lattice rungs, creating a living green wall between neighboring balconies. The natural wood construction introduces warmth, while the foliage delivers privacy, noise reduction, and sweet floral fragrance. The color palette centers on stained cedar or teak wood, vivid green foliage, and colorful seasonal blooms. This self-supported design is ideal for side-by-side apartment balconies lacking side walls.
Step-by-Step Creation Method
- Assemble or Position the Unit: Set up an outdoor-treated cedar or acacia wood planter box with an integrated 5- to 6-foot tall lattice back panel along the shared neighbor boundary.
- Line and Elevate the Base: Line the interior planter box with porous landscape fabric and place plastic riser blocks beneath the box base to allow proper water drainage.
- Fill with Lightweight Soil: Fill the lower third of the box with lightweight potting mix blended with perlite to manage overall deck weight.
- Plant Climbing Vines: Plant fast-growing climbing vines (like Star Jasmine or Mandevilla) across the box length, gently weaving main stems into lower trellis rungs.
- Train Vine Growth: Use soft plant ties to guide growing vines upward across the lattice framework until full privacy coverage is achieved.
Idea 3: Outdoor Tension-Rod Curtains with Weather-Resistant Drapes

Concept and Design Overview
Hanging outdoor sheer curtains provides flexible, resort-style privacy for covered balconies and recessed apartment patios. Utilizing heavy-duty, spring-loaded outdoor tension rods allows you to hang full-length fabric drapes without drilling single holes into concrete ceilings or exterior walls.
When extended, the drapes block views from adjacent buildings while softening direct sunlight into a warm, diffused glow. On breezy or clear days, the curtains can be drawn back to side posts using fabric tie-backs. The color palette emphasizes crisp white, off-white, light grey, or soft navy weather-resistant fabrics (such as Sunbrella or solution-dyed polyester). This elegant, damage-free approach is tailored for covered patios and renters wanting flexible screening.
+-------------------------------------------------------------+
| [ HEAVY-DUTY OUTDOOR TENSION ROD (NO DRILLING) ] |
|=============================================================|
| | | | | |
| | | [ Full-Length Sheer Outdoor Curtain Panels ] | | |
| | | | | |
| | | (Drawn for Privacy / Tied Back on Sunny Days) | | |
| | | | | |
|=============================================================|
| [ Weather-Resistant Area Rug ] |
+-------------------------------------------------------------+
Step-by-Step Creation Method
- Measure Span & Clearance: Measure the exact horizontal distance between two side walls or ceiling posts, choosing an outdoor tension rod rated for heavy spans.
- Select Outdoor-Grade Fabric: Purchase curtain panels made from mold-resistant, mildew-proof, and UV-stabilized outdoor acrylic or polyester fabric with rust-proof grommets.
- Install Tension Rod: Thread curtain grommets onto the tension rod, extend the rod firmly between structural side walls, and twist until tightly locked in place.
- Secure Fabric Bases: Attach weighted curtain clips or small lead weights to lower hems to keep fabric from blowing inside during light breezes.
- Add Decorative Tie-Backs: Install non-damaging adhesive hooks on side walls to hold fabric tie-backs when opening curtains fully.
Idea 4: Faux-Ivy Evergreen Leaf Privacy Mesh Panels

Concept and Design Overview
Faux-ivy privacy mesh provides instant, year-round green coverage without waiting for live plants to grow or worrying about watering routines. These panels feature realistic synthetic ivy or boxwood leaves attached to a flexible plastic mesh backing, easily unrolled and trimmed to fit any railing or wall frame.
The dense leaf arrangement provides near-100% visual blockage, making it effective for hiding cluttered storage or blocking direct views from street traffic. The artificial materials are UV-treated to resist fading, offering an evergreen look across every season. The color palette centers on deep forest green, lime accents, and dark mesh backings. This zero-maintenance, instant privacy solution works exceptionally well for busy renters, shaded balconies where real plants struggle, and low railings.
Step-by-Step Creation Method
- Measure Railing Grid: Measure the length and height of the railing frame or wall section needing immediate coverage.
- Unroll and Trim Mesh: Unroll the faux-ivy privacy mat onto a flat surface, trimming excess mesh backing using household shears or utility scissors.
- Attach to Railing Spindles: Align the faux-ivy mat along the inside or outside of your balcony railing, securing plastic mesh backing to metal spindles using green zip-ties every 10 inches.
- Conceal Attachment Points: Fluff artificial leaves over zip-tie heads to conceal hardware completely.
- Wash Periodically: Spray the faux foliage with a hose or water spray bottle every few months to clear accumulated dust and keep leaves looking fresh.
Idea 5: Layered Architectural Potted Plant Border
Concept and Design Overview
Instead of a single solid wall, the architectural potted plant border uses clustered potted greenery of varying heights to form a lush, staggered living privacy screen. Grouping tall slender plants with bushy mid-height shrubs and low trailing botanicals creates a natural visual barrier that feels intentional and open.

Using lightweight, weather-resistant resin or fiber-clay pots allows you to shift planters easily when reconfiguring the space or moving out. Key plant varieties include tall snake plants, horsetail reed, bamboo palms, fiddle-leaf figs, and potted ornamental grasses. The color palette pairs neutral charcoal, white, or terracotta planters with varied green leaf textures. This flexible botanical approach is perfect for plant lovers, sunny patios, and non-permanent layouts.
+-------------------------------------------------+
| OUTDOOR SIGHTLINE |
+-------------------------------------------------+
|
v
+-------------------------------------------------+
| [ Tall Snake Plant ] [ Bamboo Palm ] |
| (In Tall Resin Pot) (In Large Cylinder) |
| \ / |
| [ Bushy Fern ] [ Potted Grasses ] |
| (Mid-Height) (Low Layer) |
+-------------------------------------------------+
|
v
+-------------------------------------------------+
| PRIVATE PATIO SEATING |
+-------------------------------------------------+
Step-by-Step Creation Method
- Select Lightweight Containers: Purchase lightweight resin, fiberglass, or fiber-clay pots in staggered heights (24-inch, 18-inch, and 12-inch sizes).
- Position Tall Back Layer: Line up tall, slender plants (such as Horsetail Reed or Snake Plants) along the outer balcony perimeter to block primary sightlines.
- Add Bushy Middle Layer: Place medium-sized, bushy plants (like Boston Ferns, Monstera, or Dwarf Palms) directly in front of the tall layer to fill visual gaps.
- Cascade Low Front Layer: Complete the cluster with low, overflowing pots filled with trailing ivy, sweet potato vine, or colorful annuals.
- Use Rolling Plant Caddies: Place heavy, large pots on rolling plant dollies to easily shift plants during patio cleaning or stormy weather.
Idea 6: Horizontal Wooden Slat Privacy Divider Screen
Concept and Design Overview
The horizontal wooden slat screen introduces sleek architectural lines, modern warmth, and structured privacy to contemporary apartment patios. This concept utilizes a freestanding wooden panel frame constructed with narrow horizontal wood slats (such as cedar, redwood, or thermo-treated pine) spaced 0.5 to 1 inch apart.

The narrow spacing between horizontal slats allows light and fresh air to pass through while obscuring direct views into your sitting area. The structured timber frame can also hold small hanging planter boxes, solar lights, or outdoor wall decor. The color palette features warm honey cedar, dark walnut stain, or sleek black-painted wood paired with modern outdoor furniture. This polished design is ideal for modern apartment complexes and side-by-side patio dividers.
Step-by-Step Creation Method
- Construct or Purchase Divider Panel: Source a freestanding horizontal slat screen panel (5 to 6 feet tall) built with outdoor-grade cedar or treated timber.
- Anchor Freestanding Base: Secure the panel base using heavy-duty wooden foot braces or anchor it inside two heavy wooden planter boxes filled with gravel.
- Apply Weather-Proof Stain: Coat raw timber surfaces with a clear or tinted exterior deck sealer to protect wood against rain and UV rays.
- Attach Railing Bracket Braces: If allowed, attach non-damaging adjustable clamps between the screen frame and balcony railing for extra wind stability.
- Hang Accent Pots: Mount small metal pot hangers onto horizontal wood slats to display potted succulents, trailing ivy, or solar lanterns.
Idea 7: Retractable Side Patio Awning / Pull-Out Fabric Screen

Concept and Design Overview
The retractable side patio awning is an ingenious privacy solution that expands when you need it and rolls out of sight when you don’t. This unit features a spring-loaded fabric roller casing mounted vertically to a side wall or post, paired with a receiving bracket mounted to the opposite railing or floor base.
When pulled open, the durable polyester fabric screen spans 5 to 10 feet horizontally, creating an instant windbreak and privacy wall between adjacent balconies. When finished outdoors, the screen retracts smoothly into its compact aluminum housing. The color palette emphasizes clean modern shades like charcoal grey, taupe, navy, or beige. This space-saving, retractable option is perfect for tight balconies, high-wind areas, and multipurpose layouts.
Step-by-Step Creation Method
- Verify Mounting Anchor Points: Ensure you have a solid side wall or corner post to mount the main retractable roller cassette securely.
- Mount Roller Cassette: Attach the main aluminum roller housing vertically to a side wall using mounting brackets or non-damaging post clamps.
- Install Receiving Post: Anchor the receiving catch post or clamp bracket onto the opposite railing spindle or deck floor edge.
- Test Pull Action: Extend the retractable fabric handle across the balcony width, locking it securely into the receiving catch post.
- Retract for Storage: Unlock and guide the handle gently back into the cassette casing during heavy storms or prolonged absence to prolong fabric lifespan.
Idea 8: Hanging Macramé Plant Hangers and Hanging Basket Canopy
Concept and Design Overview

Utilizing ceiling space to hang a series of trailing macramé plant holders creates a bohemian, garden-like privacy canopy overhead. Hanging potted plants at staggered heights along the outer edge of a covered balcony forms an organic green curtain that blocks upper-level views from neighboring buildings.
Trailing plant varieties—such as Golden Pothos, String of Hearts, English Ivy, and Boston Ferns—grow downward, filling vertical gaps with lush foliage over time. The soft cotton cord macramé introduces handwoven texture that pairs well with rattan furniture and string lighting. The color palette features cream cotton cord, terracotta pots, vibrant green vines, and warm amber lights. This creative design is suited for covered balconies, boho decor fans, and budget-conscious renters.
+-------------------------------------------------------------+
| [ CEILING / BEAM MOUNTED HANGING HOOKS ] |
|=============================================================|
| | | | | |
| [Macramé] [Macramé] [Macramé] [Macramé] |
| [ Pothos ] [ Fern ] [ Ivy ] [ Pothos ] |
| (vines (foliage (vines (vines |
| drapes) cascades) drapes) drapes) |
|=============================================================|
| [ Rattan Outdoor Furniture ] |
+-------------------------------------------------------------+
Step-by-Step Creation Method
- Check Ceiling Support: Confirm overhead beams or ceiling overhangs can support hanging plant pots (or use heavy-duty outdoor tension rods across side walls).
- Install Weather-Proof Hooks: Screw stainless steel ceiling hooks into structural overhead joists, or secure non-damaging clamp hooks over exposed steel beams.
- Hang Macramé Holders: Hang weather-resistant cream cotton or jute macramé plant hangers at varied lengths (staggering heights by 6 to 12 inches).
- Insert Lightweight Pots: Place lightweight plastic or resin pots planted with trailing vines (like Pothos or Philodendron) inside macramé cradles.
- Guide Trailing Vines: Allow trailing vines to cascade downward, weaving long stems together to form a cohesive, living privacy curtain.
Idea 9: Frosted Glass / Acrylic Privacy Railing Panels
Concept and Design Overview

Frosted acrylic or tempered glass railing panels provide a sleek, high-end privacy upgrade that blocks direct views while allowing maximum natural sunlight to illuminate your patio. These translucent panels replace open railing spindles with smooth, frosted surfaces that obscure line of sight completely while maintaining a bright, open atmosphere.
Custom-cut frosted acrylic sheets can be clamped directly onto existing metal railing frames using heavy-duty, non-damaging glass clamps or heavy zip-ties through pre-drilled corner holes. The frosted finish resists moisture, blocks wind, and cleans easily with glass spray. The color palette focuses on translucent icy white, polished chrome hardware, and clean modern finishes. This contemporary solution is ideal for dark balconies needing light preservation and windy high-rise apartments.
Step-by-Step Creation Method
- Measure Railing Spans: Measure exact railing opening dimensions, ordering custom-cut 1/4-inch thick frosted acrylic or polycarbonate sheets with smooth rounded edges.
- Pre-Drill Corner Holes: Ensure corner holes are pre-drilled through acrylic sheets 1 inch inward from edges for zip-tie or clamp mounting.
- Align Panels to Railing: Position the frosted panel along the inside frame of your metal balcony railing.
- Secure with Glass Clamps or Ties: Fasten panels tightly using stainless steel glass clamp brackets or clear heavy-duty outdoor zip-ties thread through pre-drilled holes.
- Clean and Maintain: Wipe down frosted surfaces with a microfiber cloth and mild soap solution to keep panels streak-free and luminous.
Idea 10: Artificial Boxwood Hedge Wall Units
Concept and Design Overview

Artificial boxwood hedge wall units offer a lush, manicured greenery barrier that delivers 100% privacy and noise reduction. Pre-assembled hedge panels mounted on lightweight steel frames stand upright along patio borders, mimicking clean, formal topiary hedges found in luxury estates.
These dense, 3D foliage walls block views, absorb street noise, and create a cozy, enclosed courtyard feel on concrete balcony decks. The artificial boxwood leaves are constructed from high-density, UV-stabilized polyethylene that resists fading and rain damage year-round. The color palette pairs vibrant deep green hedge foliage with sleek dark metal or wood bases. This high-end, zero-maintenance design suits luxury apartment patios, urban high-rises, and busy professionals.
+-------------------------------------------------------------+
| [ DENSE ARTIFICIAL BOXWOOD HEDGE PANEL ] |
| |
| +-----------------------------------------------------+ |
| | 3D Synthetic Foliage (100% Visual Blockage) | |
| | | |
| +-----------------------------------------------------+ |
| | STURDY HEAVY BASE CONTAINER (Filled with Gravel) | |
| +-----------------------------------------------------+ |
| |
| [ Interlocking Composite Floor ] |
+-------------------------------------------------------------+
Step-by-Step Creation Method
- Select Modular Hedge Units: Source pre-built 3D artificial boxwood hedge wall panels mounted on sturdy wire mesh or metal frames (typically 4 to 6 feet tall).
- Anchor Heavy Base: Place the hedge frame into a long trough planter or weigh down the steel base frame with heavy patio pavers or gravel bags to withstand wind.
- Interlock Adjacent Panels: Connect multiple hedge units together using built-in snap-lock connectors or dark zip-ties to create a seamless green wall.
- Align Along Exposure Line: Position the hedge wall along the primary exposed boundary line facing neighboring windows or street corridors.
- Hose Off Annually: Rinse foliage annually with a water hose to remove urban dust and preserve vibrant green color depth.
Common Beginner Mistakes and How to Avoid Them
- Violating Lease & HOA Terms: Drilling holes into exterior building walls, stucco, or common-area railings can result in fines and loss of security deposits. Always use freestanding, zip-tied, or tension-rod solutions that leave zero permanent damage.
- Neglecting Wind Resistance: Installing large, solid privacy screens without proper base weight or wind gaps turns screens into sails during high winds, risking damage or falling hazards. Always weigh down freestanding bases with heavy pavers and choose breathable woven or slatted materials.
- Creating Unwanted Shade: Over-blocking a small balcony with solid dark walls can make your adjoining indoor living room feel dark and gloomy. Use translucent, frosted, or breathable materials (like sheer outdoor curtains or lattice trellises) that block views while letting light pass through.
- Overloading Deck Weight Capacity: Placing multiple heavy concrete planters filled with wet soil can exceed balcony structural weight limits. Always select lightweight resin, fiber-clay, or fabric containers and use perlite-blended potting soils.
- Blocking Emergency Access & Fire Escapes: Obstructing balcony access gates, fire escape routes, or door swing radii creates severe safety hazards. Keep primary walking paths clear by at least 24 to 30 inches.
Practical Tips for Elevated Privacy Styling
- Combine Hard & Soft Elements: Pair rigid structural screens (like bamboo rolls or wooden slats) with soft, organic textiles (like outdoor sheer drapes or hanging trailing plants) to create a layered, interior-designed look.
- Strategic Angle Placement: You don’t need to enclose your entire balcony; place tall privacy screens only along primary exposure angles (such as side-by-side neighbor boundaries) while leaving front views open to preserve scenery.
- Integrate Warm Evening Lighting: Clip warm white LED string lights or solar fairy lanterns along privacy trellises or bamboo screens to transform your privacy barrier into a glowing ambient wall at night.
- Opt for Multi-Functional Furniture: Use tall outdoor storage benches or high-backed wicker loveseats along perimeter edges to double as functional seating and physical privacy barriers.
- Coordinate Interior-Exterior Palette: Choose privacy screen colors and plant pot finishes that match your interior living room color palette, making your small balcony feel like a natural, seamless extension of your indoor space.