10 Colorful Glass Bead DIY Coaster Ideas

Spread the love

Creating custom drink coasters using vibrant glass beads turns everyday tabletop protection into an engaging, expressive craft project. Traditional store-bought coasters often rely on generic cork, plain ceramic, or printed cardboard that wears down quickly when exposed to drink condensation. Crafting with colorful glass seed beads, faceted crystal rounds, and fused glass nuggets allows makers to design eye-catching, durable home decor that reflects light across dining and living spaces. This comprehensive guide outlines the foundational principles of assembling, gluing, stringing, and resin-sealing complex glass bead coaster designs across varied DIY techniques. You will learn the exact adhesive applications, silicone mold setups, heat-resistant casting methods, and backing reinforcements needed to produce practical drink mats. Understanding bead sizing, surface levelness, waterproof barrier protection, and thermal tolerance ensures your finished coasters hold hot mugs and iced glasses securely without cracking or sticking. Crafting your own glass bead drink coasters delivers lasting artistic satisfaction, adds a pop of handmade color to your coffee table, and creates practical handmade gifts for friends and family.

Why This Idea Is Trending or Useful

Glass bead coasters have become a popular home decor trend across modern craft platforms because they combine accessible DIY techniques with rich, light-catching textures. Glass beads naturally resist moisture absorption, preventing the water rings, warping, and mold buildup that frequently damage standard wood or unfinished ceramic drink mats. When illuminated by overhead room lighting or natural sunlight, the transparent, iridescent, and metallic finishes of glass beads reflect radiant colors across tabletop surfaces. Furthermore, bead crafting offers limitless design versatility, allowing crafters to experiment with everything from swirling mosaic spirals and floral mandalas to sleek geometric color-block grids. The project remains beginner friendly because it can be customized around multiple assembly methods, including crystal-clear epoxy casting, flexible wire weaving, or direct mosaic gluing onto natural cork blanks. These projects require minimal specialized machinery, making them accessible to complete on a small craft desk. The combination of heat resistance, wipe-clean durability, low material costs, and customizable color schemes makes DIY glass bead coasters an exceptionally rewarding creative project.

Materials and Preparation

Crafting durable and level glass bead coasters requires gathering uniform glass beads, heat-resistant adhesives, durable base substrates, and protective finishing supplies before beginning assembly. Essential crafting materials include size 6/0 and 8/0 glass seed beads, faceted glass crystal rondelles, flat-backed glass mosaic gems, clear heat-resistant epoxy resin, heavy-duty waterproof craft adhesive, and four-inch natural cork or unfinished wooden coaster blanks. Required tools include silicone coaster casting molds, needle-nose jewelry pliers, disposable resin mixing cups, wooden stir sticks, a heat gun or torch for bubble removal, and flexible bead tweezers. Begin preparation by setting up a clean, level workspace covered with a non-stick silicone craft mat or wax paper. Wipe down all coaster blanks and glass beads with isopropyl alcohol to remove surface dust and manufacturing oils that could prevent strong glue bonding. Sort your glass beads by color family and diameter into shallow organizing trays to streamline your pattern layout. If using epoxy resin, ensure your work area maintains a consistent room temperature of seventy-two to seventy-five degrees Fahrenheit to facilitate proper resin curing without surface clouding.

Idea 1: Concentric Rainbow Spiral Seed Bead Cork Coaster

How to Create

A concentric rainbow spiral seed bead coaster utilizes a continuous coiled bead string glued over a natural cork base to produce a vibrant, hypnotic tabletop accent. This design starts with a single central metallic gold glass seed bead and radiates outward in smooth, concentric rings of red, orange, yellow, green, blue, and violet size 6/0 glass seed beads. The circular cork foundation absorbs minor drink vibrations and prevents surface scratching, while the raised glass beads lift cold beverage glasses slightly above the cork base, allowing condensation to dissipate naturally. The smooth, rounded glass bead contours create a stable, non-slip resting surface for mugs and glasses while delivering a bright, joyful pop of color that enlivens modern coffee tables and patio dining sets.

To create this rainbow spiral coaster, cut a piece of durable 24-gauge jewelry wire measuring roughly five feet in length, securing one end with a small wire loop. String your selected size 6/0 glass seed beads onto the wire in a repeating spectral rainbow sequence until the entire wire is densely loaded. Apply a nickel-sized puddle of heavy-duty waterproof craft adhesive (such as silicone adhesive or E6000) directly to the center of a four-inch round cork coaster blank. Coil the start of the beaded wire tightly into a small central spiral, pressing it firmly into the wet glue. Continue spreading adhesive outward in spiral rings, pressing the beaded wire down row by row while keeping the coils tightly pressed against each other without gaps. Once you reach the outer edge of the cork blank, trim excess wire, tuck the sharp cut end under the final bead row with pliers, and place a flat heavy book over wax paper on top of the coaster for twelve hours to ensure a flat, level surface.

Idea 2: Clear Epoxy Resin Cast Glass Gem Mosaic Coaster

Step-by-Step Guide

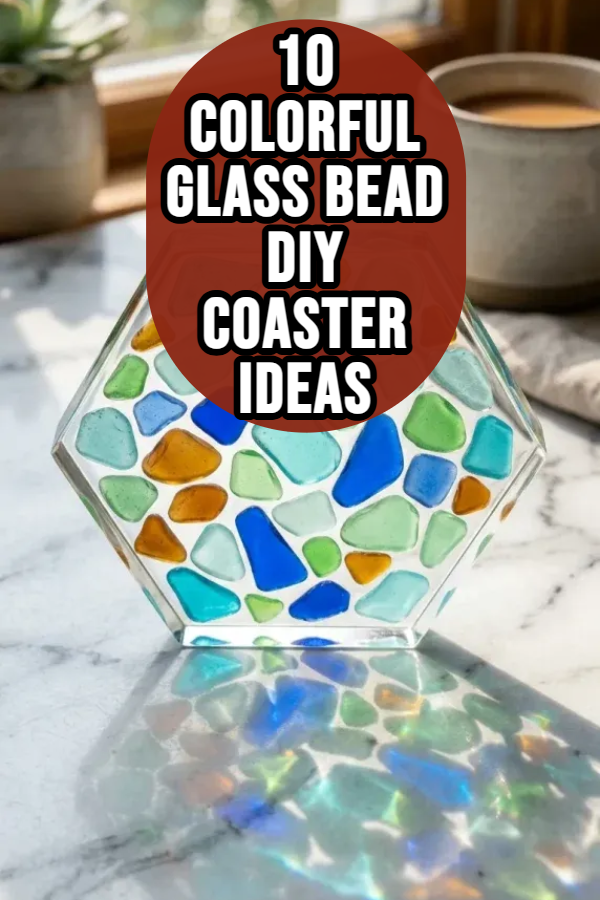
The clear epoxy resin cast glass gem mosaic coaster suspends flat-backed, iridescent glass nuggets inside a crystal-clear, heat-resistant resin disc. This technique creates a smooth, level tabletop surface that mimics sea glass embedded in clear water, allowing the rich colors of the glass gems to shine through with high optical clarity. The solid resin encasement locks the glass pieces permanently in place, making the coaster completely waterproof, washable, and resistant to heat from hot coffee mugs. Arranging translucent aqua, cobalt, seafoam green, and amber glass nuggets in an organic mosaic layout produces a coastal, spa-like aesthetic that elevates everyday beverage service.

Begin by setting a four-inch round or hexagonal silicone coaster mold on a level work table, spraying the interior lightly with mold release spray. Arrange flat-backed colored glass gems inside the bottom of the silicone mold, placing the smooth, flat faces downward and leaving narrow one-sixteenth-inch gaps between stones. In a clean plastic measuring cup, mix equal parts of two-part clear casting epoxy resin and hardener, stirring slowly for three full minutes with a flat wooden stir stick to minimize air bubbles. Slowly pour the mixed clear resin over the arranged glass gems until the liquid level rises just above the top edges of the glass pieces. Sweep a handheld heat gun or culinary torch on low heat across the liquid resin surface two inches above the mold to pop any rising air bubbles. Allow the resin coaster to cure undisturbed for twenty-four to forty-eight hours before gently peeling the silicone mold away to reveal the glossy, glass-embedded drink mat.

Idea 3: Geometric Color-Block Woven Delica Bead Tile Coaster

Setup Method

A geometric color-block woven Delica bead tile coaster uses high-precision Japanese cylinder glass beads woven into a square tapestry to create a modern, Bauhaus-inspired drink mat. Cylinder beads feature laser-cut, flat edges that fit snugly together like miniature ceramic tiles, producing a flat, smooth, fabric-like surface that keeps glasses perfectly stable. The design incorporates bold color-blocked quadrants of mustard yellow, terracotta, olive green, and crisp ivory, bordered by a thin frame of matte charcoal glass beads. This coaster provides a flexible, heat-resistant resting surface that can be attached to a thin wood backing or used as a soft, textile-style drink mat that will not scratch delicate glass or polished wood tabletops.

To set up this project, graph a fifty-row by fifty-column square color-block chart on peyote or loom grid paper, mapping out each colored block quadrant. Warp a sturdy tabletop bead loom with fifty-one strands of bonded nylon beading thread, pulling each strand taut across the threaded spring rollers. Thread a long beading needle with five feet of conditioned 6lb bonded beading thread, tying the tail securely to the leftmost warp strand. String fifty size 11/0 Japanese cylinder glass beads according to your pattern chart, bringing the needle under the warp threads and pressing each bead up into its respective warp slot with your fingertip. Pass the needle back through all fifty beads above the warp threads to lock the first row firmly in place. Continue weaving row by row according to your geometric chart until the square tapestry is complete. Remove the piece from the loom, weave all warp ends securely into the beadwork matrix, and adhere the woven tile onto a four-inch square wooden coaster base using contact cement.

Idea 4: Moroccan Mandala Pattern Beaded Wood Disc Coaster

Execution Process

The Moroccan mandala pattern beaded wood disc coaster combines intricate radial symmetry with rich jewel-toned glass beads to create an ornate, bohemian tabletop showpiece. This layout uses a round, laser-cut wooden craft blank as a rigid foundation, upon which concentric rings of teardrop, petal, and round glass beads are glued in repeating geometric petal arrangements. The color scheme features deep ruby red, rich sapphire blue, warm topaz, and metallic bronze glass beads, mimicking traditional Mediterranean and Middle Eastern tile work. The varied bead heights create tactile interest around the outer perimeter while maintaining a flat, level central zone designed to support beverage cups securely.

Execute this design by drawing radial reference guidelines across a four-inch round wooden craft disc using a pencil and ruler, dividing the circle into eight equal pie-shaped segments. Apply a thin, even coat of high-strength clear craft adhesive across the central one-inch circle of the wood base. Position a large, flat glass jewel in the center point using tweezers, surrounding it with a ring of tiny metallic gold size 11/0 seed beads. Work outward segment by segment, gluing teardrop-shaped glass beads pointing toward the center to form symmetrical flower petals, filling the spaces between petals with contrasting turquoise and ruby glass seed beads. Continue building the mandala pattern in concentric rings until the entire wooden surface is covered. Let the adhesive cure for twenty-four hours, then brush a coat of water-resistant clear gloss polycrylic sealer over the top to lock the beadwork in place and protect the wood base from drink spills.

Idea 5: Floating Sea-Glass and Micro-Bead Coaster with Gold Leaf Trim

How to Create

A floating sea-glass and micro-bead coaster with gold leaf trim suspends tumbled beach glass and sparkling micro-glass caviar beads inside a clear hexagonal resin frame edged in metallic gold. This design combines the frosty, organic textures of tumbled sea glass with the delicate sparkle of transparent miniature glass bubbles. The glass pieces are arranged along the outer perimeter of the coaster, leaving a clear resin window in the center that showcases clean, minimalist drinkware. Gilding the outer edge with genuine or imitation gold leafing adds a high-end, boutique hotel aesthetic that balances the organic beach textures with modern luxury.

To create this coastal coaster, clean several pieces of authentic or tumbled craft sea glass in shades of cobalt blue, aqua, and frosted white. Place a six-sided hexagonal silicone coaster mold on a flat, level table and arrange the sea glass pieces in a decorative crescent along one half of the mold perimeter. Sprinkle tiny, transparent size 15/0 micro-glass seed beads around the sea glass clusters to mimic ocean foam and rising water bubbles. Mix a small batch of low-viscosity, crystal-clear casting resin, pouring it gently into the center of the mold so the liquid flows outward without dislodging the sea glass arrangement. Pop surface bubbles with a quick pass of a heat gun, allowing the resin to cure fully for two days. Demold the cured coaster, paint a thin line of gilding adhesive along the outer beveled rim, and press sheets of gold leaf foil onto the edges, sealing the gold trim with a thin coat of clear gloss resin.

Idea 6: Chevron Stripe Seed Bead Woven Flexible Coaster Mat

Step-by-Step Guide

The chevron stripe seed bead woven flexible coaster mat utilizes flat odd-count peyote beadweaving to produce a soft, flexible drink mat that rolls up easily for compact storage. This design features sharp, symmetrical V-shaped chevron stripes in contrasting pastel or earth-toned palettes, such as sage green, blush pink, mustard, and cream glass beads. Because this coaster uses no rigid wooden base or hard epoxy resin, it rests softly against furniture surfaces, absorbing tabletop impact and preventing clinking noises when setting down heavy glassware. The tightly interlocking glass beads create a dense, textile-like surface that catches moisture between bead crevices while remaining easy to rinse clean under running water.

Begin by cutting a six-foot strand of 6lb thermally bonded beading thread, threading a size 12 English beading needle and placing a temporary stop bead six inches from the tail. String thirty-three size 8/0 glass seed beads onto the thread to create the foundation base row for the chevron pattern. Pick up the thirty-fourth bead, skip the thirty-third bead on your base string, and pass the needle back through the thirty-second bead, pulling the thread snug to lock the first peyote stitch. Continue working back across the row, placing one bead into every alternating gap. At the end of the odd-count row, execute a figure-eight turn through adjacent edge beads to step up cleanly into the next row without leaving exposed exterior threads. Follow your charted chevron color pattern for forty-five rows until the woven mat forms a four-inch square. Weave all working thread tails back through ten internal bead channels in figure-eight loops to secure the ends without knots, trimming threads flush with micro-tip scissors.

Idea 7: Millefiori Murano Glass Tile and Seed Bead Grout Coaster

Setup Method

A Millefiori Murano glass tile coaster pairs historic Italian floral glass slices with fine glass seed beads used as a decorative, textured mosaic grout alternative. Millefiori—meaning “a thousand flowers”—features multi-colored glass rods fused and sliced into cross-sections that reveal intricate internal floral patterns. In this design, colorful Millefiori glass slices are glued across a square ceramic or wooden coaster base, with the narrow channels between tiles packed with tiny, colorful size 15/0 glass seed beads instead of standard cement grout. This technique creates a continuous, glittering glass surface that showcases historic glass-making artistry while providing a flat, heat-resistant resting pad for teacups and mugs.

Set up this project by selecting an assortment of four-to-six-millimeter round and square Millefiori glass slices in varied floral patterns. Spread a layer of slow-curing clear epoxy paste or waterproof craft adhesive across the top surface of a four-inch square ceramic tile blank using a notched craft spatula. Press the Millefiori glass slices firmly into the adhesive bed, spacing the tiles roughly one-eighth of an inch apart in an organic mosaic grid. While the adhesive is still tacky, pour a generous handful of mixed-color size 15/0 micro glass seed beads over the entire coaster surface, using your fingers to press the tiny beads down into the adhesive gaps between the floral tiles. Allow the adhesive to cure for six hours, then tip the coaster on its edge over a bowl to brush away unbonded loose seed beads. Seal the entire surface with a thin layer of clear, heat-resistant topcoat resin to level the grout lines and lock all micro beads in place.

Idea 8: Wire-Wrapped Glass Crystal Sunburst Coaster

Execution Process

The wire-wrapped glass crystal sunburst coaster combines structural metallic wire sculpting with light-refracting faceted crystal glass beads to create a radiant, geometric drink mat. This design uses a thick 16-gauge copper or brass wire frame shaped into an eight-pointed star or circular sunburst, with internal spokes woven with fine 26-gauge wrapping wire loaded with sparkling faceted crystal rondelles. The faceted edges of the glass crystals catch ambient candlelight and room lighting, casting dancing reflections across the table during evening dinner parties. The sturdy metal wire frame provides structural rigidity and holds glasses elevated above the tabletop, while the tightly packed crystal beads form a supportive, level bed for beverage bases.

Execute this design by bending a twelve-inch piece of 16-gauge dead-soft brass wire into a four-inch outer circle using round-nose pliers, wrapping the wire ends tightly together to form a rigid structural outer ring. Cut eight four-inch pieces of 18-gauge wire to serve as internal radial spokes, wrapping their outer tips securely around the perimeter ring at equal intervals and joining them at a central wire hub. Anchor a five-foot spool of fine 26-gauge brass wrapping wire to the central hub, stringing three four-millimeter faceted crystal glass rondelles onto the wire. Wrap the fine wire around the first spoke, add three more crystals, and wrap around the second spoke, working in continuous spiral rounds from the center hub outward toward the perimeter frame. Maintain firm, even wire tension to keep the crystal beads tightly packed and level across all spokes. Once you reach the outer ring, wrap the fine wire four times around the perimeter frame, trim the end, and press four clear silicone bumper dots to the underside of the outer wire frame to protect table surfaces.

Idea 9: Pressed Botanical and Floating Glass Seed Bead Resin Disc

How to Create

A pressed botanical and floating glass seed bead coaster combines delicate dried flowers with shimmering translucent glass beads suspended inside a crystal-clear resin disc. This design layers real pressed pansies, ferns, and lace flowers with delicate arrangements of translucent green, gold, and champagne glass seed beads that trace the natural contours of the botanical petals. The clear resin encasement preserves the fragile dried plants indefinitely, shielding them from moisture and drink heat while creating an optical depth where botanicals appear to float over a bed of dew-like glass droplets. The soft, natural garden aesthetic pairs beautifully with rustic wood furniture, linen tablecloths, and garden tea settings.

To create this botanical coaster, collect and dry small flat flowers—such as pansies, forget-me-nots, and sweet alyssum—in a wooden flower press or heavy book for two weeks until all botanical moisture is removed. Place a four-inch round silicone coaster mold on a level surface, wiping away any dust with a tack cloth. Mix two ounces of clear casting epoxy resin, pouring a thin one-eighth-inch base layer into the bottom of the mold. Let the base resin sit for two hours until it reaches a tacky, gel-like consistency. Carefully arrange your pressed flowers face-down onto the sticky resin layer using fine tweezers. Drop tiny translucent and metallic gold size 11/0 glass seed beads around the petal edges and center flower pistils, creating delicate beaded outlines. Mix a second batch of clear resin and pour it gently over the arranged flowers and beads until the mold is filled to the top rim. Pop surface bubbles with a heat gun and allow the coaster to cure for two full days before demolding.

Idea 10: Terrazzo-Style Crushed Glass and Seed Bead Composite Coaster

Step-by-Step Guide

The terrazzo-style crushed glass and seed bead composite coaster mimics high-end Italian architectural terrazzo by embedding colorful glass fragments and seed beads into an opaque, eco-resin mineral base. Using an off-white or pale charcoal eco-resin (such as Jesmonite or acrylic composite resin), vibrant chunks of tumbled glass cullet and contrasting glass seed beads are mixed directly into the liquid stone slurry. Once cured, the top surface is sanded down with progressive wet-sanding pads to expose the interior cross-sections of the colorful glass beads and raw glass chips. This technique produces a smooth, stone-like coaster speckled with jewel-toned glass flecks, delivering a modern, textured home accessory that is durable and impact-resistant.

Begin by selecting an assortment of chunky colored crushed glass chips (two-to-four-millimeter size) and bold contrasting glass seed beads in cobalt, emerald, mustard, and coral hues. In a silicone mixing cup, mix your two-part eco-resin liquid and mineral base powder according to the manufacturer’s ratio (typically 1 part liquid to 2.5 parts powder), stirring until a smooth, lump-free slurry forms. Fold a half-cup of your mixed glass chips and seed beads directly into the wet resin slurry, stirring gently to distribute the glass aggregates evenly. Pour the composite mixture into a four-inch round silicone coaster mold, tapping the sides of the mold firmly against the tabletop to release trapped air pockets and settle the glass pieces toward the bottom face. Allow the eco-resin to harden for two hours before demolding. Wet-sand the top surface using 120-grit wet sandpaper to grind through the thin top mineral skin and expose the colorful glass cross-sections underneath. Progress through 240, 400, and 800-grit wet sandpaper until the surface is silky smooth, then seal with a food-safe natural beeswax sealer.

Common Beginner Mistakes and How to Avoid Them

The most critical mistake beginners make when crafting glass bead coasters is creating an uneven or bumpy top surface that causes drinkware to wobble and tip over. Gluing beads of inconsistent heights onto a base without a leveling step results in an unstable platform for glasses. To prevent this, always select uniform, high-grade beads (such as Japanese cylinder or calibrated seed beads), or encase uneven beads inside a level pour of crystal-clear casting resin. Another common error is using standard school glue or water-based craft adhesives, which break down and dissolve when exposed to cold beverage condensation or hot mug steam. Always choose waterproof, high-tack silicone adhesives, two-part epoxy pastes, or polyurethane craft glues designed for non-porous glass surfaces. Additionally, many crafters pour epoxy resin in unlevel workspaces or humid rooms, causing the resin to cure with tacky spots, cloudy blushes, or sloping surfaces. Always use a spirit level to balance your work table before pouring, maintain a steady room temperature between seventy-two and seventy-five degrees, and cover curing resin with an overturned clean plastic container to keep airborne dust particles from settling onto the wet surface.

Practical Tips for Better Results

Achieving professional, boutique-quality results with DIY glass bead coasters relies on proper surface preparation, heat management, and clean finishing techniques. When working with clear epoxy resin, always use a heat gun or small culinary butane torch swept quickly two to three inches above the wet surface to pop microscopic bubbles before the resin begins to gel. For coasters built on wooden or cork disc blanks, apply self-adhesive clear silicone bumper dots or a cut circle of soft craft felt to the bottom underside; this prevents the hard coaster base from scratching delicate wood table finishes and provides a non-slip grip. When arranging intricate bead patterns on adhesive beds, use a wax-tipped rhinestone pickup pen or fine-point jewelry tweezers rather than fingers, which allows for precise bead placement without smearing wet glue across top glass faces. Finally, for coasters intended to hold very hot coffee mugs or tea kettles, choose an epoxy resin explicitly rated for high thermal resistance (up to one hundred and eighty to two hundred degrees Fahrenheit) to prevent hot cup bottoms from leaving cloudy ring indentations in the cured surface.

Styling, Presentation, or Organization Ideas

Styling your handmade glass bead coasters involves coordinating color themes and displays to complement your living and dining room decor. Stack a matching set of four or six colorful beaded coasters inside a custom wood, wrought-iron, or woven brass coaster holder positioned beside your living room coffee table books, ceramic table lamps, and decorative centerpieces. Choose bead colorways that harmonize with surrounding textile accents—such as matching emerald and gold beads to living room throw pillows or coastal aqua beads to dining room linen napkins. For open-concept shelving or bar cart staging, display one or two colorful glass bead coasters upright on miniature brass photo easels behind your cocktail shakers and glassware to turn practical drink mats into decorative tabletop art. When packaging your handmade coasters as gifts, tie a curated stack of four coasters with a rustic frayed-edge linen ribbon, tucking a sprig of dried lavender or a small wooden stirring spoon into the knot for a thoughtful, artisan presentation.

Budget or Time Planning

Creating custom glass bead coasters is an economical, high-reward DIY craft project that can be completed on an accessible budget across multiple skill levels. A basic starter setup—including a variety pack of multi-colored glass seed beads, four-inch cork coaster blanks, and a tube of waterproof silicone craft adhesive—typically costs between fifteen and twenty-five dollars, producing enough supplies to create eight to ten finished coasters. Mid-range projects utilizing silicone casting molds, two-part heat-resistant epoxy resin, and specialized Millefiori or tumbled sea glass generally require an investment of thirty to fifty dollars, yielding boutique-quality drink mats that rival high-end home decor retailers. In terms of time management, assembling direct-glued seed bead coasters or wire-wrapped pieces typically takes forty-five to sixty minutes per coaster. Resin-cast and composite terrazzo coasters require roughly thirty minutes of active preparation and pouring time, followed by twenty-four to forty-eight hours of passive, undisturbed curing time. Planning your crafting sessions over a single weekend allows you to pour your molds on Saturday morning and demold, sand, and finish your completed sets by Sunday afternoon.

Creative Expansion and Advanced Inspiration

Once you have mastered basic coaster designs, you can explore advanced structural techniques to expand your glass bead craft repertoire across your home. Consider applying these bead-weaving and resin-casting techniques to larger tabletop items, such as crafting matching eight-inch circular glass bead trivets for hot serving dishes, decorative bottle coasters for wine carafes, or glass-beaded cocktail serving trays. Another exciting expansion is integrating battery-powered, waterproof micro-LED fairy lights into the base of resin-cast glass gem coasters, creating illuminated, glowing drink mats that add an enchanting ambiance to evening patio gatherings and dinner parties. You can also experiment with embedding personalized elements alongside glass beads, such as vintage watch gears, polished beach pebbles, metallic foil lettering, or crushed opals to create meaningful custom heirlooms. Integrating these creative, advanced additions transforms everyday drink coasters into durable, functional works of glass art that enhance your home entertaining experience for years to come.

Similar Posts

  • 10 Bedroom Design Ideas

    Spread the love

    Spread the loveYour bedroom is more than just a place to sleep. It is your personal sanctuary, a space to unwind, recharge, and express your style. Whether you love a cozy, minimalist vibe or prefer something bold and dramatic, the right design choices can completely transform your bedroom into a dream retreat. In this blog…

  • 10 Cozy Patio Corner Makeover

    Spread the love

    Spread the loveA cozy patio corner can become the most inviting spot in your home — a peaceful retreat for morning coffee, a gathering nook for friends, or a relaxing hideaway after a long day. Whether you have a small balcony, a large deck, or a quiet garden patio, the right design choices can make…

  • 10 Bed Nook Yellow Ideas

    Spread the love

    Spread the loveA bed nook is more than just a place to sleep. It is a cozy retreat, a personal corner where comfort meets design. When paired with yellow tones, a bed nook transforms into a warm, cheerful, and inviting space that feels both relaxing and uplifting. Yellow is a color that reflects sunlight, positivity,…

  • 10 Book Basket Exchange Ideas

    Spread the love

    Spread the loveBook lovers know that there is something magical about receiving a carefully curated selection of books. It is more than just reading; it is a thoughtful gesture that shows someone cares about your interests and passions. One creative way to share books is through a book basket exchange. A book basket exchange is…

  • 10 Stylish Kids Bathroom Ideas

    Spread the love

    Spread the loveDesigning a contemporary, highly functional bathroom for children requires an intentional fusion of playful aesthetics, smart spatial ergonomics, and moisture-resistant material architecture. Far from relying on overwhelming commercial motifs, a modern kids’ bathroom balances youthful energy with a refined, sophisticated envelope that effortlessly grows alongside your family. This comprehensive design guide outlines practical,…

Leave a Reply

Your email address will not be published. Required fields are marked *