Placing a small, folding side table or narrow rolling utility cart flush against one side of your main desk creates an “L-zone.” One side handles primary laptop and typing work, while the secondary wing holds textbooks, notebooks, printers, or study snacks. The color palette pairs matching wood tones, neutral metal frames, and clean desk mats.
Step-by-Step Implementation Method
- Position Main Desk in Corner: Align your primary dorm desk against a corner wall layout.
- Add Flush Extension Table: Set a narrow, same-height folding table or 3-tier cart adjacent to the desk’s side edge to form a 90-degree L-shape.
- Assign Functional Wings: Dedicate the main desk face to screen work and typing; use the extension wing for spreading out physical textbooks and binders.
- Incorporate Swivel Seating: Ensure your desk chair swivels smoothly between both work zones without hitting bed frames or walls.
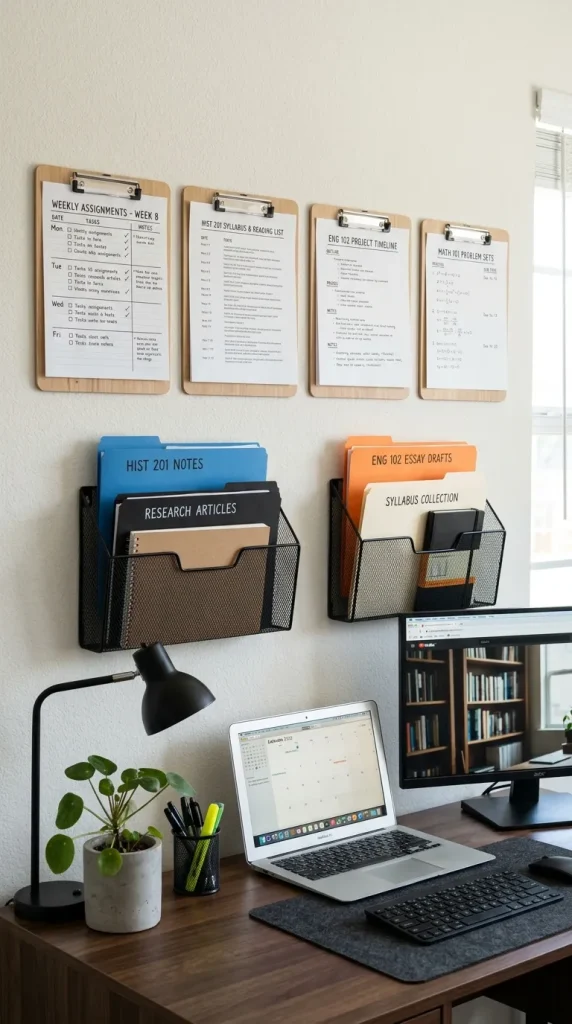
Idea 9: High-Density Vertical Grid with Wire Baskets & Clip Boards
Concept and Design Overview
Ideal for visual learners, project planners, and art/design students, this setup utilizes a grid of wall clipboards and hanging metal baskets to display active assignments, project timelines, and study schedules right at eye level.