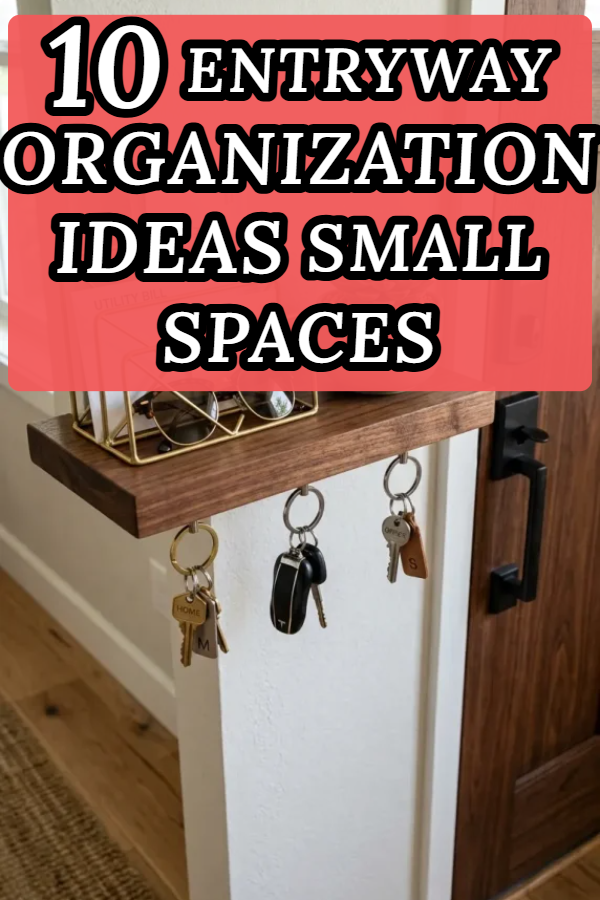
10 Entryway Organization Ideas Small Spaces

An entryway establishes your home’s first impression, but when space is limited to a narrow hallway, a micro-foyer, or a door opening directly into a living room, clutter accumulates fast. Without designated drop zones, daily essentials—shoes, coats, keys, bags, mail, and umbrellas—can quickly pile up, creating visual noise and daily friction.
The secret to mastering a small entryway lies in vertical spatial zoning, slim-profile containment, and multi-functional furniture. By utilizing empty wall height, mounting floating fixtures off the floor, and choosing shallow storage solutions that keep walking paths clear, you can turn even the smallest door threshold into an organized, welcoming space. This guide details 10 high-efficiency entryway organization ideas tailored for tight footprints across various budgets and layout styles.
Key Rules & Spatial Preparation
Before purchasing entry consoles, wall hooks, or shoe bins, follow these core spatial rules:
- Maintain the 36-Inch Clearance Rule: Keep a clear walking corridor of at least 30 to 36 inches from the front door swing through the entry passage.
- Keep Furniture Under 12 Inches Deep: Standard consoles (16–18 inches deep) block narrow entryways. Select shallow floating ledges, slim shoe cabinets, or wall-mounted drop hubs measuring 8 to 12 inches deep.
- Establish a 3-Zone Drop System: Every entryway needs three defined zones:
- Upper Zone: Wall hooks or high shelves for coats, hats, and bags.
- Middle Zone: A narrow surface or tray for keys, mail, and sunglasses.
- Lower Zone: Under-bench space, floating shoe shelves, or bins for footwear.
- Clear the Floor Plane: Lifting shoe racks and benches off the ground exposes floor space, making tight entryways feel noticeably larger.
Idea 1: Slim Ultra-Shallow Shoe Cabinets (IKEA Trones / Bissa Style)
Concept and Design Overview
Traditional shoe racks take up valuable floor area and leave footwear exposed. Slim, tilt-out shoe cabinets (measuring just 6 to 9 inches deep) mount flat against the wall, hiding shoes behind sleek flip-down doors while keeping walking paths completely clear.

Because shoes are stored vertically inside the tilting compartments, these cabinets hold 6 to 12 pairs of footwear within a minimal footprint. The flat top surface doubles as a narrow entry console for a key tray, mail sorter, or small vase. The color palette features clean white, light oak, or matte black, paired with minimalist hardware.
+-------------------------------------------------------------+
| NARROW ENTRYWAY WALL |
| |
| [ Wall-Mounted Vanity Mirror / Art ] |
| +-----------------------------------------+ |
| | SLIM TILT-OUT SHOE CABINET (6" to 9" Deep)| |
| | [Compartment 1: Daily Shoes (Tilt Out)]| |
| | [Compartment 2: Boots / Sneakers] | |
| +-----------------------------------------+ |
| |
| [ 100% Clear Walking Hallway Path ] |
+-------------------------------------------------------------+
Step-by-Step Implementation Method
- Measure Door Clearance: Ensure the cabinet sits behind the door swing arc, maintaining at least 30 inches of hallway width.
- Anchor Securely to Wall: Mount the tilt-out cabinet directly into wall studs using heavy-duty anchors to prevent tipping when drawers tilt open.
- Group Footwear by Frequency: Place daily shoes in the top tilting bin; store secondary footwear or umbrellas in lower compartments.
- Style the Top Ledge: Add a small ceramic tray for keys and a slender wall mirror overhead to reflect natural light.
Idea 2: Wall-Mounted Floating Bench with Under-Basket Storage
Concept and Design Overview

A traditional entry bench can feel heavy and block light in compact foyers. Mounting a sturdy wooden floating bench directly to wall studs creates a comfortable seating spot for taking off shoes while keeping the floor beneath wide open.
Placing open seagrass, felt, or wire storage bins directly under the floating bench provides hidden containment for shoes, dog leashes, and sports gear. The visible floor plane beneath the bench prevents visual crowding. The color scheme pairs warm natural oak, woven seagrass, crisp white walls, and black steel brackets.
Step-by-Step Implementation Method
- Locate Wall Studs: Use a stud finder to locate solid 2×4 studs for mounting heavy-duty steel floating shelf brackets.
- Mount at Ergonomic Height: Anchor a 12- to 14-inch deep solid wood plank at a comfortable seating height of 18 inches from the floor.
- Slide Bins Beneath: Position two or three matching woven storage baskets underneath the bench footprint.
- Add Top Cushioning: Top the bench with a low-profile 2-inch outdoor fabric seat pad or a folded throw blanket.
Idea 3: Vertical Board & Batten Wall Hook Grid
Concept and Design Overview

When horizontal wall space is limited, building a vertical board-and-batten accent wall with staggered coat hooks converts an plain wall into an architectural storage grid.
Attaching double-pronged black metal hooks along horizontal wood battens provides dedicated hanging spots for coats, backpacks, hats, and dog leashes. Staggering hook heights allows children to reach lower hooks while adults use upper rows, maximizing vertical wall real estate. The color palette features crisp white board-and-batten trim, dark painted accent walls, and matte black iron hooks.
+-------------------------------------------------+
| VERTICAL BOARD & BATTEN WALL |
| |
| +-----------------------------------------+ |
| | UPPER HANGING RAIL | |
| | [Hook 1: Adult Coat] [Hook 2: Purse] | |
| +-----------------------------------------+ |
| | LOWER HANGING RAIL | |
| | [Hook 3: Kid Backpack] [Hook 4: Leash] | |
| +-----------------------------------------+ |
| |
+-------------------------------------------------+
Step-by-Step Implementation Method
- Install Horizontal Trim Boards: Fasten 1×4 poplar boards horizontally across the wall at heights of 4 feet and 6 feet from the floor.
- Attach Vertical Batten Strips: Space vertical 1×3 wood battens 12 to 16 inches apart to create a structured grid.
- Paint with Semi-Gloss Paint: Coat the entire board-and-batten grid with durable, washable semi-gloss paint.
- Mount Heavy-Duty Hooks: Screw dual-prong matte black metal hooks into the horizontal trim boards over wall stud locations.
Idea 4: Floating Key & Mail Drop Ledge with Magnetic Strip
Concept and Design Overview

Keys, mail, sunglasses, and wallets frequently accumulate on kitchen counters when entryways lack a designated “drop zone.” Installing an ultra-slim (4- to 6-inch deep) floating wooden ledge with an integrated magnetic underside creates a compact landing pad for daily pocket contents.
The top surface holds mail, sunglasses, and a small plant, while strong neodymium magnets hidden underneath catch metal key rings automatically. Because it projects just a few inches from the wall, it fits into tight spaces behind entry doors. The color palette pairs natural walnut or oak, brass accents, and green botanicals.
Step-by-Step Implementation Method
- Select Location near Door: Position the ledge on the wall directly beside the front door handle at a comfortable elbow height (approx. 42 inches).
- Mount Key Ledge: Fasten a floating wooden ledge to the wall using concealed mounting screws or heavy-duty anchors.
- Embed Magnets (DIY): Drill shallow recess holes on the underside of the wooden ledge and glue strong neodymium disc magnets flush with the surface.
- Add a Mail Sorter: Place a small brass or wire letter organizer on top to keep incoming/outgoing mail standing upright.
Idea 5: Oversized Wall Mirror with Integrated Storage Pegs
Concept and Design Overview
Mirrors are essential in small entryways because they reflect light and create an optical illusion of space. Choosing an oversized floor-length or arch mirror featuring integrated storage pegs or an attached lower shelf combines spatial reflection with functional utility.

Hanging a mirror directly opposite a window or door multiplies light in dark entryways. Integrated wooden pegs or bottom ledges provide a spot to hang scarves, keys, and hats without requiring extra wall fixtures. The color palette features thin gold, black metal, or natural wood mirror frames, clear glass, and minimalist accessories.
+-------------------------------------------------------------+
| SMALL ENTRYWAY REFLECTIVE ZONE |
| |
| +-----------------------------------------+ |
| | OVERSIZED ARCHED WALL MIRROR | |
| | (Reflects Ambient Light & Expands Space)| |
| | | |
| | [Integrated Wooden Pegs: Scarves/Keys] | |
| | [Lower Shallow Shelf: Sunglasses] | |
| +-----------------------------------------+ |
| |
+-------------------------------------------------------------+
Step-by-Step Implementation Method
- Select Scale: Choose an arched or rectangular mirror that measures at least 24×36 inches to maximize light reflection.
- Mount to Wall Studs: Anchor the mirror securely to wall studs using heavy-duty French cleats or rated wall anchors.
- Utilize Storage Pegs: Use attached side pegs to hang lightweight accessories like scarves, umbrellas, or key rings.
- Keep Glass Clean: Keep a microfiber cloth nearby to remove fingerprints from daily check-ins.
Idea 6: Behind-the-Door Vertical Pocket & Shoe Caddy
Concept and Design Overview
In micro-apartments where the front door opens directly into a living room or tight hallway, the back of the entry door offers valuable vertical storage. Hanging a heavy-duty canvas or leather pocket organizer turns unused door surface into a vertical storage hub.

Deep fabric pockets hold shoes, umbrellas, mail, winter gloves, dog supplies, and reusable shopping bags out of sight. Selecting a neutral canvas or structured leather caddy elevates the look beyond basic plastic organizers. The color palette features natural cream canvas, cognac leather, and matte black hooks.
Step-by-Step Implementation Method
- Select Structured Material: Choose an organizer made from heavy-duty canvas, felt, or synthetic leather with reinforced metal grommets.
- Hang with Low-Profile Hooks: Place ultra-thin flat steel hooks over the top edge of the entry door to ensure smooth closing.
- Categorize Pockets: Assign top pockets for keys, sunglasses, and mail; middle pockets for gloves and dog gear; bottom pockets for shoes and umbrellas.
- Secure Bottom Edge: Use double-sided Command strips on bottom corners to keep the caddy flush against the door when opening and closing.
Idea 7: Corner Umbrella Stand & Vertical Floating Tower
Concept and Design Overview
Unused 90-degree wall corners beside front doors are often overlooked. Installing a tall, narrow corner shelf tower or pairing a slim cylindrical umbrella stand with floating corner ledges converts dead spatial voids into organized storage hubs.
A tall, narrow corner unit utilizes vertical height while taking up just a few inches of floor area. Storing wet umbrellas inside a heavy ceramic or metal drip stand prevents floor water damage. The color scheme pairs matte black metal stands, white corner shelves, and green potted plants.

+-------------------------------------------------+
| CORNER ENTRYWAY SPATIAL VOID |
| |
| +-----------------------------------------+ |
| | TALL NARROW CORNER SHELF TOWER | |
| | [Top Shelf: Plant / Fragrance Diffuser]| |
| | [Middle Shelf: Mail & Sunglasses] | |
| | [Bottom Base: Tall Umbrella Stand] | |
| +-----------------------------------------+ |
| |
+-------------------------------------------------+
Step-by-Step Implementation Method
- Measure Corner Radius: Verify that the corner unit projects no more than 10 to 12 inches from either wall to avoid blocking door pathways.
- Mount Floating Corner Shelves: Install three to four quarter-round floating shelves stacked vertically in the corner.
- Place Umbrella Stand at Base: Set a weighted, rust-proof metal or ceramic umbrella cylinder with an internal water drip tray at the floor base.
- Organize Vertically: Place daily grab-and-go items on middle shelves and decorative accents on top tiers.
Idea 8: Built-In Closet Conversion with Sliding Barn Door

Concept and Design Overview
If your small entry features a shallow, cluttered coat closet, removing standard bifold doors and converting the interior into an open “mudroom nook” dramatically improves access and functionality. Adding a sliding barn door or heavy linen curtain panel allows you to conceal or reveal storage as needed.
Removing interior drywall frames allows you to install a built-in bench, upper cubbies, and coat hooks inside the closet cavity. When open, it functions as a built-in mudroom nook; when closed, the sliding door hides outerwear clutter. The color scheme features warm wood bench tops, white shiplap back walls, and black sliding hardware.
Step-by-Step Implementation Method
- Remove Old Closet Doors: Take down outdated bifold or swing doors and remove interior wire shelving.
- Install Wall Shiplap/Paint: Line the back closet wall with painted white shiplap or a bold accent paint color.
- Build Built-In Bench: Install a sturdy wooden bench platform across the lower width of the closet frame.
- Hang Sliding Door Track: Mount a top-hung sliding barn door track above the closet header, hanging a space-saving sliding door panel.
Idea 9: Ceiling-Mounted Hanging Clothes Rail

Concept and Design Overview
When floor space and wall real estate are entirely consumed by doorways or radiators, look to the ceiling. Suspending a sleek industrial steel or timber hanging clothes rail from structural ceiling joists creates an airy, floating garment rack for daily coats and jackets.
Because the rail hangs from above, the floor beneath remains completely clear for shoe mats or vacuuming. The open overhead structure provides a boutique-style display that keeps damp coats spaced apart to dry quickly. The color palette pairs industrial matte black steel pipe, warm timber hangers, and neutral outerwear.
+-------------------------------------------------------------+
| CEILING STRUCTURAL JOISTS |
|=============================================================|
| || (Steel Support Cables / Industrial Pipe) || |
| || || |
| +----+---------------------------------------------+----+ |
| | | SUSPENDED CEILING CLOTHES RAIL | | |
| | | [Coats on Wooden Hangers] [Scarves/Bags] | | |
| +----+---------------------------------------------+----+ |
| |
| [ 100% Clear Open Floor Plane Beneath ] |
+-------------------------------------------------------------+
Step-by-Step Implementation Method
- Locate Ceiling Joists: Use a stud finder to locate solid ceiling joists above the entry zone.
- Install Heavy-Duty Flanges: Anchor threaded steel flanges or heavy-duty eye-bolts directly into ceiling joists.
- Suspend Rail Frame: Connect rigid steel pipes or heavy-duty wire cables to suspend a 24- to 36-inch horizontal clothes rail.
- Maintain Clearance Heights: Position the rail 60 to 66 inches above the floor so long coats hang freely without touching the ground.
Idea 10: Multi-Functional Storage Bench with Integrated Coat Rack
Concept and Design Overview

For small open-concept entryways that lack adjacent walls, an all-in-one hall tree unit combines a shoe bench, lower shoe rack, middle coat hooks, and an upper hat shelf into a single compact freestanding piece.
Selecting a hall tree with a narrow depth (12 to 14 inches) consolidates all three entry storage zones into a single vertical footprint. This option works exceptionally well in rental units where wall drilling is restricted. The color palette features a black steel framework, rustic oak wooden surfaces, and organized woven baskets.
+--------------------------------------------------------------------------+
| ALL-IN-ONE FREESTANDING HALL TREE |
| |
| Upper Hat Shelf | Middle Coat Hooks | Lower Storage Bench |
+--------------------------------------------------------------------------+
|
FEATURED:
v
+------------------+------------------+------------------+-----------------+
| UPPER SHELF | COAT HOOK RAIL | SEATING BENCH | SHOE RACK BASE |
| Baskets for Hats | Dual-Prong Hooks | Solid Wood Top | Slatted Mesh |
| & Gloves | Coats & Purses | Seat for Shoes | Footwear Grid |
+------------------+------------------+------------------+-----------------+
Step-by-Step Implementation Method
- Select Narrow Depth: Purchase a freestanding hall tree unit that measures 12 to 14 inches deep by 24 to 36 inches wide.
- Anchor Safety Strap: Screw an anti-tip safety strap into a wall stud to secure the tall unit against accidental tipping.
- Assign Vertical Zones: Use the upper shelf for seasonal baskets; middle hooks for daily coats and bags; lower bench for sitting; and slatted base shelf for shoes.
- Add a Drip Tray: Place a low-profile rubber shoe tray on the bottom shelf to catch mud and water from outdoor boots.
Common Beginner Mistakes and How to Avoid Them
- Using Deep Furniture: Buying standard 16- to 18-inch deep consoles blocks entry pathways and makes doors bump into furniture. Keep small entry furniture under 8 to 12 inches deep.
- Neglecting Wall Anchoring: Failing to anchor tall hall trees or tilt-out shoe cabinets to wall studs creates serious safety hazards. Always use anti-tip wall straps and stud anchors.
- Piling Shoes on the Floor: Leaving shoes scattered across the floor creates immediate visual clutter and tripping risks. Utilize tilt-out shoe cabinets, floating benches with bins, or under-bench shoe trays.
- Overloading Coat Hooks: Hanging dozens of heavy coats on a single wall rack causes hooks to pull out of drywall. Limit hooks to daily-use items only, and anchor hook rails directly into wood studs.
- Forgetting a Wet Weather Zone: Failing to plan for wet umbrellas and muddy boots leads to ruined flooring. Always include a rubber boot tray and a drip-proof umbrella stand.
Practical Tips for Sustainable Entryway Organization
- The Seasonal Swap Rule: At the start of every season, move off-season coats, shoes, and gear to bedroom closets. Keep only items actively used this month in the entry zone.
- Establish a Daily Mail Sorting Habit: Recycle junk mail immediately at the door before it reaches kitchen counters or entry ledges.
- Use Matching Hangers: Using uniform wood or heavy-duty velvet hangers on entry coat rails creates an instant, organized look.
- Incorporate Motion-Sensor Lights: Install a small USB-rechargeable LED motion-sensor light above entry hooks to illuminate the drop zone when you open the front door at night.
- Add a Rubber Boot Tray: Place a low-profile tray with river rocks near the door to catch water, ice, and mud during rain or winter months.