10 Intricate Miniature Polymer Clay Bakery Desserts Craft Ideas

Introduction
Miniature polymer clay baking crafts capture the textures, crumb structures, and glossy glazes of real patisserie treats at a 1:12 dollhouse scale. Achieving realism in miniature food sculpting relies on manipulating clay translucency, texturing with needle tools, applying soft chalk pastels for baked browning, and utilizing liquid polymer clay or UV resin for realistic frostings and fruit glazes. Whether you are building a dollhouse bakery counter, designing charm jewelry, or curating realistic miniature dioramas, these miniature food crafts provide an engaging creative outlet. This guide outlines ten intricate polymer clay dessert concepts, complete with texturing techniques, shading methods, and glaze formulations.
Why Miniature Clay Desserts Are Trending
- Extreme Textural Realism: Techniques using toothbrushes, needle tools, and chalk pastel dust allow crafters to replicate flaky puff pastry, aerated sponge cake, and dusting powders.
- Versatile Display & Functional Applications: Finished 1:12 and 1:6 scale miniatures function as dollhouse props, charm jewelry (earrings, phone charms), planner clips, or resin shaker filler.
- Low Material Cost with High Detail Yield: A single 2 oz block of clay produces dozens of miniatures, making it a high-yield, accessible hobby.
- Accessible Liquid Mediums: Clear liquid clay, bakeable gloss glazes, and UV resins streamline the creation of high-shine coulis, syrups, whipped creams, and melted chocolate.
1. Multi-Layered French Strawberry Fraisier Cake Slice
How to Create

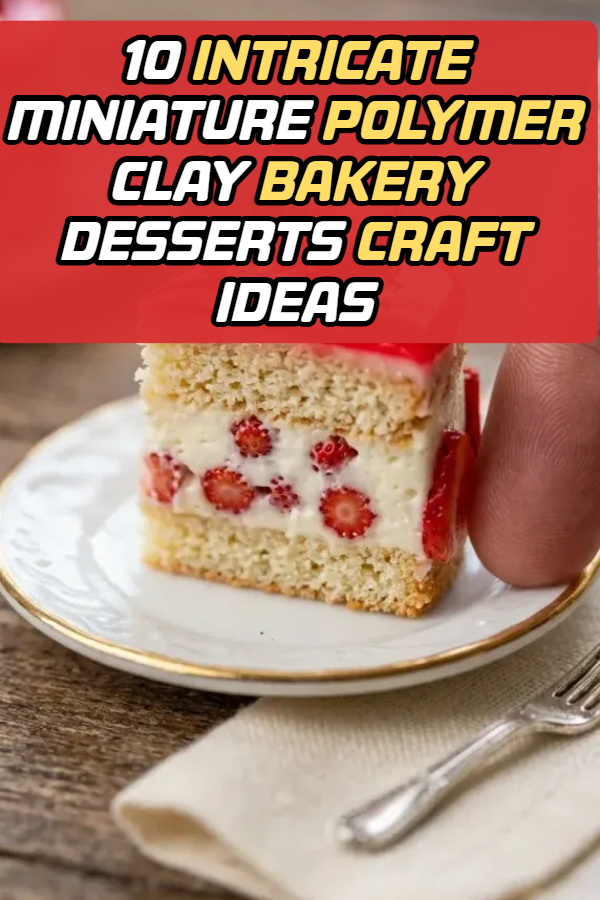
Mix equal parts translucent clay with pale ecru clay to create the Genoese sponge cake layers. Roll out two thin slabs, texture them deeply with a brass wire brush, and dust the top edges with golden-ochre pastels. For the mousseline cream filling, mix white liquid clay with a drop of yellow chalk pastel dust. Slice miniature strawberry canes into tiny halved berry cross-sections and press them flat against a clear acrylic baking plate. Sandwich the cream and berries between the two cake layers, top with a micro-thin layer of vibrant red clay for the strawberry jelly glaze, bake, and finish the top with a high-gloss varnish.
2. Flaky Parisian Butter Croissants with Honey Glaze

How to Create
Mix 60% translucent clay with 40% warm beige dough clay. Roll the clay into an elongated, paper-thin triangle. Using a hobby knife, score shallow horizontal lines across the clay strip to simulate laminated dough layers. Roll the triangle from wide base to pointed tip, curving the ends into a crescent. Use a needle tool to pick and tear tiny surface areas along the curves for flaky pastry skin. Lightly dust the raised curves with powdered chalk pastels starting with yellow ochre, transitioning to burnt sienna, and finishing with raw umber on the crispest edges. Once baked, paint with a semi-gloss water-based varnish.
3. Glossy Mirror-Glaze Mousse Dome with Pistachio Crumb Rim

How to Create
Roll a small ball of white clay and slice it in half to create a hemisphere base. Texture the flat bottom with a coarse sanding block to resemble a biscuit base. Mix liquid polymer clay with rich burgundy-red acrylic paint until opaque and syrupy. Dip the dome into the liquid glaze or spoon it over the dome until smooth and drip-free. Bake the dome while suspended on a needle. After baking, apply a band of tacky glue along the bottom rim and roll it in finely chopped cured lime-green and olive clay crumbs to mimic crushed pistachios. Seal the dome with a thick coat of UV resin for a glass-like finish.
4. Fresh Fruit Kiwi & Blackberry Custard Tartlet

How to Create
Shape a 1/2-inch round disc of tan clay and press a crimped bottle cap or miniature tart pan into it to form fluted crust edges. Texture the inner rim with a needle tool and dust the outer edges with golden-brown pastel. Fill the crust center with pale yellow liquid clay (pastry cream). Slice miniature polymer clay canes of kiwi (featuring tiny black seed details) and sculpt individual micro-blackberries made of clustered clay micro-balls. Arrange the kiwi slices and blackberries over the cream. Bake, then dab clear gloss glaze over the fruit pieces to replicate apricot bakery gelatin.
5. Petite Pastel French Macaron Towers

How to Create
Roll tiny pastel-colored clay balls (pistachio green, lavender, blush pink, and lemon yellow). Flatten each ball into a neat dome. Use a sharp needle tool to roughly poke, pull, and drag the bottom perimeter outward in small circular motions to form the bubbly “feet” (pied) of the macaron shells. Bake the shells. Once cooled, pipe a dollop of matching thick liquid clay or white silicone cream between two shells and press gently until the filling bulges slightly. Stack them into a vertical miniature bakery display tower using clear tacky glue.
6. Sliced Fig & Honey Ricotta Sourdough Danish
How to Create
Roll a strip of warm-white dough clay into a pinwheel or diamond folded pocket. Texture the exposed dough corners with sandpaper and dust with burnt-umber pastels for a dark, caramelized bake. Fill the center hollow with textured, crumbly white clay to mimic ricotta cheese. Sculpt miniature black mission fig wedges—crafting purple-black rinds, deep crimson pulp, and tiny white seed lines. Press three fig slices into the cheese center. After baking, drip a thread of translucent amber-tinted liquid clay diagonally across the pastry to simulate raw honey drizzle.

7. Decadent Triple Chocolate Mirror-Glaze Opera Cake
How to Create

Roll paper-thin, millimeter-precise sheets of dark chocolate clay, coffee-colored buttercream clay, and almond sponge clay. Stack six alternating layers using a roller to compress them without distorting the straight edges. Chill the raw stack in the freezer for 10 minutes to firm the clay, then use a tissue blade to slice clean, rectangular cake portions with visible internal striping. Coat the top plane with glossy dark chocolate liquid clay, cure, and place a tiny speck of genuine gold leaf foil on the top corner.
8. Japanese Fluffy Soufflé Pancake Stack with Melting Butter

How to Create
Roll three thick, puffy discs of warm-cream clay. Texture the vertical side perimeters using a soft needle stippling technique to mimic aerated pancake sponge, leaving the flat top and bottom surfaces smooth. Heavily dust the top and bottom circles with yellow ochre and warm sienna pastels to replicate golden griddle marks. Stack the three pancakes slightly offset. Top with a tiny square of pale yellow translucent clay for melting butter and drizzle with translucent caramel-colored liquid clay for maple syrup.
9. Torched Meringue Lemon Curd Tartlet
How to Create

Sculpt a small fluted circular tart crust using toasted-sand clay and fill the reservoir with translucent canary-yellow liquid clay (lemon curd). To create the meringue peaks, use thick white bakeable clay paste loaded into a miniature piping syringe with a star tip. Pipe three to five spiraled rosettes across the top. Use a fine-tip watercolor brush dipped in dry burnt-umber pastel powder to lightly dust only the sharp tips and ridges of the piped meringue, creating a realistic blowtorched finish.
10. Classic Glazed Cinnamon Roll with Cream Cheese Drip
How to Create

Roll a thin, flat ribbon of dough-colored clay. Brush the top surface with liquid clay and coat with a blend of dark brown pastel and fine sand (cinnamon sugar). Roll the strip tightly into a spiral cylinder, slice into 1/3-inch rounds, and press down slightly so the inner rings flare outward. Texture the outer edges and dust with light tan pastels. Bake. Once cured, mix white liquid clay with a speck of translucent clay and drizzle it over the warm roll, letting the icing pool into the spiral crevices and drip down the sides.
Pro-Tips for Realism in Miniature Clay Baking
- The 50/50 Translucent Rule: Pure opaque white or tan clay looks like chalky plastic when baked. Always mix 30% to 50% translucent clay into dough and crust recipes; the cured polymer will allow light to penetrate the surface like real baked flour.
- Dust Before You Bake: Chalk pastel shading must be applied to raw clay. The natural oils in uncured polymer clay pull in the dry pigment particles permanently, baking the toasted gradients directly into the material.
- Chill Before Slicing: To cut clean, cross-section cake slices without squishing the internal layers, place your raw clay layered stack into the freezer for 10–15 minutes before cutting with an ultra-thin, razor-sharp tissue blade.
