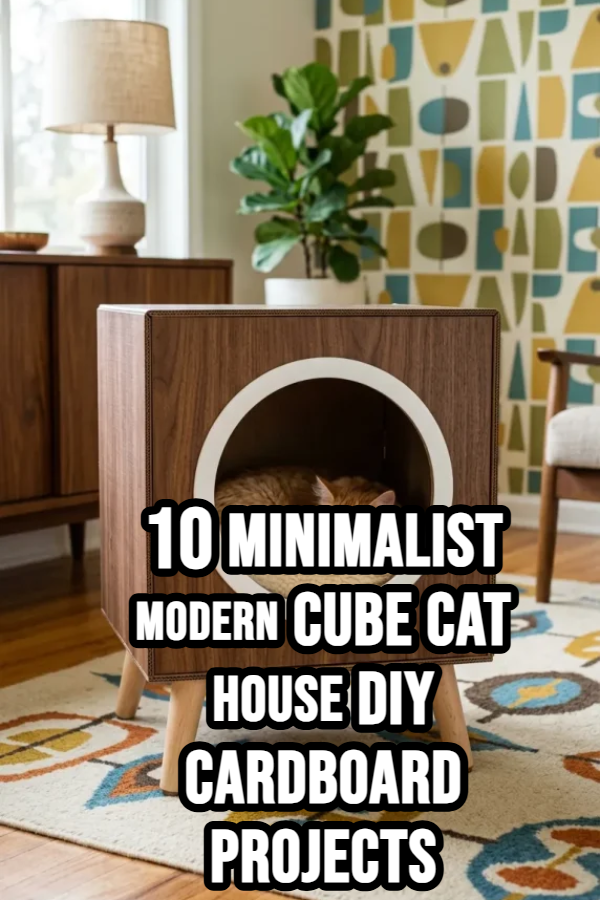
10 Minimalist Modern Cube Cat House DIY Cardboard Projects

Spread the love

Minimalist modern architecture prioritizes clean geometric lines, unadorned surfaces, functional simplicity, and seamless integration into contemporary living spaces. While traditional cat trees and cardboard playhouses can often look cluttered or chaotic, minimalist modern cube cat houses turn humble corrugated cardboard into sleek, sculptural furniture pieces that elevate modern home decor while catering to feline instincts.

Designing a minimalist modern cat cube requires precise geometric geometry, hidden structural reinforcement, and clean edge finishing. By utilizing double-walled corrugated sheets, flush interlocking dado slots, hidden internal corner cleats, and flush architectural cutouts, you can build a durable, aesthetically refined cat house that serves as both a cozy feline sanctuary and a modern architectural accent. This comprehensive guide details 10 creative minimalist modern cube cat house projects across varied spatial configurations, assembly techniques, and design finishes.

Essential Principles for Minimalist Cardboard Joinery

To achieve a sleek, gallery-worthy finish that conceals raw cardboard construction, keep these core fabrication rules in mind:

  • Precision Razor Scoring & Cutting: Minimalist design relies on razor-sharp 90-degree edges. Always use a fresh utility knife blade guided by a heavy steel T-square or metal ruler. Make multiple light passes through cardboard rather than forcing a single heavy cut.
  • Conceal Raw Flute Edges: Exposed corrugated edges ruin a clean modern look. Cover raw edges using water-activated paper binding tape, iron-on veneer edge-banding, or wrap full cardboard sheets smoothly around 90-degree scored corners.
  • Use Hidden Internal Corner Cleats: Rather than applying visible tape or glue along outer seams, glue triangular cardboard L-angle cleats inside interior corners using non-toxic hot glue or PVA wood glue to maintain pristine outer faces.
  • Incorporate Architectural Geometric Cutouts: Instead of crude hand-drawn door arches, cut crisp geometric portals—such as perfect circles, clean squares, or angled hexagons—sized at 7.5 to 8.5 inches to ensure comfortable cat passage.

Idea 1: Monolithic Matte Black Cube with Brass Accent Trim

Concept and Design Overview

Understated, dramatic, and refined, this monolithic 16-inch cube features a seamless matte black exterior punctuated by a single circular entry portal lined with a thin brushed-brass trim ring.

Constructed from heavy-duty double-walled corrugated cardboard, the cube relies on hidden internal corner cleats to keep all outer surfaces completely smooth and fastener-free. The dark interior creates a calm, cave-like den that cats love for sleeping. The color palette pairs matte jet black, brushed gold/brass, and a dark charcoal felt interior cushion.

+-------------------------------------------------------------+
|              MONOLITHIC MATTE BLACK CUBE                    |
|                                                             |
|   +-----------------------------------------------------+   |
|   | MATTE BLACK EXTERIOR (Hidden Corner Cleats)         |   |
|   |                                                     |   |
|   |          /-------------------\                      |   |
|   |         /     CIRCULAR        \                     |   |
|   |        |   ENTRY PORTAL        |                    |   |
|   |        |  (Brass Trim Ring)    |                    |   |
|   |         \                     /                     |   |
|   |          \-------------------/                      |   |
|   +-----------------------------------------------------+   |
|   | [ Charcoal Felt Cushion Inside ]                    |   |
+-------------------------------------------------------------+

Step-by-Step DIY Assembly

  1. Cut Six 16-Inch Squares: Cut six identical 16×16-inch square panels from heavy-duty double-walled cardboard using a metal ruler and utility knife.
  2. Cut Central Portal: Use a beam compass to draw a centered 8-inch circle on the front panel; cut cleanly with a fresh craft blade.
  3. Assemble Internal Framing: Glue 1×1-inch triangular cardboard L-cleats along the interior edges of five panels using non-toxic PVA glue, clamping until dry.
  4. Finish Exterior: Spray-paint exterior panels with non-toxic, zero-VOC matte black acrylic paint before final box closure.
  5. Add Brass Rim Accent: Glue a flexible strip of metallic brass tape or a thin brass trim ring around the circular portal rim.

Idea 2: Floating Wall-Mounted Cantilever Cube

Concept and Design Overview

Freeing up floor space in small urban apartments, the floating cantilever cube mounts securely to wall studs, creating an elevated climbing perch and sleeping capsule for cats.

Featuring a clean birch-wood-veneered outer shell (achieved by laminating thin real-wood veneer onto reinforced corrugated cardboard), the cube appears to float weightlessly off the wall. An offset square entry portal on the front and a circular side window provide dual vantage points. The color scheme highlights natural light birch wood grain, crisp white interior walls, and light oat-milk felt.

Step-by-Step DIY Assembly

  1. Build Reinforced Double-Core: Laminate two layers of heavy-duty corrugated cardboard together with perpendicular grain lines to form a rigid 14x14x14-inch box.
  2. Laminate Wood Veneer: Apply peel-and-stick natural birch wood veneer onto the four outer side faces, trimming flush with a razor.
  3. Cut Offset Geometry: Cut a 7.5-inch square entry portal on the right side of the front face.
  4. Install Rear Cleat Channel: Glue a thick 3-layer cardboard mounting channel flush inside the rear back wall to receive a heavy-duty wall cleat or Command heavy-duty mounting system.
  5. Insert Interior Cushion: Line the bottom floor with a removable, washable cream felt cat pad.

Idea 3: Staggered Modular Cube Stack with Interlocking Slots

Concept and Design Overview

Inspired by modern architectural modular housing, this project uses three independent 15-inch cubic modules that lock together using precision-cut dado slots without requiring permanent glue or hardware.

By shifting or staggering the cubes horizontally, you create cantilevered exterior stepping ledges for cats to jump between levels, while internal pass-through portals allow passage inside the tower. The modular design allows easy disassembly for flat storage or re-configuration. The color palette pairs raw kraft cardboard brown with crisp white painted accent faces.

       +-------------------------------------------------+
       |           STAGGERED MODULAR CUBE STACK          |
       |                                                 |
       |               +------------------+              |
       |               | CUBE 3 (TOP)     |              |
       |          +----+------------------+----+         |
       |          | CUBE 2 (MID STAGGER)  |    |         |
       |     +----+-----------------------+----+----+    |
       |     | CUBE 1 (BASE MODULE)                 |    |
       |     +--------------------------------------+    |
       |                                                 |
       +-------------------------------------------------+

Step-by-Step DIY Assembly

  1. Cut Three Cubic Shells: Fabricate three 15x15x15-inch cardboard cubes from double-wall cardboard.
  2. Cut Interlocking Slots: Cut 0.25-inch wide by 3-inch deep dado slots into the top and bottom rims where modules overlap.
  3. Cut Internal Pass-Throughs: Cut 8-inch circular climbing portals on the top ceiling of Cube 1 and bottom floor of Cube 2.
  4. Paint Accent Fronts: Paint the front face of each module in stark optic white, leaving side panels in raw natural kraft brown for two-tone contrast.
  5. Slide and Interlock: Interlock the three modules together via the dado slots in a staggered offset stack.

Idea 4: Slatted Wood-Style Venetian Shutter Cube

Concept and Design Overview

Emulating Scandinavian slatted timber architecture, this cube features horizontal or vertical cardboard slats spaced evenly across three side faces over a dark interior background.

The slatted design allows ambient light and ventilation to filter inside while giving the cat a 360-degree view of the living room without feeling exposed. The visual lines of the slatted exterior create a striking shadow-and-light pattern. The color palette focuses on natural oak-stained cardboard slats over a matte charcoal inner core.

Step-by-Step DIY Assembly

  1. Build Core Charcoal Box: Fabricate a 16-inch cardboard cube painted entirely in matte charcoal grey, cutting wide 10×10-inch rectangular window voids on three side walls.
  2. Cut Cardboard Slats: Cut dozens of 1-inch wide by 16-inch long strips from thick triple-wall corrugated cardboard.
  3. Stain Slats: Coat the cardboard strips with a water-based light oak wood stain or warm gel stain, allowing to dry flat.
  4. Glue Slats Vertically: Glue the stained slats across the open window voids with precise 0.75-inch gaps using a wooden spacer jig.
  5. Create Front Portal: Leave a clear 8-inch unslatted opening on the front face for cat entry.

Idea 5: Mid-Century Modern Cube on Tapered Wooden Dowel Legs

Concept and Design Overview

Raising a geometric cardboard cube off the floor using angled, tapered wooden legs elevates the design into a piece of legitimate mid-century modern living room furniture.

The elevated cube keeps cats off cold floors while placing them at a comfortable height for interacting with sitting humans. A large circular front portal and clean walnut-stained exterior faces channel iconic 1950s furniture design. The color palette pairs warm walnut brown wood stain, matte white portal trim, and raw birch wooden legs.

+-------------------------------------------------------------+
|              MID-CENTURY ELEVATED CAT CUBE                  |
|                                                             |
|   +-----------------------------------------------------+   |
|   | WALNUT-STAINED CARDBOARD CUBE                       |   |
|   |  [Centered 8" Circular Portal with White Trim]      |   |
|   +-----------------------------------------------------+   |
|       \                                             /       |
|        \  [Tapered Angled Wooden Dowel Legs x4]    /        |
|         \                                         /         |
+-------------------------------------------------------------+

Step-by-Step DIY Assembly

  1. Construct Reinforced Base Floor: Laminate three layers of heavy-duty corrugated cardboard together for the bottom floor panel to carry structural leg loads.
  2. Build 16-Inch Cube Body: Assemble the cube walls over the reinforced floor base, applying walnut-toned wood-grain contact paper or gel stain to outer faces.
  3. Cut Front Portal: Cut an 8-inch circular entry in the front face, edging the rim with crisp white plastic or rubber channel trim.
  4. Attach Wooden Dowel Legs: Screw four 6-inch angled wooden furniture legs (fitted with top mounting plates) through the reinforced triple-layer bottom floor.
  5. Place Internal Cushion: Insert a plush cream wool or faux-shearling cushion inside.

Idea 6: Japanese-Inspired Shoji Screen Paper Cube

Concept and Design Overview

Drawing inspiration from traditional Japanese interior architecture, this serene cube combines a dark-stained wood-look cardboard frame with translucent white rice-paper (or durable non-toxic parchment paper) window panels.

The translucent paper panels filter ambient living room daylight into a soft, calming interior glow for sleeping cats. Slender geometric grid bars (kumiko pattern) laid over the paper faces introduce delicate architectural detail. The color palette pairs dark espresso brown framing, translucent parchment white, and natural bamboo.

Step-by-Step DIY Assembly

  1. Construct Open Frame Skeleton: Build a 15-inch cubic frame using thick 1.5-inch wide hollow cardboard beam posts, painted dark espresso brown.
  2. Cut Window Frames: Leave wide rectangular openings on side walls.
  3. Apply Translucent Parchment: Glue heavy-duty non-toxic translucent baking parchment paper or reinforced Japanese rice paper over interior window faces.
  4. Add Kumiko Grid Bars: Glue thin 0.25-inch cardboard strips in a minimalist grid pattern across outer window faces.
  5. Cut Unobstructed Entry: Cut an open, un-papered arched or square entry portal on the front face.

Idea 7: Brutalist Architectural Concrete-Look Cube

Concept and Design Overview

Bold, industrial, and sculptural, this Brutalist-inspired cat house mimics raw poured concrete using lightweight cardboard finished with a textured faux-concrete plaster or lime-wash technique.

Sharp, unrefined geometric cutouts—such as an asymmetrical triangular entry portal and narrow vertical light slits—give the cube a heavy, monolithic presence while remaining completely lightweight and mobile. The color scheme focuses on raw slate grey, light concrete ash, and charcoal black.

       +-------------------------------------------------+
       |         BRUTALIST CONCRETE-LOOK CUBE            |
       |                                                 |
       |   +-----------------------------------------+   |
       |   | FAUX CONCRETE PLASTER FINISH            |   |
       |   |                                         |   |
       |   |      /\                                 |   |
       |   |     /  \   ASYMMETRICAL                 |   |
       |   |    /    \  TRIANGULAR PORTAL            |   |
       |   |   /______\                              |   |
       |   +-----------------------------------------+   |
       |                                                 |
       +-------------------------------------------------+

Step-by-Step DIY Assembly

  1. Assemble Rigid Cube: Fabricate a heavy-duty 16-inch double-walled cardboard cube with hidden internal corner bracing.
  2. Cut Asymmetrical Geometry: Cut a 9-inch asymmetrical triangular entry portal on the front face and narrow 1×8-inch vertical light slits on side walls.
  3. Apply Faux Concrete Finish: Sponge or trowel a thin layer of zero-VOC concrete-look Venetian plaster or textured grey acrylic paint mixed with fine baking soda across exterior faces.
  4. Sand for Weathered Patina: Lightly sand dry exterior surfaces with fine sandpaper to reveal subtle grey tonal variations.
  5. Line Interior: Insert a thick, dark slate grey wool felt lining pad inside the base.

Idea 8: Two-Tone Hexagonal Modern Honeycomb Module

Concept and Design Overview

Shifting away from standard 90-degree boxes, this geometric 6-sided hexagonal module introduces modern sculptural rhythm to living room floors or wall displays.

The two-tone color treatment—featuring a raw kraft cardboard exterior paired with a vibrant or pastel interior face (e.g., dusty sage green, terracotta, or mustard yellow)—creates striking visual depth through the wide front opening. The color palette pairs natural kraft tan with dusty sage green or terracotta.

Step-by-Step DIY Assembly

  1. Score Hexagonal Geometry: Score a long double-walled cardboard sheet at 60-degree angles to fold six equal 10-inch wide panel faces.
  2. Paint Interior Before Assembly: Paint the interior-facing side of the cardboard sheet in a smooth, zero-VOC dusty sage green or terracotta acrylic.
  3. Join Hexagonal Rim: Glue the overlapping end tabs together with non-toxic hot glue to form a rigid 6-sided tube.
  4. Attach Rear Backing Panel: Glue a fitted hexagonal rear back panel painted in matching interior color.
  5. Edge Rim with Paper Tape: Seal the front raw cardboard rim using smooth natural kraft paper binding tape for a clean finish.

Idea 9: Dual-Level Cube with Integrated Top Scratching Deck

Concept and Design Overview

Combining sleeping privacy with functional scratching utility, this 2-level modern cube features a cozy enclosed lower sleeping den paired with an inset, recessed top roof deck lined with heavy-duty corrugated cardboard scratching strips.

Cats can scratch and stretch on the top deck before stepping inside the lower den for a nap. Clean circular entry portals on both front and side faces provide multi-directional entry and exit. The color palette pairs crisp off-white painted side walls with natural corrugated cardboard top textures.

+-------------------------------------------------------------+
|              DUAL-LEVEL SCRATCHING CUBE                     |
|                                                             |
|   +=====================================================+   |
|   | RECESSED TOP SCRATCHING DECK (Corrugated Strips)    |   |
|   +-----------------------------------------------------+   |
|   | CRISP OFF-WHITE CARDBOARD DEN WALLS                 |   |
|   |  [Centered 8" Circular Front Entry Portal]          |   |
|   +-----------------------------------------------------+   |
|   | [ Internal Lower Sleeping Chamber ]                 |   |
+-------------------------------------------------------------+

Step-by-Step DIY Assembly

  1. Build 16-Inch Off-White Shell: Assemble a 16-inch cardboard cube painted in crisp off-white, leaving the top roof recessed 1.5 inches below side wall tops.
  2. Cut Densely Stacked Scratching Strips: Cut dozens of 1.5-inch wide by 15.5-inch long strips of single-wall corrugated cardboard.
  3. Pack Top Recess: Pack the corrugated strips vertically side-by-side into the top roof recess, gluing edges together to form a dense scratching surface.
  4. Cut Dual Entry Portals: Cut an 8-inch circular portal on the front face and a 7-inch portal on one side face.
  5. Pad Lower Den: Place a soft, washable cushion inside the lower enclosed chamber.

Idea 10: Scandinavian Light Ash & White Acrylic Glass Cube

Concept and Design Overview

Embodying minimalist Nordic design, this ultra-clean cube combines light ash-wood-look cardboard finishes with a clear acrylic glass (plexiglass) front face featuring a precision-cut circular entry portal.

The transparent front face allows humans to view their sleeping cat inside without disrupting them, while keeping the visual footprint of the cat house exceptionally light and open. The color scheme highlights pale ash wood grain, crystal-clear acrylic glass, and warm oat-milk wool fabrics.

+--------------------------------------------------------------------------+
|                  SCANDINAVIAN CLEAR-FRONT CUBE                           |
|                                                                          |
|       Light Ash Wood Shell   |  Clear Acrylic Front  |  Circular Entry   |
+--------------------------------------------------------------------------+
                                     |
                                 FEATURED:
                                     v
+------------------+------------------+------------------+-----------------+
| LIGHT ASH SHELL  | TRANSPARENT FACE | CIRCULAR PORTAL  | OAT MILK FELT   |
| Pale Wood Texture| Uninterrupted    | Smooth Polished  | Warm Acoustic   |
| Clean Outer Core | Interior View    | Entry Rim        | Interior Lining |
+------------------+------------------+------------------+-----------------+

Step-by-Step DIY Assembly

  1. Construct Light Ash Shell: Build a 5-sided 15-inch cubic shell using double-walled cardboard covered in pale ash wood-grain vinyl or contact paper.
  2. Source Clear Acrylic Panel: Obtain a thin 15×15-inch sheet of clear acrylic glass or rigid transparent PET plastic.
  3. Cut Entry Portal in Acrylic: Use a hole-saw or plastic cutter to cut a smooth 8-inch circular portal in the center of the acrylic sheet.
  4. Attach Acrylic Front: Frame and glue the acrylic front panel flush into the front rim of the cardboard shell using clear silicone or non-toxic adhesive.
  5. Upholster Interior with Felt: Line all internal cardboard walls with self-adhesive pale oat-milk felt.

Common Beginner Mistakes and How to Avoid Them

  • Using Dull Razor Blades: Cutting thick corrugated cardboard with a dull utility blade tears paper edges, creating jagged, unsightly fraying along cutouts. Change utility blades frequently (every 10–15 cuts).
  • Leaving Flute Edges Unsealed: Unsealed corrugated cardboard edges collect dust, fray over time, and look unfinished. Always seal raw edges using paper binding tape, veneer tape, or wrapped folds.
  • Neglecting Internal Structural Cleats: Relying solely on tape applied to outer corners results in structural sagging and visible seams. Always glue hidden L-cleats inside interior corners.
  • Sizing Entry Portals Too Small: Cutting door portals under 7 inches makes entry uncomfortable for adult cats and can cause whisker fatigue. Maintain 7.5 to 8.5 inch diameter openings.
  • Using Off-Gassing Toxic Paints: Applying cheap solvent-based spray paints or industrial cements fills enclosed cat dens with toxic fumes. Always use zero-VOC, water-based, non-toxic acrylic paints and glues.

Essential Finishing & Finishing Supplies

  • Heavy-Duty Double-Wall Cardboard: 200 lb test double-walled corrugated sheets for maximum structural rigidity.
  • Cutting & Measurement Tools: Heavy steel T-square, aluminum ruler, utility knife with fresh breakaway blades, and circle beam compass.
  • Non-Toxic Adhesives: PVA non-toxic wood glue, zero-VOC hot glue sticks, and water-activated natural kraft paper tape.
  • Finishing Materials: Peel-and-stick wood veneers, non-toxic zero-VOC acrylic paints, self-adhesive acoustic felt sheets, and brass trim edging.

Similar Posts

  • 10 Cozy Thanksgiving Table Ideas

    Spread the love

    Spread the loveThanksgiving is the perfect time to gather around the table with family and friends, share delicious food, and create lasting memories. The table is the heart of your Thanksgiving celebration, and the way you decorate it can set the mood for the entire evening. From rustic farmhouse charm to elegant minimalist style, there…

  • 10 Crafts Mom From Kids Ideas

    Spread the love

    Spread the loveHandmade crafts created by kids are among the most cherished keepsakes a mother can receive. Whether it is for Mother’s Day, a birthday, or just to say “I love you,” crafts that incorporate a child’s handprints, thumbprints, personal drawings, or heartfelt messages hold immense sentimental value. Below is a curated guide to 10…

  • 10 Live Edge Shelves Ideas

    Spread the love

    Spread the loveLive edge shelves have become one of the most loved interior design elements for modern and rustic homes alike. Their organic shape, natural wood grain, and unique imperfections bring warmth and authenticity into any space. Unlike mass produced shelving, live edge shelves feel personal and timeless, making them perfect for Pinterest inspired homes…

  • 10 Basement Family Room Ideas

    Spread the love

    Spread the loveDesigning a basement family room can completely transform your home. What was once a dark, unused area can become the heart of your house — a place for relaxation, entertainment, and connection. Whether you want a modern retreat, a cozy movie lounge, or a multifunctional space, there are endless ways to bring warmth…

  • 10 Dream Life House Bedroom

    Spread the love

    Spread the loveThe bedroom is more than just a place to sleep. It is where your day begins and ends, where you relax, recharge, and reconnect with yourself. A dream life house bedroom reflects comfort, beauty, and personal expression. It blends calming design with thoughtful details that make the space feel peaceful and inspiring. Whether…

  • 10 Nook Ideas Bedroom

    Spread the love

    Spread the loveBedrooms are more than just a place to sleep. They are sanctuaries where you recharge, reflect, and retreat after a long day. One of the best ways to make your bedroom truly functional and inviting is to design a nook. Bedroom nooks are versatile corners or small spaces within the room that can…

Leave a Reply

Your email address will not be published. Required fields are marked *