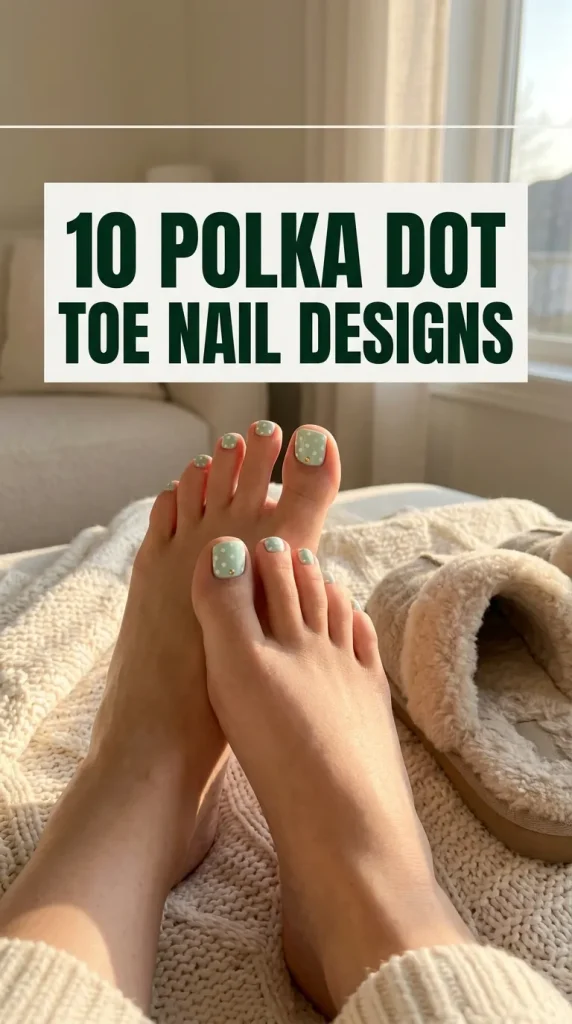
10 Polka Dot Nails Toes Ideas

Spread the love

Polka dot pedicures represent one of the most cheerful, timeless, and accessible forms of nail art in modern beauty styling. Perfect for open-toed footwear, beach vacations, pool days, or simply elevating your everyday personal grooming, dot patterns deliver an instantly eye-catching contrast that looks intentionally polished. While finger manicures offer ample real estate across all ten digits, pedicures present a unique structural dynamic: the big toe provides a wide, prime canvas for detailed patterns, while the smaller toes demand clean, simplified accents that do not look cluttered. In this comprehensive guide, you will explore structured design concepts, step-by-step execution strategies, essential nail care preparation, and long-term maintenance methods tailored specifically for long-lasting polka dot toe nail art. Master these practical techniques to achieve salon-quality results from home with complete confidence.


Why Polka Dot Pedicures Are Practical and Trending

Polka dot pedicures have maintained a permanent place in contemporary nail styling because they bridge the gap between high visual appeal and effortless execution. Complex hand-painted nail designsโ€”such as detailed florals, intricate portraiture, or freehand line artโ€”can be exceptionally difficult to perform on oneself, especially when reaching down to paint toe nails. Polka dots, by contrast, rely on a simple, singular mechanical movement: a controlled, vertical tap using a dotting tool or everyday household item.

Beyond their ease of application, polka dot toe designs possess exceptional practical utility:

  • Ideal Spatial Distribution: The natural anatomy of the foot features one large nail plate (the hallux or big toe) and four significantly smaller nail plates. Polka dots adapt seamlessly to this scale ratio. A full staggered grid pattern can be painted on the big toe, while a single micro-dot placed on each smaller toe creates a unified, balanced look across the entire foot.
  • Versatile Wardrobe Matching: Polka dots can be styled in high-contrast monochromatic shades (like black and white), soft pastel tones, earthy neutrals, or vibrant beach neon hues. This flexibility ensures your pedicure complements a wide variety of footwearโ€”from casual leather sandals and athletic slides to formal open-toed heels.
  • Pores and Texture Camouflage: Pedicures are frequently subjected to harsh daily wear, shoe friction, and environmental exposure. A crisp, structured geometric dot pattern draws visual attention outward, disguising subtle surface ridges or slight natural asymmetries on smaller toe nail plates.
  • Longevity: Because toe nails grow significantly slower than fingernails (roughly one-third to one-half the speed of finger nails), a properly prepped and sealed gel or lacquer polka dot pedicure can remain pristine for four to six weeks without needing a full redesign.

Materials and Preparation

Achieving sharp, uniform, and smudge-free polka dot pedicures requires methodical prep work and the right tool set. Taking time to properly clean, shape, and dehydrate the toe nail plates before applying polish is the single most important factor in preventing premature chipping, peeling, or line bleeding.

Essential Tools and Products Table

CategoryRecommended ItemsPurpose & Practical Function
Ergonomics & HygieneFoam Toe SeparatorsKeeps toes comfortably spread apart to prevent accidental polish smudges.
Preparation90% Isopropyl Alcohol & Lint-Free WipesCleanses natural oils, moisture, and dust from the nail plate for maximum polish adhesion.
Nail Prep ToolsFine-Grit Nail File (240 grit) & Cuticle StickShapes the free edge and gently pushes back cuticle tissue to maximize canvas space.
Dotting EquipmentDouble-Ended Metal Dotting ToolsFeatures spherical tips of varying diameters (0.5mm to 3mm) for absolute control over dot size.
DIY Tool SubstitutesBobby Pins, Toothpicks, Sewing Pin HeadsBudget-friendly household items that double as functional dotting applicators.
Color Base CoatRidge-Filling or Rubberized Base CoatSmooths natural toe ridges and creates a flexible, adhesive anchor for color layers.
PolishesHighly Pigmented Lacquers or Gel PolishesEnsures single-tap full opacity so dots do not require double-dabbing.
Protective FinishHigh-Shine or Plumping Top CoatSeals all elevation layers, levels dot edges, and protects against shoe friction.

Step-by-Step Toe Preparation Protocol

  1. Cleanse and Sanitize: Wash feet thoroughly with warm water and soap. Soak for five minutes if cuticles require softening. Dry feet completely, ensuring no water remains trapped under the nail folds.
  2. Shape and Trim: Trim toe nails straight across using heavy-duty toenail clippers to prevent painful ingrown nails. Gently file the edges with a 240-grit file to smooth out any sharp corners.
  3. Gently Manage Cuticles: Apply a drop of cuticle remover if necessary, then use an orange wood stick to gently push back the proximal nail fold. Never aggressively cut healthy cuticle tissue on feet.
  4. Buff and Dehydrate: Lightly pass a fine-grit buffer over the surface of the big toe nail to remove excess shine and smooth prominent surface ridges. Saturate a lint-free wipe with 90% isopropyl alcohol and thoroughly wipe down every toe nail, paying special attention to the lateral sidewalls and cuticle crevices.
  5. Insert Toe Separators: Place foam toe separators between all digits to hold them steady and isolated throughout the painting process.

10 Polka Dot Nails Toes Ideas

Idea 1: Classic Black & White Retro Toes

Step-by-Step Guide

The Classic Black & White Retro pedicure is the ultimate nod to 1950s rockabilly fashion and timeless graphic minimalism. This high-contrast aesthetic features a crisp, opaque white background adorned with deep, rich black dots.

  • Base Color Application: Apply a thin layer of ridge-filling base coat to all toes and allow it to dry. Sweep two thin, even coats of opaque chalk-white polish across all five toes. Ensure complete opacity; if the white looks streaky, apply a third ultra-thin coat rather than one heavy layer.
  • Big Toe Canvas Setup: Pour a quarter-sized drop of rich black polish onto a disposable palette or piece of foil. Dip the larger end of a metal dotting tool (approx. 2mm diameter) into the black polish.
  • Creating the Grid: Touch the tool perpendicularly (at a 90-degree angle) to the center of the big toe nail plate. Re-dip the tool before placing each subsequent dot to guarantee uniform size. Create a staggered grid pattern: place three dots down the central vertical axis, then place alternating dots along the sides to form a balanced diamond or honeycomb structure.
  • Accent Toes: For toes two through five, switch to a smaller dotting tool tip (approx. 1mm). Place a single black dot directly in the dead center of each small toe nail plate.
  • Sealing: Allow the black dots to air-dry for at least 4 to 5 minutes until fully set. Float a generous drop of high-gloss top coat over the big toe, holding the brush parallel to the nail surface so the bristles never drag directly against the dots.

Idea 2: Summer Pastel Confetti Mix

How to Create

This playful, festive design captures the joyful energy of summer carnivals, birthdays, and tropical vacations. Set against a soft, barely-there sheer nude or translucent milky white background, a burst of multi-colored pastel dots mimics a shower of celebratory confetti.

  • Color Palette Selection: Gather four to five soft pastel polishesโ€”such as mint green, pastel lavender, baby blue, butter yellow, and coral pink.
  • Base Layer: Paint all toes with two coats of a sheer nude or translucent pink polish. This neutral background gives the illusion of a clean, natural nail bed while allowing the soft pastel tones to pop clearly.
  • Confetti Application: Place small drops of each pastel polish side-by-side on your palette. Select a medium-to-small dotting tool (1mm diameter).
  • Randomized Placement: Starting on the big toe, dip into your first pastel color (e.g., butter yellow) and place 4 to 5 dots spaced far apart across the nail plate. Clean the tool tip on a lint-free alcohol wipe. Dip into the second color (e.g., lavender) and fill in some of the open negative space. Repeat this process for all pastel shades until the big toe resembles scattered confetti.
  • Small Toes Coordination: On the four smaller toes, assign one distinct pastel shade to each toe. Place 2 to 3 small dots clustered near the tip or base of each small nail plate.
  • Finish: Seal with an ultra-shiny, plumping gel-effect top coat to fuse the multi-colored dots into a smooth, unified plane.

Idea 3: Red & White Sailor Retro

Step-by-Step Guide

Nautical and vibrant, the Red & White Sailor pedicure is a mid-century classic that pairs effortlessly with summer sandals, navy-striped swimwear, and classic canvas sneakers.

  • Base Layer: Apply your base coat followed by two coats of a vibrant, warm cherry-red or poppy-red polish across all toes. Ensure the red polish is fully dry before beginning dot placement, as white polish can absorb wet red pigment and turn pink.
  • Dot Application: Dispense a small drop of opaque white polish onto your palette. Using a large-tipped dotting tool (2.5mm to 3mm), paint bold white dots onto the big toe. Space them slightly wider apart than usualโ€”leaving roughly twice the diameter of a dot in negative red space between each point.
  • Symmetry: Create three parallel diagonal rows of white dots across the big toe for a dynamic visual flow.
  • Smaller Digits: On the smaller toes, keep the solid cherry-red base intact, but place a single, crisp white dot directly near the free edge boundary on each nail.
  • Sealing & Edge Capping: Cap the free edge of all toe nails with a durable top coat to protect the bold red-and-white contrast against wear from enclosed shoes.

Idea 4: Minimalist Sheer Nude Micro-Dots

Setup Method

For those who prefer low-maintenance elegance, modern clean aesthetics, or subtle grooming, the Minimalist Sheer Nude Micro-Dot pedicure offers a sophisticated, editorial touch.

  • Base Prep: Apply a sheer, blurring nude or pink-tinted base coat that neutralizes natural nail discoloration while maintaining a natural, breathable finish. Apply two coats for an even, glass-like background.
  • Micro-Dot Precision: Select your finest micro-dotting tool (0.5mm diameter) or the sharp point of a wooden toothpick. Dip only the absolute tip into opaque black, deep espresso, or stark white polish.
  • Placement Strategy: On the big toe, place a single micro-dot centrally positioned roughly 1 millimeter above the cuticle line (the lunula area).
  • Flawless Lineup: Repeat this exact placement across all four smaller toes, placing one delicate micro-dot at the lower center of each nail bed.
  • Texture Option: Finish with either a super-glossy top coat for a pristine glass finish or a velvety matte top coat for an ultra-modern, editorial runway look.

Idea 5: Nautical Navy & Gold Foil Dots

Execution Process

Bringing a touch of evening glamour and metallic warmth to coastal styling, this design combines deep, moody navy blue with alternating crisp white dots and shimmering metallic gold accents.

  • Base Setup: Apply two rich coats of deep navy blue or midnight blue polish across all toes.
  • Layering Colors: Prepare two accent shades on your palette: an opaque pure white polish and a dense, reflective metallic gold glitter or liquid gold foil polish.
  • Pattern Mapping: On the big toe, create alternating diagonal rows. Paint one diagonal line of white dots using a 1.5mm dotting tool. Directly alongside it, paint a parallel diagonal row of metallic gold dots using the same tool size.
  • Balancing the Small Toes: Alternate the accent color on the smaller digitsโ€”paint toes two and four with a single central gold dot, and toes three and five with a single white dot.
  • Protective Seal: Metallic polishes can occasionally lose their luster if rubbed excessively by footwear; apply two thin layers of high-shine top coat to lock the metallic pigments beneath a protective shield.

Idea 6: French Pedicure with Dotted Smile Line

How to Make

This design reimagines the world-famous French pedicure by replacing or accentuating the classic solid white tip with a delicate, textured crescent of tiny dots.

  • Classic Base: Paint all toes with a classic French backdrop shadeโ€”such as a sheer milky pink, translucent nude, or soft peach.
  • Mapping the Tip: Rather than painting a solid white free-edge strip, use a fine-liner dotting tool (1mm) dipped in white polish.
  • Building the Curve: Trace a continuous, overlapping arc of small white dots along the natural curve of the free edge on the big toe. Layer a second row of slightly smaller dots directly above the first to create a soft, lace-like gradient tip.
  • Smaller Digits: On the smaller toes, place a simple row of 3 to 4 micro white dots directly along the tip line to mirror the big toe’s design.
  • Glass Finish: Apply a thick, plumping top coat over the entire nail to blend the raised dot boundaries smoothly into the French background.

Idea 7: Sunshine Yellow & Daisy Accent Dots

Step-by-Step Guide

Cheerful, youthful, and vibrant, this floral variation converts simple polka dots into charming 5-petal daisy blooms across a bright yellow background.

  • Base Layer: Paint all toes in two coats of a bright butter-yellow or pastel yellow polish.
  • Forming Daisy Petals: On the big toe, select a medium dotting tool (1.5mm) and dip it into opaque white polish. Paint five white dots arranged in a tight circle, leaving a tiny open center point. This forms the flower petals. Create two to three of these white dot circles across different areas of the big toe.
  • Flower Centers: Wipe your dotting tool clean and dip it into a contrasting warm orange or rich mustard-yellow polish. Place a single dot directly into the center of each white dot ring to complete the daisy structures.
  • Filling Negative Space: Add a few loose, isolated white dots in the open areas around the daisies to balance the design.
  • Small Toes: Place a single daisy floral cluster in the center of the second toe, and place single isolated white dots on the remaining smaller toes.
  • Final Seal: Coat with a glossy top coat for a fresh, garden-inspired presentation.

Idea 8: Matte Black Base with Glossy Polka Dots

Setup Method

This sophisticated design relies entirely on the interplay of visual textures rather than color contrast, creating an understated tone-on-tone effect that looks luxurious and modern.

  • Monochromatic Base: Apply two coats of full-coverage, jet-black polish across every toe.
  • Matte Transformation: Apply a high-quality, velvety matte top coat over all five toes and allow it to dry completely. The surface will transform from shiny to a soft, non-reflective suede finish.
  • Applying the Gloss: Dispense a small pool of non-wipe high-gloss gel top coat (or standard glossy top coat) onto your palette.
  • Dotting the Texture: Dip a medium dotting tool (2mm) into the clear glossy top coat. Tap clear dots onto the matte black surface of the big toe in a structured grid.
  • Do Not Re-Cover: Crucial Step: Do not apply a final top coat over the entire nail! Leave the background matte and the dots glossy.
  • Small Toes: Place one glossy clear dot in the center of each small matte black toe to complete this chic textural play.

Idea 9: Pink & Mint Tropical Punch

Execution Process

Vibrant and energetic, this color-blocked design uses contrasting pastel tones to create a high-impact summer aesthetic that demands attention.

  • Split Canvas Setup: Paint toes two and four with solid soft mint green polish. Paint toes three and five with solid pastel bubblegum pink polish.
  • Big Toe Diagonal Split: On the big toe, use striping tape or a steady hand to paint one diagonal half of the nail in mint green and the opposite diagonal half in pastel pink.
  • Inverted Dotting: Dispense mint green polish and pink polish onto your palette.
  • Crossing Over: Using a 1.5mm dotting tool, paint pink polka dots over the mint green half of the big toe. Then, paint mint green polka dots over the pink half of the big toe.
  • Small Toes Accent: On the solid mint toes, add a single pink dot. On the solid pink toes, add a single mint dot.
  • Finish: Seal with a glossy top coat to unify the split color plane into a seamless finish.

Idea 10: Glitter Base with Black Accent Dots

How to Make

High-shine glamour meets sharp graphic structure in this design, which overlays crisp black dots onto a dazzling metallic silver or champagne glitter base.

  • Sparkling Base: Apply two to three coats of a fine, high-density silver or champagne glitter polish to all toes until the nail bed is completely covered in reflective sparkle. Allow it to set firmly.
  • Smoothing Pass: Apply a thin layer of clear top coat over the glitter base first. This creates a flat surface so your dotting tool does not catch on rough glitter particles.
  • Dot Application: Dip a medium dotting tool into rich, opaque black polish. Place spaced-out black dots across the sparkling big toe canvas. The stark contrast of jet-black dots floating over an intense glitter base creates a mesmerizing 3D effect.
  • Minimalist Small Toes: Keep the small toes fully sparkling, adding just one small black dot at the base of the second digit for balance.
  • High-Gloss Coating: Seal with a thick, glass-like top coat to lock down the glitter texture and protect the black dots.

Detailed Look-by-Look Comparison Table

To help you choose the ideal style for your upcoming occasion, wardrobe, or skill level, review the comparative breakdown below:

Idea #NameColor SchemeDifficulty LevelIdeal Occasion / Style MatchEstimated DIY Time
1Classic Black & WhiteWhite & BlackBeginnerEveryday Casual, Retro, Sandals25 Mins
2Summer Pastel ConfettiSheer Nude, Multi-PastelsBeginner-IntermediateBeach Vacations, Pool Parties35 Mins
3Red & White SailorCherry Red & Pure WhiteBeginnerSummer Holidays, Cruise Wear25 Mins
4Minimalist Sheer NudeSheer Nude, Black/WhiteAdvanced (Precision)Work-Friendly, Minimalist Style20 Mins
5Nautical Navy & GoldNavy, White, Metallic GoldIntermediateEvening Events, Resort Wear30 Mins
6Dotted French PedicureSheer Pink & Opaque WhiteIntermediateWeddings, Elegant Formal Events35 Mins
7Sunshine Yellow DaisiesYellow, White, OrangeIntermediateSpring/Summer Picnics, Casual35 Mins
8Matte & Glossy BlackJet Black (Tone-on-Tone)IntermediateHigh-Fashion, Edgy/Night Out30 Mins
9Pink & Mint TropicalMint Green & Bubblegum PinkIntermediate-AdvancedTropical Trips, Summer Festivals40 Mins
10Glitter Base & Black DotsSilver Glitter & Jet BlackBeginner-IntermediateNew Year’s Eve, Glam Night Out30 Mins

Technical Step-by-Step Guide to Flawless Dotting

Executing perfectly round, uniform polka dots free of trailing tails, smudges, or uneven sizes requires mastering a few physical techniques.

       [ Correct 90ยฐ Tool Orientation ]          [ Incorrect Angle (Smeared) ]

               |  Tool                                 \  Tool
               |                                        \
               v                                         v
        +--------------+                          +--------------+
        |  Opaque Dot  |                          | Smeared Oval |
        +--------------+                          +--------------+
      ====================                      ====================
         Nail Surface                              Nail Surface

1. The Perpendicular Tap Technique

Always hold your dotting tool or bobby pin at a strict 90-degree angle relative to the nail surface. If you approach the nail at an angle, the bead of wet polish will transfer as an elongated oval or a streaked teardrop rather than a crisp circle.

2. Managing Polish Bead Size

Do not submerge the entire tip of your dotting tool into the polish bottle. Instead, pour 3 to 5 drops of polish onto a flat palette (such as a piece of plastic wrap, ceramic tile, or foil). Dip only the rounded spherical tip halfway into the pool of liquid. You want a small, controlled bead hanging from the tip.

3. The Single-Touch Rule

Touch the bead of polish lightly to the nail surface and lift straight up vertically. Do not press hard onto the nail plate, as flattening the tool tip forces polish to bleed outward into an irregular shape. Never re-tap or “stir” the tool on a dot that has already been placed; doing so creates unsightly air bubbles and uneven texture.

4. Re-Dipping Discipline

For uniform dot sizes across a grid, re-dip your tool into the polish palette before creating every single dot. If you tap multiple times without re-dipping, each successive dot will automatically shrink in size as the polish bead depletes, resulting in an unintentional gradient size. (Note: Only skip re-dipping if you actively want an intentional fading size effect!)


Common Mistakes and How to Fix Them

Even experienced DIY beauty enthusiasts run into occasional errors when painting pedicures. Here is how to diagnose, prevent, and fix the most common polka dot mistakes:

1. Smudging Dots with Top Coat

  • The Problem: You apply your final top coat, and the brush drags the black or colored dots across the background, leaving ugly streaks.
  • The Cause: The dots were either wet internally, or you pressed the top coat brush bristles too hard against the nail surface.
  • The Prevention: Allow wet dots to air-dry for at least 4 to 5 full minutes. When applying top coat, load the brush generously so a thick bead of clear liquid rests beneath the bristles. “Float” this clear bead over the dots with light, sweeping motions so the bristles never physically scrape the nail art.

2. Uneven or Distorted Dot Shapes

  • The Problem: The dots look jagged, teardrop-shaped, or connected to each other.
  • The Cause: Dried polish buildup on the tip of the dotting tool, or holding the tool at a slanted angle.
  • The Fix: Keep a lint-free pad saturated with acetone on your workspace. Wipe the metal tip of your dotting tool clean after every 4 to 5 dots to prevent tacky, half-dried polish from distorting subsequent dots.

3. Polish Bleeding into Cuticle Crevices

  • The Problem: Wet polish floods the lateral sidewalls or cuticle fold of the toe.
  • The Cause: Too much base color polish loaded onto the brush, or painting too close to the skin folds.
  • The Fix: Dip a flat, angled nail art brush or eyeliner brush into pure acetone. Gently trace along the skin crease to instantly erase flooded polish before curing or air-drying.

4. Premature Chipping on Tip Edges

  • The Problem: The design begins peeling or flaking off the free edge of the big toe within a few days.
  • The Cause: Failing to cap the free edge, or wearing tight-fitting shoes before the polish has fully cured.
  • The Fix: Always run your base coat, color coat, and top coat horizontally along the front edge (the thickness cut edge) of the toe nail plate to seal all layers behind a protective cap.

Maintenance and Longevity Strategies

Toe nails endure significant mechanical stress due to shoe friction, pressure from walking, moisture exposure in showers, and contact with outdoor terrain. Implementing a structured maintenance routine ensures your polka dot pedicure remains pristine for up to four weeks or longer.

1. The 3-Day Top Coat Refresh

Every three to four days, apply a fresh, thin layer of quick-drying glossy top coat over your pedicure. This replenishes lost surface shine and restores the protective barrier over raised polka dots that face friction from socks and closed-toe footwear.

2. Daily Cuticle and Skin Hydration

Feet lack the sebaceous glands found on other areas of the body, making toe nail beds prone to dryness and flaking. Apply a drop of jojoba or sweet almond cuticle oil to the base of each toe every evening before sleep. Massaging oil into the surrounding skin prevents dry cuticles from lifting the edges of your polish base layer.

3. Strategic Footwear Choices Post-Pedicure

  • Immediate Care (0โ€“2 Hours): Wear open-toed flip-flops or broad sandals immediately after completing your pedicure. Standard nail lacquers take up to two hours to fully harden throughout their lower layers, even if they feel dry to the touch after 15 minutes.
  • Enclosed Shoes: When wearing closed-toe shoes or boots, always wear soft, clean cotton socks to absorb sweat and buffer the nail surface against interior shoe friction.

4. Sun and Chemical Protection

  • UV Shielding: Bright colors and crisp white polishes can yellow when exposed to extended sunlight or chlorine in swimming pools. Look for top coats that contain UV inhibitors to preserve color brightness.
  • Rinse After Swimming: Always wash feet with clean fresh water after swimming in ocean salt water or chlorinated pools to prevent harsh chemicals from dulling your top coat finish.

Creative Expansion and Advanced Styling

Once you feel completely comfortable executing basic polka dot patterns on your toes, you can combine these techniques with broader nail art concepts to create advanced, customized looks.

  • Glazed Chrome Overlays: After painting and sealing your polka dot pattern, buff a micro-fine pearl chrome powder over a non-wipe gel top coat. This adds an iridescent glazed finish over both the background and the dots simultaneously.
  • Negative Space Outlines: Instead of solid dots, use a fine detail brush to draw small hollow circles (dot outlines) across the nail, leaving the center open to reveal the bare or tinted background.
  • Seasonal Variations: Adapt your color palette to reflect seasonal shifts:
  • Spring: Pastel pink, mint, and soft lilac dots over a cream base.
  • Summer: Neon orange, hot pink, and lime green dots over a crisp white base.
  • Autumn: Mustard yellow, burnt orange, and deep warm brown dots over a nude base.
  • Winter: Deep burgundy, emerald green, and gold glitter dots over a jet-black base.
  • Mixed-Media Toe Sets: Combine your polka dot big toe with complementary solid accent toesโ€”such as pairing a polka dot big toe with full metallic foil or glitter accents on the adjacent digits.

Frequently Asked Questions

1. What household items can I use if I don’t own a professional dotting tool?

You can easily create perfect polka dots using common items found around the house:

  • Bobby Pins: Unfold a standard bobby pin; the small plastic-coated ball at the tip makes an ideal medium-sized dotting tool.
  • Toothpicks: The pointed end of a wooden toothpick creates tiny micro-dots, while a dull or slightly snicked toothpick end makes small-to-medium dots.
  • Sewing Pins: Insert the sharp point of a metallic sewing pin into the eraser end of a pencil; the round metal head on top serves as an ultra-precise dotting tool.
  • Ballpoint Pens: An dried-out ballpoint pen tip works exceptionally well for small, uniform dots.

2. Should I use gel polish or traditional nail lacquer for toe nail art?

Both formulas work effectively, but they carry distinct advantages:

  • Gel Polish: Cures instantly under an LED/UV lamp, eliminating dry-time smudging entirely. Gel dots lay completely flat once sealed and typically last 4 to 6 weeks without chipping.
  • Traditional Lacquer: Requires no specialized lamp equipment, is faster to remove with standard acetone, and allows for quick design changes whenever desired.

3. How do I stop my polka dots from feeling bumpy on my toe nails?

Because dotting places a concentrated bead of polish on top of a flat base coat, dots naturally create small raised mounds. To achieve a smooth, flat surface:

  • Allow the dots to dry completely.
  • Apply a thick, plumping “gel-effect” top coat over the entire nail. The thick top coat self-levels, filling in the open gaps between the raised dots and creating a completely smooth, glass-like finish.

4. How long do I need to wait for my toe nail dots to dry before putting on shoes?

  • Open-Toed Shoes: You can wear open sandals 15 to 20 minutes after applying a quick-dry top coat.
  • Socks & Closed Shoes: Wait at least 1 to 2 full hours before wearing socks or tight enclosed footwear if using traditional polish. If using cured LED gel polish, you can put on closed shoes immediately after wiping away any tacky inhibition layer.

5. Why do my white polka dots turn pink when placed over red polish?

This occurs when the underlying red polish has not fully dried or cured before adding the white dots. The wet white polish dissolves a tiny amount of the red pigment beneath it, turning the white into pink. Always allow your base color to dry thoroughly (or fully cure if using gel) before applying your polka dots.

Similar Posts

  • 10 Icy Blue Nail Ideas

    Spread the love

    Spread the loveIcy blue nails offer a crisp, refreshing, and sophisticated manicure option that brings a cool-toned elegance to any season. Sitting right at the intersection of soft pastels and striking modern tones, icy blue provides a serene canvas that flatters various skin tones and nail lengths. In this comprehensive guide, you will discover structured…

  • 10 Emerald Cat Eye Nail Designs Ideas

    Spread the love

    Spread the loveEmerald cat eye nails represent the ultimate intersection of jewel-toned luxury, magnetic physics, and high-fashion nail artistry. The “cat eye” or magnetic manicure effect utilizes fine iron-powder particles suspended within gel polish, which are manipulated using a neodymium magnet before curing under a UV/LED lamp. When paired with a deep, rich emerald green…

  • 10 Trendy Nail Art Designs Ideas

    Spread the love

    Spread the loveModern nail design offers a dynamic canvas for personal expression, effortlessly combining contemporary minimalist aesthetics with rich textures, vivid color palettes, and innovative finishes. Exploring current manicure trends allows individuals to elevate their everyday look, adapt styles to seasonal wardrobes, and discover creative applications tailored to various nail lengths and shapes. In this…

  • 10 Vegas-Themed Nails Ideas

    Spread the love

    Spread the loveCatchy & Engaging Introduction There is no city on Earth quite like Las Vegas. It is a dazzling desert oasis where neon lights cut through the night sky, high-stakes games fold into early mornings, and luxury, high fashion, and playful extravagance reign supreme. Whether you are prepping for an upcoming weekend on the…

  • 10 Super Mario Nails Ideas

    Spread the love

    Spread the loveIn the fast-evolving landscape of modern beauty and self-expression, nail art has transcended simple color applications to become a canvas for personal storytelling, artistic talent, and cultural homage. Among the most vibrant, expressive, and universally recognized aesthetics making a massive comeback across Pinterest feeds, salon lookbooks, and beauty runways is pop-culture gaming nail…

Leave a Reply

Your email address will not be published. Required fields are marked *