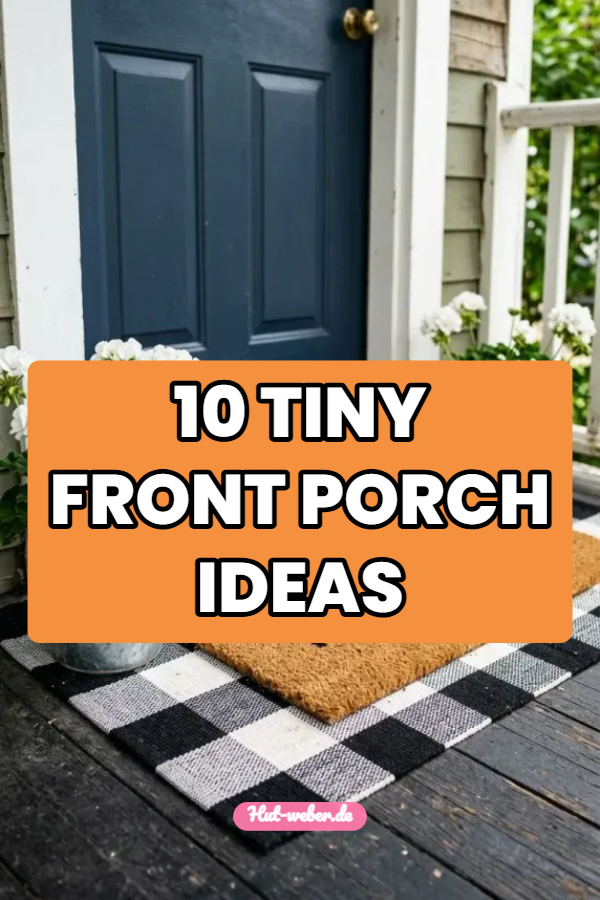
10 Tiny Front Porch Ideas

Spread the love

A tiny front porch may lack spatial depth, but it holds immense potential to define your home’s curb appeal and extend a warm architectural welcome. When working with a small footprint—often just a few square feet between the front door and entry steps—traditional bulky patio sets and scattered decor can quickly cause visual clutter and block essential walking paths.

Maximizing a compact entry relies on vertical spatial zoning and floor clearance. By utilizing wall space, opting for folding or multi-functional furniture, layering entryway textiles, and drawing the eye upward with overhead lighting or greenery, you can create a polished, functional outdoor entry zone. This comprehensive guide details 10 creative ideas designed specifically to maximize tiny front porches across varied architectural styles and budget levels.

Key Design Principles for Small Entryways

To ensure your tiny front porch remains safe, functional, and visually balanced, keep these core rules in mind:

  • Maintain Clear Traffic Paths: Keep a minimum 30- to 36-inch clear walking corridor from the entry steps to the front door handle. Avoid placing floor pots or chair legs directly in swing zones.
  • Embrace Verticality: Move decor off the deck plane. Utilize wall-mounted planters, overhead ceiling hooks, gooseneck lights, and vertical trellises to add depth without consuming floor area.
  • Scale Down Furniture: Avoid full-sized armchairs or heavy wooden benches. Choose slender wrought-iron bistro sets, low-profile saddle stools, or slim wall-mounted drop-leaf shelves.
  • Use High-Contrast Focal Points: Painting the front door a standout accent color or installing prominent hardware draws attention to architectural details rather than limited floor space.

Idea 1: The Compact Folding Bistro Corner

Concept and Design Overview

When space permits only a single seating spot, a foldable, slender metal bistro set delivers high visual appeal without permanently crowding the porch. A small round bistro table paired with a single folding chair creates a cozy nook for morning coffee.

Because the furniture features open wire or narrow bar construction, light passes through easily, preventing the porch from feeling cramped. When extra standing clearance is needed for deliveries or moving items, both the chair and table fold completely flat against the wall. The color palette pairs matte black or white iron, cream cushions, and fresh green potted accents.

+-------------------------------------------------------------+
|              TINY PORCH EXTERIOR WALL                       |
|                                                             |
|         [ Wall-Mounted Metal Sconce / Light ]               |
|       +-----------------------------------------+           |
|       |   FOLDING METAL BISTRO CHAIR            |           |
|       +-----------------------------------------+           |
|            [ Tiny Round Bistro Table (18" Dia) ]            |
|                                                             |
|           [ Low-Profile Coir Welcome Mat ]                  |
+-------------------------------------------------------------+

Step-by-Step Creation Method

  1. Measure Corner Footprint: Ensure you have at least a 24×24-inch corner space clear of the front door’s opening swing path.
  2. Select Powder-Coated Metal: Choose a lightweight, weather-resistant powder-coated iron or steel bistro set.
  3. Add a Tied Seat Cushion: Secure a thin, weather-resistant Sunbrella cushion to the chair seat to introduce comfort without bulk.
  4. Keep Tabletop Minimal: Style the table with only a single small potted succulent or candle lantern to preserve usability.

Idea 2: Built-In Corner Storage Bench

Concept and Design Overview

A custom or slim prefabricated corner bench maximizes unused perimeter space while providing hidden storage for outdoor essentials. Built flush against the house wall, the bench offers functional seating while housing parcel deliveries, garden hoses, or outdoor shoes under its lift-top seat.

Painting the bench the same color as the house siding helps it blend into the architecture, while painting it a contrasting trim color makes it a built-in focal point. The color scheme pairs crisp white or grey wood, navy cushions, and natural woven storage baskets.

Step-by-Step Creation Method

  1. Build or Buy to Fit: Construct or purchase a narrow box bench (14 to 16 inches deep) tailored to your porch’s specific corner dimensions.
  2. Apply Weather-Proof Paint: Coat the wooden bench frame in exterior-grade satin or semi-gloss paint.
  3. Add a Custom Bench Pad: Top the bench with a 2-inch thick exterior foam cushion covered in a washable outdoor fabric.
  4. Incorporate Under-Bench Baskets: Use woven plastic or seagrass bins inside the storage cavity to keep small items organized.

Idea 3: Vertical Wall-Mounted Herb & Floral Trellis

Concept and Design Overview

When floor area is virtually zero, moving your garden vertically up the house wall adds natural warmth without reducing walking space. A wall-mounted wooden lattice or steel grid trellis holds small, lightweight planter pots stacked vertically beside the door frame.

This vertical garden frames the entryway with greenery, fragrance, and color. It works exceptionally well for growing culinary herbs (like rosemary, thyme, and mint) or cascading annuals (like ivy and petunias). The color palette highlights natural cedar or black steel grids, terracotta clay pots, and bright botanical green.

       +-------------------------------------------------+
       |           ENTRYWAY WALL BESIDE DOOR             |
       |                                                 |
       |   +-----------------------------------------+   |
       |   | VERTICAL WOOD/STEEL GRID WALL TRELLIS   |   |
       |   |  [Pot 1: Mint]      [Pot 2: Rosemary]   |   |
       |   |  [Pot 3: Ivy]       [Pot 4: Thyme]      |   |
       |   +-----------------------------------------+   |
       |                                                 |
       |             [ Clear Walking Path ]              |
       +-------------------------------------------------+

Step-by-Step Creation Method

  1. Mount Trellis to Studs: Anchor a pre-made wood or metal grid frame securely to your exterior wall studs using heavy-duty masonry or siding anchors.
  2. Attach Pot Clamps: Fasten adjustable ring clamps or metal hooks to the trellis frame at staggered vertical heights.
  3. Use Lightweight Pots: Insert small 4- to 6-inch plastic or terracotta pots into the ring clamps to avoid excessive wall strain.
  4. Select Low-Maintenance Botanicals: Plant trailing ivy, succulents, or culinary herbs that thrive in your porch’s sunlight conditions.

Idea 4: Symmetrical Hanging Basket Canopy

Concept and Design Overview

Hanging plants from the ceiling eaves frames the front door from above, drawing the eye upward and giving a small porch a lush, inviting feel without taking up a single square inch of deck floor.

Pairing two identical hanging baskets on either side of the doorway creates architectural symmetry and balance. Classic Boston ferns, trailing fuchsias, or spider plants thrive in covered porch shade, creating a natural botanical archway. The color scheme pairs natural coconut coir liners, black iron hanging chains, and vibrant green foliage.

Step-by-Step Creation Method

  1. Install Ceiling Hooks: Thread heavy-duty stainless steel eye-hooks directly into solid wooden ceiling rafters on both sides of the door.
  2. Select Wire Baskets: Choose coconut-coir lined wire baskets for breathable root health and classic texture.
  3. Plant Shade-Tolerant Foliage: Fill baskets with lush, full foliage plants like Boston Ferns or Calibrachoa.
  4. Set Proper Height: Hang baskets so the bottom rim sits at least 7 feet above floor level to prevent head bumps.

Idea 5: High-Impact Layered Entryway Mats

Concept and Design Overview

On tiny porches where furniture isn’t feasible, styling the floor area directly in front of the door creates immediate visual charm. Layering two distinct mats introduces pattern, texture, and depth within a minimal footprint.

A larger flat-weave outdoor rug (such as a black-and-white buffalo plaid or ticking stripe pattern) acts as the decorative base layer. Centered on top is a smaller, heavy-duty natural coconut coir mat featuring simple typography or a bold border. The color scheme focuses on black, crisp white, natural coconut tan, and green accents.

       +-------------------------------------------------+
       |           FRONT ENTRY DOORWAY                   |
       |                                                 |
       |   +-----------------------------------------+   |
       |   | BASE OUTDOOR RUG (24x36" Stripe/Plaid)   |   |
       |   |   +---------------------------------+   |   |
       |   |   | NATURAL COIR MAT (18x30")       |   |   |
       |   |   +---------------------------------+   |   |
       |   +-----------------------------------------+   |
       |                                                 |
       +-------------------------------------------------+

Step-by-Step Creation Method

  1. Size the Base Layer: Choose a washable polypropylene outdoor rug that extends 3 to 4 inches past the top coir mat on all sides.
  2. Lay Non-Slip Underlayment: Place a non-slip rubber grip pad beneath the base rug to prevent slipping on smooth porch decks.
  3. Center the Coir Mat: Lay a dense 100% natural coir welcome mat centered over the base pattern.
  4. Secure Corners: Use double-sided outdoor rug tape on the corners to keep mats flat during high winds.

Idea 6: The Slim Wall-Mounted Drop-Leaf Console

Concept and Design Overview

A wall-mounted drop-leaf shelf serves as a temporary console table for mail, keys, coffee cups, or seasonal decor without occupying permanent floor space. Attached directly to the wall beside the door, the shelf lifts up when needed and drops flat when not in use.

This floating surface provides essential drop-zone functionality for daily routines. Stained in a warm timber shade or painted to match trim work, it introduces a custom architectural feel. The color palette highlights natural oak, black hardware, and simple stone accessories.

Step-by-Step Creation Method

  1. Install Folding Brackets: Mount two heavy-duty locking steel folding shelf brackets into wall studs at a standard 34- to 36-inch counter height.
  2. Attach Floating Ledge: Fasten a pre-sealed 8- to 10-inch deep wooden plank onto the bracket arms.
  3. Apply Weather Sealant: Finish the wood surface with a clear UV-resistant polyurethane sealer to protect against rain spray.
  4. Keep Clear for Daily Use: Style with only a small potted succulent or single candle lantern to ensure quick folding capability.

Idea 7: Single Statement Teak Rocking Chair

Concept and Design Overview

Instead of forcing a pair of chairs onto a tiny porch, embrace asymmetry by placing a single, high-quality statement chair in the open corner. A solid teak or poly-lumber rocking chair angled slightly toward the entrance establishes a cozy, welcoming mood.

A single well-proportioned rocker feels intentional rather than cramped. Paired with a small ceramic garden stool to hold a beverage, it creates a peaceful outdoor reading spot. The color scheme features warm natural teak, charcoal cushions, and a ceramic garden accent.

       +-------------------------------------------------+
       |           PORCH CORNER ACCENT WALL              |
       |                                                 |
       |   +-----------------------------------------+   |
       |   | SINGLE STATEMENT TEAK ROCKING CHAIR     |   |
       |   | (Angled 45 Degrees Toward Entrance)     |   |
       |   +-----------------------------------------+   |
       |         [ Ceramic Garden Side Stool ]           |
       |                                                 |
       +-------------------------------------------------+

Step-by-Step Creation Method

  1. Select All-Weather Timber: Choose weather-resistant teak or high-density poly-lumber that stands up to rain and sun exposure.
  2. Position at an Angle: Set the chair in your largest open corner, angling it 45 degrees toward the center of the porch.
  3. Add a Ceramic Stool: Place a compact 12-inch wide ceramic garden stool beside the armrest to serve as a side table.
  4. Style with a Pillow: Add a single weather-resistant lumbar pillow to introduce color and back support.

Idea 8: Statement Front Door Paint & Minimalist Hardware

Concept and Design Overview

When porch square footage is too limited for furniture or large planters, transform the architecture itself into the primary decorative element. Painting the front door a vibrant, unexpected color instantly elevates curb appeal and makes the entryway pop.

Pairing a bold door color—such as sage green, navy blue, canary yellow, or classic black—with upgraded brass or matte black hardware creates a tailored look. Because the door plane consumes zero floor space, this approach is 100% space-efficient. The color palette balances an accent door color with neutral wall siding and warm metallic hardware.

Step-by-Step Creation Method

  1. Prep the Door Surface: Clean, sand, and prime the front door to ensure proper paint adhesion.
  2. Apply Exterior Semi-Gloss Paint: Apply two to three coats of high-durability exterior semi-gloss or satin paint.
  3. Upgrade Hardware: Replace dated knobs and deadbolts with crisp matte black or brushed brass handlesets and matching house numbers.
  4. Frame with Lighting: Mount an updated overhead or wall fixture to illuminate the new door color at night.

Idea 9: Tiered Corner Plant Stand Staging

Concept and Design Overview

A quarter-round or tiered ladder plant stand fits snugly into an unused porch corner, allowing you to display multiple potted plants vertically within a compact footprint.

By elevating plants on staggered tiers, each pot receives adequate sunlight while creating a lush, layered garden effect. Combining plants of varied textures, leaf shapes, and flower colors brings vibrant life to plain entry corners. The color scheme pairs dark metal or wooden stands, natural terracotta pots, and diverse green foliage.

+-------------------------------------------------------------+
|               PORCH CORNER ACCENT ZONE                      |
|                                                             |
|  +-------------------------------------------------------+  |
|  | TIERED QUARTER-ROUND CORNER PLANT STAND               |  |
|  |   [ Top Tier: Trailing Pothos ]                       |  |
|  |   [ Middle Tier: Flowering Pansies ]                  |  |
|  |   [ Bottom Tier: Snake Plant / Fern ]                 |  |
|  +-------------------------------------------------------+  |
|                                                             |
|             [ Uncluttered Door Threshold ]                  |
+-------------------------------------------------------------+

Step-by-Step Creation Method

  1. Select a Corner Stand: Purchase a 3-tier corner metal or teak plant stand designed to nestle into a 90-degree wall corner.
  2. Arrange by Height: Place taller, sun-loving plants on the top shelf and fuller, shade-tolerant plants on lower tiers.
  3. Mix Container Styles: Use uniform terracotta or matte ceramic pots to maintain a clean visual look across different plant species.
  4. Check Door Clearance: Ensure the stand’s outer edge does not catch clothing or block the door’s opening path.

Idea 10: Overhead Flush-Mount Warm Lighting Accent

Concept and Design Overview

Overhead lighting plays a dual functional and aesthetic role on covered tiny porches. Upgrading a builder-grade porch light to a stylish flush-mount or semi-flush cage light creates a striking overhead centerpiece that illuminates the entry zone.

Pairing a warm 2700K Edison LED bulb with a soft painted ceiling finish (such as traditional sky-blue or clean white) casts a cozy downward glow that makes the small porch feel welcoming at night. The color palette emphasizes warm amber light, black or brass fixture metal, and soft ceiling paint.

Step-by-Step Creation Method

  1. Choose Exterior-Rated Fixture: Select a wet- or damp-rated exterior flush-mount light fixture fitted with clear glass panels.
  2. Turn Off Power Safety: Shut off electrical breaker power before removing old fixtures and installing new mounting plates.
  3. Install Warm Bulbs: Use 2700K to 3000K warm white LED bulbs to ensure an inviting, warm light output.
  4. Apply Exterior Caulk: Seal around the fixture ceiling base with clear exterior silicone caulk to keep moisture and insects out.

Similar Posts

  • 10 Teens Nails Design Ideas

    Spread the love

    Spread the loveNail art has become one of the most fun and creative ways for teens to express their personality. From soft pastel shades to playful patterns and minimal designs, teen nail styles focus on creativity without being too bold or overpowering. Whether it is for school events, birthdays, vacations, or just everyday self expression,…

  • 10 Future House Ideas Decorating Interiors

    Spread the love

    Spread the loveThe idea of the future house is no longer limited to science fiction. It is already shaping the way we design, decorate, and experience our interiors today. Future house interiors focus on comfort, sustainability, smart technology, and a strong connection to personal well being. These homes are designed to adapt to changing lifestyles,…

  • 10 Crochet Keychain Ideas

    Spread the love

    Spread the loveCrocheting is one of the most relaxing and rewarding crafts you can do. From cozy blankets to cute accessories, there are endless possibilities. But one of the simplest and most delightful crochet projects is a keychain. Crochet keychains are small, quick to make, and perfect for beginners. They also make thoughtful gifts and…

  • 10 Sleeping Nook Bedroom Ideas

    Spread the love

    Spread the loveDesigning a bedroom that feels comfortable, functional, and inviting is one of the most important steps in creating a restful home. While many people focus on full-sized bedrooms with large layouts, sleeping nooks have become an increasingly popular trend. These small and intimate spaces are perfect for apartments, tiny homes, vacation rentals, or…

Leave a Reply

Your email address will not be published. Required fields are marked *