10 Waist Length Knotless Braids Ideas
Waist-length knotless braids represent the pinnacle of modern protective styling. Unlike traditional box braids that anchor synthetic extensions at the root with a bulky, high-tension knot, the knotless technique starts with your natural hair and gradually feeds in braiding hair as the plait progresses. The result is a flat, seamless root, zero scalp tension, and instant styling flexibility from day one.
Extending this technique to waist length creates a dramatic, elegant silhouette that moves naturally. Because the weight of the extensions is distributed along the entire length rather than concentrated at the root, you can enjoy a long, flowing look without the heavy pulling or scalp strain typical of traditional long braids.
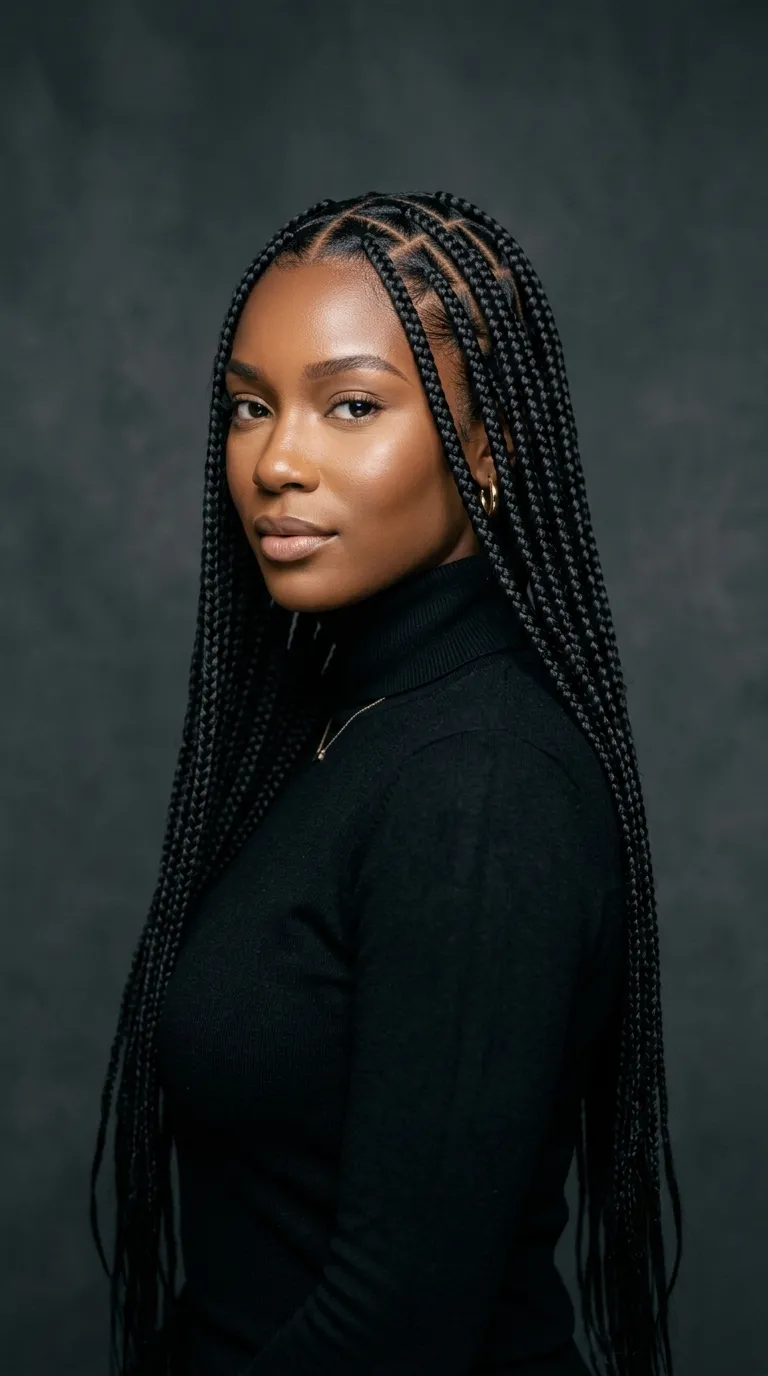
Whether you prefer sleek square parts, geometric triangles, goddess curls, or warm honey-blonde blends, waist-length knotless braids offer versatility across all occasions. This comprehensive guide covers essential hair prep protocols, parting mechanics, ten distinct styling concepts, maintenance routines, and production-ready visual prompts.
Why This Idea Is Trending & Flattering
-
Zero Scalp Tension & Pain-Free Install: Feeding hair in gradually eliminates tension on hair follicles, preventing traction alopecia and tender-scalp headaches.
-
Instant Styling Flexibility: Because the roots lie flat, you can style your braids into high buns, half-up ponytails, or intricate updos on the very first day.
-
Elongating, Flattering Silhouette: The vertical lines of waist-length plaits draw the eye downward, creating an elegant, streamlined frame for all face shapes and body types.
-
Lightweight Movement & Natural Fall: Knotless braids mimic the flow of natural hair, eliminating the stiff, rigid look of traditional box braids.
-
Long-Lasting Protective Styling: With proper hydration and nighttime protection, a waist-length knotless install comfortably lasts 6 to 8 weeks while promoting natural hair retention.
Materials, Preparation & Scalp Care Guide
Achieving a clean, long-lasting waist-length install requires proper hair prep, quality braiding hair, and targeted scalp care products.
Essential Hardware & Hair Supplies
-
Pre-Stretched Braiding Hair (48″ to 54″ length): 4 to 6 packs of 100% Kanekalon or hypoallergenic pre-feathered synthetic braiding hair.
-
Parting Comb: A metal rat-tail comb with a precision tip for crisp, razor-sharp part lines.
-
Braiding Gel / Edge Control: A non-flaking, water-based pomade (such as Shine ‘n Jam or braiding grip mousse) to create clean parts and smooth flyaways.
-
Human Hair or Synthetic Deep-Wave Bundles (Optional for Goddess/Boho styles): 2 to 3 bundles of 18″ to 22″ curly hair for curly leave-outs.
-
Scalp Oil & Hydration Mist: A lightweight jojoba, peppermint, or rosemary oil paired with a soothing aloe vera water spray.
-
Satin/Silk Bonnet & Scarf: An extra-long satin bonnet (or braid tube) and edge-laying scarf to preserve roots overnight.
Pre-Install Hair Preparation Protocols
-
Clarify and Deep Condition: Wash the scalp thoroughly with a clarifying shampoo to remove product buildup, followed by an intensive moisturizing deep conditioner.
-
Blow-Dry on Stretched Hair: Blow-dry natural hair straight using a tension method or comb attachment; blown-out hair ensures seamless blending with synthetic hair and prevents frizz.
-
Apple Cider Vinegar (ACV) Hair Rinse: If prone to scalp irritation, soak synthetic hair in warm water and ACV for 20 minutes to strip alkaline coatings before braiding.
-
Sectioning & Tension Balance: Keep parted sections proportional to the braid size to ensure the natural hair base can comfortably support the weight of the waist-length extension.
Main Ideas & Style Variations
| Knotless Style Concept | Parting Geometry | Key Feature / Accent | Best Occasion |
| Classic Clean Square-Part Jet Black | Precision square grid | Sleek dipped ends, minimalist edge layout | Daily wear, professional & formal |
| Boho Goddess with Human Hair Curls | Triangle / Diamond parts | Wavy leave-outs throughout length | Vacations, festivals & romantic outings |
| Honey Blonde & Caramel Ombré Blend | Large square parts | Multi-tonal blonde feed-in gradient | Summer getaways & style switch-ups |
| Jumbo Statement Knotless Plaits | Oversized square parts | Thick statement plaits, fast install | Low-maintenance, quick protective style |
| Romantic French-Curled Ends | Medium square parts | Bouncy, roller-set spiral ends | Weddings, date nights & galas |
| Geometric Triangle Parting Grid | Diagonal chevron/triangles | Sharp geometric scalp layout | Streetwear fashion & creative styling |
| Half-Up Topknot & Flowing Lengths | Any medium parting | High crown bun with loose waist plaits | Casual chic, brunch & active days |
| Rich Copper / Warm Ginger Knotless | Medium box parts | Vibrant spiced-copper/auburn colorway | Autumn transitions & high-impact color |
| Golden Metallic Cuffs & String Wrap | Medium square parts | Gold filigree cuffs, criss-cross cords | Special events & elevated boho looks |
| Beaded Waist-Length Ends | Medium / Small parts | Wooden, glass, or clear acrylic beads | Cultural celebrations & festival chic |
1. Classic Clean Square-Part Jet Black

Concept Overview & Aesthetic Appeal
The foundational standard of knotless braiding. Precision-carved square parts form a uniform grid across the scalp, flowing into waist-length, jet-black (#1 or #1B) plaits with tapered, hot-water-dipped ends.
Step-by-Step Execution Guide
-
Section the scalp into clean, symmetrical square rows using a metal rat-tail comb and braiding pomade.
-
Begin each braid using only natural hair, making three initial passes before feeding in small, equal strands of pre-stretched black braiding hair.
-
Continue braiding down to the waist, tapering the ends naturally.
-
Dip the bottom 6 inches of the braids in boiling hot water for 15 seconds to seal and create a fluid, lightweight swing.
-
Smooth the hairline using a lightweight edge control brush.
Pro Styling Tip
Use an anti-itch scalp serum along the parted rows immediately after installation to soothe the scalp and lock in shine.
2. Boho Goddess with Human Hair Curls

Concept Overview & Aesthetic Appeal
A free-spirited, voluminous look that combines knotless braids with cascading curly tendrils along the shaft and ends. Incorporating human hair deep-wave curls ensures the leave-outs remain tangle-free and soft.
Step-by-Step Execution Guide
-
Map out diamond or medium square parts.
-
As you feed in synthetic braiding hair, insert strands of human deep-wave curly hair at staggered intervals along each braid.
-
Leave one arm of the curly strand out of the braid, continuing to plait down with the remaining hair.
-
Leave the bottom 4 inches of each braid unplaited, securing the end with a small clear elastic band or knot to let the curly texture flow.
-
Apply a lightweight curl mousse throughout the lengths to define and separate the wavy tendrils.
Pro Styling Tip
Use 100% human hair for the curly leave-outs instead of synthetic hair to prevent matting and extend the life of the style.
3. Honey Blonde & Caramel Ombré Blend

Concept Overview & Aesthetic Appeal
A multi-tonal dimensional style that introduces warm honey-blonde (#27), caramel (#30), and golden-blonde (#613) tones without chemical processing on natural hair.
Step-by-Step Execution Guide
-
Start the roots using natural dark hair, gradually feeding in caramel-toned extensions near the mid-shaft.
-
Transition to lighter honey-blonde braiding hair as you reach the lower lengths to create an ombré gradient.
-
Maintain consistent tension through color transitions to ensure smooth, bump-free plaits.
-
Seal the ends in hot water and style with a light shine spray.
Pro Styling Tip
Blending two adjacent shades (e.g., #27 and #30) together in your hands before feeding them in creates a seamless, natural color melt.
4. Jumbo Statement Knotless Plaits

Concept Overview & Aesthetic Appeal
Bold, chunky, and fast to install. Jumbo knotless braids (18 to 25 total braids) deliver an editorial aesthetic that highlights scalp geometry and cuts salon sitting time to under three hours.
Step-by-Step Execution Guide
-
Section the hair into large, clean quadrants (roughly $2times2$ inch squares).
-
Apply a generous amount of braiding pomade along each part to keep jumbo sections smooth and flyaway-free.
-
Begin the three-strand plait, quickly feeding in thicker bundles of pre-stretched hair to build diameter down to the waist.
-
Dip the ends in hot water to soften the synthetic fibers and give them a natural drape.
Pro Styling Tip
Because jumbo sections carry more weight per braid, limit wear to 3–4 weeks to prevent strain on hair edges.
5. Romantic French-Curled Ends

Concept Overview & Aesthetic Appeal
A sophisticated variation featuring sleek knotless braids down to the mid-back that transition into bouncy, voluminous French curls cascading down to the waist.
Step-by-Step Execution Guide
-
Install standard medium knotless braids down to mid-back level.
-
Stop braiding 8 to 10 inches from the ends and secure with a discreet slip knot or clear elastic.
-
Wrap the loose ends around large flexi-rods or perm rods.
-
Submerge the rodded ends in hot water for 30 seconds, towel dry, and let them cool completely before unraveling to reveal defined spirals.
-
Separate curls gently with a drop of hair serum.
Pro Styling Tip
Brush through the curled ends daily with a wide-tooth comb and apply a dime-sized amount of leave-in foam to keep the curls bouncy and tangle-free.
6. Geometric Triangle Parting Grid

Concept Overview & Aesthetic Appeal
An eye-catching, architectural alternative to standard square boxes. Clean triangular sections create a diagonal chevron pattern across the scalp, turning the parting itself into a design element.
Step-by-Step Execution Guide
-
Map horizontal baseline rows across the scalp.
-
Carve diagonal zigzag lines across each row to form alternating equilateral triangles.
-
Smooth each triangular base with edge control before braiding.
-
Feed in hair evenly, ensuring the braid emerges from the center of each triangle to distribute weight uniformly.
-
Finish with hot-water dipping and scalp shine spray.
Pro Styling Tip
Keep triangle sizes uniform across the entire head to maintain visual balance and even weight distribution.
7. Half-Up Topknot & Flowing Lengths

Concept Overview & Aesthetic Appeal
A versatile everyday styling option that gathers the crown braids into a high, sculpted topknot while leaving the remaining waist-length braids to cascade down the back and shoulders.
Step-by-Step Execution Guide
-
Part the braids horizontally from ear to ear, separating the top crown half from the lower half.
-
Smooth the upper braids into a high ponytail at the crown using a large, snag-free hair bungee or scrunchie.
-
Wrap the ponytail braids around the base to form a tall, structured bun, tucking the ends securely underneath.
-
Let the bottom half flow freely over the back.
-
Frame the face by pulling out two individual accent braids along the temples.
Pro Styling Tip
Because knotless braids lie flat at the root, you can create this high bun immediately after your appointment without tension or pain.
8. Rich Copper / Warm Ginger Knotless

Concept Overview & Aesthetic Appeal
A striking, vibrant color choice. Rich spiced-copper and warm ginger (#350 or #30/#350 mix) braiding hair delivers a bold, warm tone that complements deep, olive, and golden complexions.
Step-by-Step Execution Guide
-
Select 4 to 5 packs of pre-stretched braiding hair in vibrant copper or auburn tones.
-
Braid using medium square parts, feeding in copper hair from the very first feed-in pass for full, saturated color coverage.
-
Braid down to waist length and seal with hot water.
-
Set the roots with a lightweight setting mousse and tie down with a satin wrap for 10 minutes to lock in a sleek finish.
Pro Styling Tip
Pair copper braids with gold metallic cuffs or gold thread accents to complement the warm, spicy undertones.
9. Golden Metallic Cuffs & String Wrap

Concept Overview & Aesthetic Appeal
Elevate simple knotless braids into festival-ready or formal statement hair by incorporating gold filigree cuffs, metallic cords, and cowrie shell accents along random braids.
Step-by-Step Execution Guide
-
Install standard waist-length knotless braids in your chosen size and parting layout.
-
Select 4 to 6 accent braids around the face and crown.
-
Open adjustable gold filigree hair cuffs and clamp them along the length of the selected braids at 2-inch intervals.
-
Take a 4-foot length of gold metallic embroidery cord, wrap it criss-cross style down a front accent braid, and tie it off at the bottom.
-
Slide cowrie shell clips onto the ends for a bohemian finish.
Pro Styling Tip
Remove metallic accessories before washing your braids to prevent tarnishing and product buildup under the cuffs.
10. Beaded Waist-Length Ends

Concept Overview & Aesthetic Appeal
A traditional, rhythmic aesthetic featuring natural wooden beads, translucent amber beads, or clear acrylic beads stacked along the bottom 3 to 4 inches of each waist-length braid.
Step-by-Step Execution Guide
-
Complete medium-to-large knotless braids down to waist length.
-
Thread a collection of wooden or acrylic beads onto a beading tool or loop wire.
-
Slide the beads onto the ends of each braid, stacking 4 to 6 beads per plait.
-
Secure the bottom bead by looping the braid tail upward and fastening with a small rubber band, or burning the tip with a lighter for synthetic seals.
-
Distribute bead weights evenly so individual plaits do not pull on your scalp.
Pro Styling Tip
Wooden beads provide an earthy, lightweight feel that clacks softly without adding excessive drag to your neck and shoulders.
Parting & Size Breakdown
| Braid Size | Part Count Range | Install Time | Average Longevity |
| Small Knotless | 60 – 80 braids | 6 – 8 Hours | 7 – 9 Weeks |
| Smedium Knotless | 45 – 55 braids | 5 – 6 Hours | 6 – 8 Weeks |
| Medium Knotless | 30 – 40 braids | 4 – 5 Hours | 6 – 7 Weeks |
| Large Knotless | 20 – 28 braids | 3 – 4 Hours | 4 – 5 Weeks |
| Jumbo Knotless | 12 – 18 braids | 2 – 3 Hours | 3 – 4 Weeks |
Common Beginner Mistakes & How to Avoid Them
-
Starting Feed-Ins Too Close to the Scalp: Adding heavy synthetic extensions on the very first loop creates a bulky base that defeats the knotless technique. Solution: Make 2 to 3 three-strand passes with natural hair first before introducing your first extension piece.
-
Using Heavy Greasy Pomades on the Scalp: Slathering thick petroleum-based grease along the part lines clogs pores and attracts lint. Solution: Use lightweight, water-based scalp oils (jojoba, tea tree, or rosemary) applied with a dropper directly to the scalp.
-
Sleeping Without a Braid Bonnet: Letting waist-length braids drag across cotton sheets causes friction, frizz, and premature flyaways. Solution: Tuck braids into an extra-long satin braid bonnet or loose satin scarf every night.
-
Ignoring Wash Day Routine: Skipping scalp washing for weeks leads to itchiness and buildup. Solution: Cleanse parts every 2 to 3 weeks using diluted shampoo in an applicator bottle, rinsing thoroughly and drying completely under a hooded dryer.
Pro Tips, Nighttime Maintenance & Longevity Routine
| Routine Frequency | Action Item | Target Focus |
| Daily (Morning) | Light aloe vera mist & edge gel smoothing | Hairline & braid shaft hydration |
| Daily (Night) | Edge scarf tie-down & long satin bonnet | Friction protection & frizz prevention |
| Weekly | Apply targeted scalp oil along partings | Follicle nourishment & itch relief |
| Bi-Weekly | Diluted shampoo scalp cleanse & mousse refresh | Buildup removal & flyaway control |
-
The Applicator Bottle Shampoo Hack: Mix 1 part sulfate-free shampoo with 3 parts warm water in an applicator bottle; apply directly to scalp parts, massage gently with fingertips, and rinse without roughing up the braid shafts.
-
Use Setting Mousse for Mid-Style Refreshes: When braids begin to show light fuzz around week 3, apply a generous amount of setting mousse across the roots, wrap with a silk strip for 15 minutes, and blow-dry on low to restore smoothness.
-
Never Tie Waist-Length Braids Too Tightly: Avoid pulling all your waist-length braids into an ultra-tight, high ponytail every day; alternate high and low styles to prevent tension on the perimeter.
