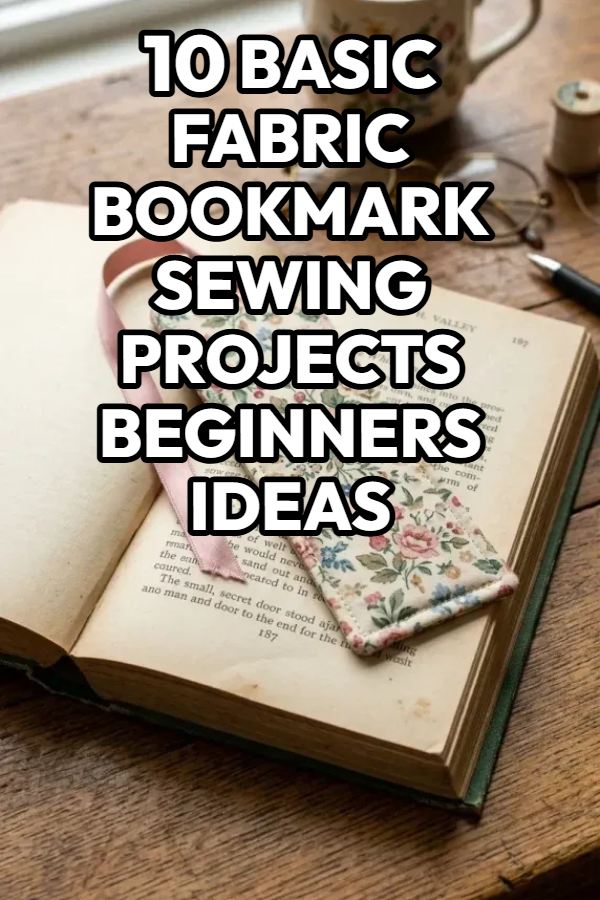
10 Basic Fabric Bookmark Sewing Projects Beginners Ideas

Spread the love

Fabric bookmarks are among the most rewarding, budget-friendly sewing projects for beginners. They require only tiny scraps of cotton fabric, take less than 20 minutes to complete, and help new sewists practice essential skills like straight-line stitching, turning corners, pressing crisp edges, and inserting trims or elastic.

Here are 10 simple fabric bookmark sewing ideas with structural diagrams, skill notes, and beginner tips.

Essential Rules for Sewing Fabric Bookmarks

  • Always Use Fusible Interfacing: Cotton fabric on its own is too flimsy. Iron medium-weight fusible interfacing (like Pellon Craft-Fuse or SF101) to the wrong side of your fabric pieces to give your bookmark structure without excessive bulk.
  • Trim & Clip Seam Allowances: To achieve sharp, 90-degree corners, trim the seam allowance diagonally across all corners before turning the bookmark right side out.
  • Press with Steam at Every Step: A thorough press with a hot steam iron before and after turning transforms homemade projects into professional, crisp accessories.
  • Keep Topstitching Consistent: Use the edge of your presser foot as a visual guide to sew a clean, even topstitch 1/8-inch (3 mm) from the finished edge.

1. Classic Rectangular Ribbon-Tail Bookmark

Concept & Design Overview

The ultimate foundational project! Two rectangular cotton panels are reinforced with interfacing, sewn together, turned right side out, and finished with a satin ribbon tail inserted at the top.

+-------------------------------------------------------------+
|              CLASSIC RECTANGULAR RIBBON BOOKMARK            |
|                                                             |
|                    [ SATIN RIBBON TAIL ]                    |
|                              ||                             |
|   +--------------------------||-------------------------+   |
|   | 1/8" PERIMETER TOPSTITCHING ALL AROUND              |   |
|   +-----------------------------------------------------+   |
|   | VIBRANT COTTON PRINT (FRONT) + INTERFACING          |   |
|   | (Standard Dimensions: 2.5" wide x 7.5" tall)        |   |
|   +-----------------------------------------------------+   |
|   | COORDINATING SOLID COTTON (BACK)                    |   |
|   +-----------------------------------------------------+   |
+-------------------------------------------------------------+

Key Sewing Steps

  1. Cut two fabric rectangles (2.5″ × 7.5″) and one piece of medium interfacing (2″ × 7″).
  2. Fuse the interfacing to the wrong side of the front piece.
  3. Sandwich a 4-inch folded ribbon between the fabric pieces (right sides facing, ribbon loop pointing inward).
  4. Sew around the edges with a 1/4-inch seam allowance, leaving a 2-inch opening on one long side. Turn, press, and topstitch around all four sides to close the opening.

2. Corner Page Hugger Triangle Bookmark

Concept & Design Overview

A triangular pocket that slips over the corner of your page to keep your place without falling out. Perfect for mastering precise 45-degree angle folds.

Key Sewing Steps

  1. Cut two squares of fabric (4″ × 4″) and one square for the pocket (4″ × 4″).
  2. Fold the pocket square in half diagonally (wrong sides together) to form a triangle and press.
  3. Lay the bottom square right-side up, place the triangle on one corner, and cover with the top square right-side down.
  4. Stitch around the outer square, leaving an opening on one side, clip corners, turn, press, and topstitch.

3. Elastic Spine-Wrap Bookmark with Pen Pocket

Concept & Design Overview

Functional and modern! A fabric strap with flat elastic that wraps snugly around the front cover and spine of a notebook or novel, featuring a small front slip pocket to hold a pen or highlighter.

       +-------------------------------------------------+
       |         ELASTIC SPINE-WRAP WITH PEN POCKET      |
       |                                                 |
       |     [ 3/4" WIDE FLAT ELASTIC LOOP STRAP ]       |
       |    /                                     \      |
       |  +-----------------------------------------+    |
       |  | FRONT FABRIC BODY (2" wide x 7" long)   |    |
       |  +-----------------------------------------+    |
       |  | MINI SLIP POCKET FOR HIGHLIGHTER / PEN  |    |
       |  +-----------------------------------------+    |
       |  | Stitched Bottom Elastic Attachment      |    |
       |  +-----------------------------------------+    |
       |                                                 |
       +-------------------------------------------------+

Key Sewing Steps

  1. Sew a small lined pocket piece and topstitch it to the lower half of the front bookmark panel.
  2. Baste a 10-inch length of 3/4-inch flat elastic to the top and bottom short edges of the front panel.
  3. Layer the back panel right-sides together over the front, sew the perimeter, turn, and topstitch to secure the elastic firmly.

4. Tapered Point Chevron Bookmark with Grommet & Tassel

Concept & Design Overview

Features an elegant pointed bottom edge. A metal eyelet/grommet installed at the flat top end holds a handmade embroidery floss tassel.

Key Sewing Steps

  1. Cut the bottom short edge of your pattern into a clean 45-degree chevron point.
  2. Interface, sew right sides together, turn, press, and topstitch around the pointed contour.
  3. Punch a hole 1/2-inch from the top edge and set a 4mm metal eyelet using an eyelet tool. Loop a chunky floss tassel through the grommet.

5. Quilted Fabric Strip Scrap-Buster Bookmark

Concept & Design Overview

Practice strip piecing and straight-line quilting! Sew leftover 1-inch or 1.5-inch cotton fabric strips together at angles, layer with fleece or batting, and quilt along the seams.

+-------------------------------------------------------------+
|              QUILTED STRIP SCRAP-BUSTER                     |
|                                                             |
|   +-----------------------------------------------------+   |
|   | COTTON SCRAP STRIPS JOINED WITH 1/4" SEAMS          |   |
|   +-----------------------------------------------------+   |
|   | [ STRAIGHT-LINE QUILTING STITCHES ALONG SEAMS ]     |   |
|   +-----------------------------------------------------+   |
|   | THIN COTTON FLEECE OR LOW-LOFT BATTING CORE         |   |
|   +-----------------------------------------------------+   |
|   | Solid Linen Backing Fabric Panel                    |   |
|   +-----------------------------------------------------+   |
+-------------------------------------------------------------+

Key Sewing Steps

  1. Sew assorted colorful fabric strips together into a strip-pieced sheet; press seams open.
  2. Cut the pieced sheet into a 2.5″ × 7.5″ rectangle.
  3. Layer with thin fleece/flannel and back fabric, stitch perimeter, turn right-side out, and quilt decorative straight lines across the surface.

6. Heart-Shaped Felt & Fabric Corner Bookmark

Concept & Design Overview

Sweet, charming, and giftable! Two heart-shaped fabric and felt pieces sewn along the lower V-edge to form a romantic corner page pocket.

Key Sewing Steps

  1. Cut two identical heart shapes (3.5″ × 3.5″) from patterned cotton and stiff wool felt.
  2. Fuse interfacing to the cotton heart and layer over the felt.
  3. Cut a matching half-heart triangle for the back pocket.
  4. Topstitch along the bottom curved V-edges, leaving the top lobes open so it slides onto the corner of a book page.

7. Pom-Pom Trim Edge Bookmark

Concept & Design Overview

Learn to insert novelty trim into seams! A row of colorful mini pom-pom trim or ball fringe runs along both long side edges of the bookmark.

       +-------------------------------------------------+
       |           POM-POM TRIM EDGE BOOKMARK            |
       |                                                 |
       |     +-------------------------------------+     |
       |  o  | PATTERNED COTTON TOP LAYER          |  o  |
       |  o  | [ MINI POM-POM FRINGE INSET ]       |  o  |
       |  o  | (Balls Facing Inward During Sewing) |  o  |
       |  o  |                                     |  o  |
       |  o  | Backing Panel + Medium Interfacing  |  o  |
       |     +-------------------------------------+     |
       |                                                 |
       +-------------------------------------------------+

Key Sewing Steps

  1. Pin mini pom-pom trim along the outer long edges of the front panel, with the pom-pom balls pointing inward toward the center.
  2. Baste the trim in place using a zipper foot so the needle glides past the balls.
  3. Place the backing fabric on top (right sides together), stitch perimeter with 1/4-inch seam, turn, press, and topstitch.

8. Two-Tone Color-Block Bookmark with Lace Inset

Concept & Design Overview

Join two contrasting prints (like mustard floral and gingham) with a strip of flat cotton lace or ric-rac covering the center dividing seam.

Key Sewing Steps

  1. Cut two smaller rectangles (e.g., 2.5″ × 4″ each) and stitch them together along the short edge to form one 2.5″ × 7.5″ strip.
  2. Press the seam flat and topstitch a strip of cotton crochet lace directly over the join line.
  3. Assemble with backing fabric as standard.

9. Monogrammed Hand-Embroidered Linen Bookmark

Concept & Design Overview

Combine basic sewing with beginner hand embroidery! Stitch a simple backstitch initial or French-knot floral sprig onto natural linen before assembling the bookmark.

+-------------------------------------------------------------+
|              MONOGRAMMED LINEN EMBROIDERY                   |
|                                                             |
|   +-----------------------------------------------------+   |
|   | NATURAL OATMEAL TEXTURED LINEN FABRIC               |   |
|   +-----------------------------------------------------+   |
|   | [ HAND-EMBROIDERED BOTANICAL INITIAL MONOGRAM ]     |   |
|   | Delicate French-Knot Floral Sprigs & Satin Leaves   |   |
|   +-----------------------------------------------------+   |
|   | Stitched Top Cord Loop + Raw Frayed Lower Fringe    |   |
|   +-----------------------------------------------------+   |
+-------------------------------------------------------------+

Key Sewing Steps

  1. Trace a letter initial or floral sprig onto an interfaced linen rectangle using a water-erasable fabric pen.
  2. Embroider the design using 2 strands of embroidery floss (backstitch, satin stitch, French knots).
  3. Sew the front and back pieces together, leaving the bottom 1/2-inch unstitched to create a gently frayed fringe edge.

10. Reversible Double-Fabric Magnetic Bookmark

Concept & Design Overview

Clamps gently over the top of your page using thin hidden magnets, ensuring your bookmark never slips out even when carried in a bag.

Key Sewing Steps

  1. Cut a long strip (2″ × 10″) of fabric and interface the wrong side.
  2. Fold in half crosswise to create a 2″ × 5″ bookmark.
  3. Glue two thin neodymium disc magnets (or flexible magnetic tape strips) inside the folded ends with fabric glue, ensuring opposite poles attract.
  4. Stitch around the open perimeter, locking the magnets securely inside their sealed fabric chambers.

Similar Posts

  • 10 Empty Pill Bottle Crafts Ideas Handmade

    Spread the love

    Spread the loveUpcycling everyday household items into practical, aesthetic objects is an impactful way to reduce waste while introducing functional organization solutions to your home environment. Empty prescription and supplement bottles offer durable, moisture-resistant, and compact plastic structures that are ideal for creative repurposing projects. This comprehensive guide explores foundational craft techniques, step-by-step methods, and…

  • 10 Pool Towel Float Storage Ideas

    Spread the love

    Spread the loveMaintaining an organized pool area requires functional, weather-resistant storage solutions that seamlessly combine practicality with outdoor aesthetics. A well-designed pool storage system keeps clean towels, inflated floats, and water accessories accessible while protecting them from moisture, sun damage, and clutter. Proper organization prevents mildew growth on wet fabrics, extends the lifespan of vinyl…

  • 10 Valentines Crafts For Adults

    Spread the love

    Spread the loveValentines Day is often associated with cards, chocolates, and flowers, but for many adults, the holiday is also an opportunity to slow down, get creative, and make something meaningful with their hands. Crafting is not just for kids. It is a powerful way for adults to express emotions, reduce stress, and create personalized…

  • 10 Gallery Wall With Clock Living Room

    Spread the love

    Spread the loveA gallery wall with a clock is one of the most stylish and functional ways to decorate a living room. It combines art and practicality while allowing you to express your personality through layout, color, and design. Whether your living room style is modern, vintage, farmhouse, or eclectic, a thoughtfully arranged gallery wall…

  • 10 Scottish Castles Interior Bedroom

    Spread the love

    Spread the loveScottish castles have long captured the imagination of travelers history lovers and interior design enthusiasts. From misty highlands to rugged coastlines these ancient structures tell stories of royalty clan battles and centuries old traditions. One of the most fascinating spaces inside these castles is the bedroom. Scottish castle interior bedrooms combine grandeur warmth…

  • 10 Tiny Homes Interior

    Spread the love

    Spread the loveTiny homes have taken the world by storm, inspiring people to simplify their lives and live with intention. Whether you are downsizing, dreaming of a minimalist escape, or simply love creative interior design, tiny homes prove that size is not everything. When designed thoughtfully, a small space can feel cozy, stylish, and incredibly…

Leave a Reply

Your email address will not be published. Required fields are marked *