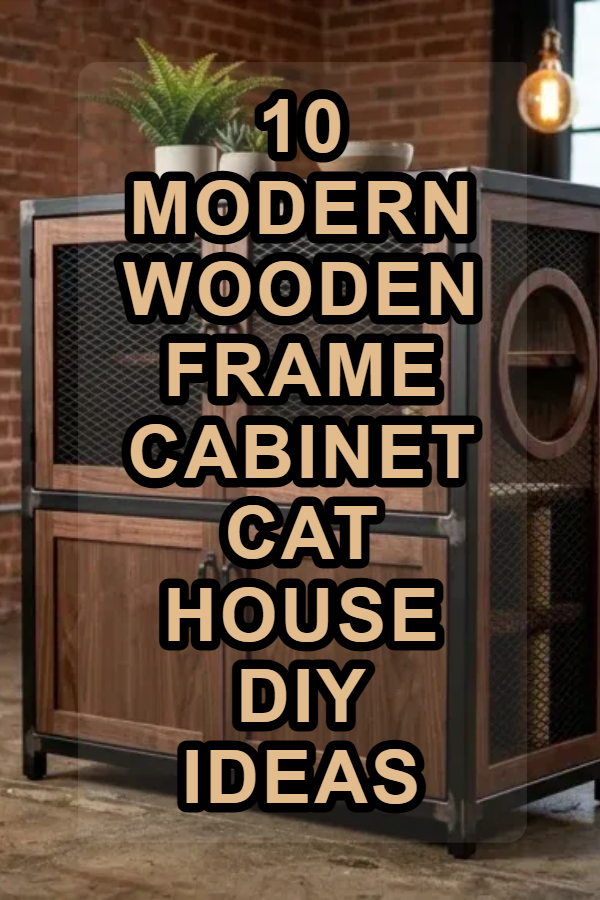
10 Modern Wooden Frame Cabinet Cat House DIY Ideas

Transforming standard living room furniture into an integrated feline sanctuary combines sophisticated home decor with functional domestic pet care. Traditional carpeted cat trees and bulky plastic litter boxes often clash with modern design schemes, occupying valuable floor space while introducing visual clutter. Building a modern wooden frame cabinet cat house allows homeowners to conceal litter pans, create private resting dens, and integrate multi-level climbing perches directly into stylish credenzas and sideboards. This comprehensive guide outlines the foundational principles of designing, framing, cutting, and finishing custom wooden cabinet cat houses tailored to modern interior spaces. You will learn the exact joinery methods, ventilation requirements, pet-safe finish selections, and interior layout configurations necessary to build a durable, dual-purpose furniture piece. Understanding proper entry clearances, odor mitigation techniques, internal baffle dividers, and sound dampening ensures your handmade creation meets your cat’s instinctual needs while elevating your living room aesthetic. Implementing a customized wooden pet cabinet delivers long-term functional value, keeps messy litter granules contained, and creates a seamless, minimalist style that harmonizes beautifully with your existing home decor.
Why This Idea Is Trending or Useful
Wooden cabinet cat houses have become a major focal point across modern Pinterest ideas and home organization platforms because they bridge the gap between pet comfort and elevated interior design. Standard commercial cat towers often feature bright synthetic fabrics that shed, wear down quickly, and disrupt neutral interior palettes. In contrast, solid timber or hardwood plywood cabinets provide clean architectural lines, warm natural textures, and concealed utility compartments that keep pet supplies completely out of sight. In compact apartments and open-concept residences, multi-functional furniture is essential for maximizing floor space. A well-built cat cabinet functions simultaneously as a media console, entryway bench, or living room accent table while housing a private feline suite underneath. Furthermore, enclosed wooden enclosures provide anxious cats with a secure, quiet retreat away from household noise and foot traffic. The DIY appeal remains high because homeowners can customize exterior stain finishes, install designer hardware, and adapt interior layouts to fit specific litter box dimensions or scratching accessories. This project delivers practical value, providing an accessible, rewarding weekend woodworking build for design-conscious pet lovers.
Materials and Preparation
Constructing a safe, long-lasting wooden cabinet cat house requires selecting high-grade materials, reliable cutting tools, and non-toxic finishing supplies before starting your creative project. Essential woodworking materials include three-quarter-inch cabinet-grade birch or white oak plywood, solid hardwood face-frame lumber, pocket hole screws, European soft-close concealed hinges, and non-toxic wood glue. For feline comfort and safety, gather sisal scratching rope, water-based polyurethane sealer, magnetic push latches, and heavy-duty felt leveling pads. The required tool kit includes a circular saw with a fine-finish blade, a pocket hole jig, a cordless drill with driver bits, a random orbital sander with varied grit sanding discs, a jigsaw for cutting entry portals, and a four-foot spirit level. Begin preparation by measuring your available living room space and your cat’s specific litter box or bedding dimensions, allowing at least three inches of vertical and lateral clearance around interior fixtures. Sketch a detailed cut list and inspect your plywood panels for straightness and smooth surface veneers. Sand all interior panel components to one hundred and twenty grit prior to assembly, and map out entry openings at least eight inches in diameter to ensure effortless feline access.
Idea 1: Mid-Century Modern Tapered Leg Credenza Cat Suite
How to Create
The mid-century modern tapered leg credenza cat suite combines iconic retro furniture architecture with a private, concealed pet sanctuary. This design features a low-profile rectangular wooden cabinet box elevated on angled, solid brass-tipped walnut legs, creating visual lightness that keeps floors looking open. The exterior showcases warm walnut veneers, clean mitred waterfall edge corners, and sleek sliding bypass doors that conceal internal compartments. The interior is divided into two distinct zones: a primary resting lounge lined with a plush wool felt cushion, and an adjoining utility chamber housing an enclosed litter pan. A smooth circular entry portal cut into the side panel provides discreet feline access, keeping the main front face looking like a high-end designer media console.

To build this mid-century modern credenza, start by cutting the top, bottom, and side panels from three-quarter-inch walnut plywood using forty-five-degree mitred bevel cuts along the joining edges. Assemble the outer shell using waterproof wood glue and internal corner biscuit joints or pocket screws, clamping the box firmly until fully cured. Install a vertical interior divider panel four inches from the right side, cutting a seven-inch pass-through archway inside to allow your cat to move freely between rooms. Use a jigsaw to cut a matching seven-inch circular entrance through the exterior side wall, smoothing the cut edges with progressive two-hundred-and-twenty-grit sandpaper. Fasten four angled metal mounting plates to the bottom base panel, screwing in six-inch turned walnut tapered legs. Finish the wood surfaces with three coats of non-toxic, satin water-based clear finish, and mount two tambour or flat wood sliding doors along the front upper and lower routing channels for effortless maintenance access.
Idea 2: Fluted White Oak Sideboard with Concealed Baffle Entry
Step-by-Step Guide

The fluted white oak sideboard with a concealed baffle entry uses rich, vertical timber texture to hide an interior labyrinth that stops litter tracking and controls odors. The exterior face is wrapped in rhythmic, half-round solid white oak tambour slats, establishing a contemporary, Japandi-inspired aesthetic that softens hard rectangular lines. Inside, an internal L-shaped baffle wall forces the cat to take a ninety-degree turn before stepping into the litter area. This structural turn serves a dual purpose: it blocks the litter box from direct sight when the cabinet doors open, and it forces paws across a grooved catch mat that captures stray granules before the cat exits the furniture. The natural light oak finish pairs effortlessly with modern minimalist decor, turning a messy utility fixture into a focal art piece.
Begin assembly by building a square cabinet carcass measuring thirty inches wide, twenty inches deep, and twenty-four inches high using three-quarter-inch white oak veneered plywood. Secure the panels using pocket hole joinery positioned on the exterior underside and rear facing surfaces to keep the interior clean. Build an internal vertical baffle wall using half-inch plywood, positioning it six inches inward from the outer entry hole and securing it with removable wooden cleats for easy deep-cleaning access. Cut individual half-inch solid oak half-round fluted trim moldings, gluing and pinning them vertically across the front cabinet door faces with micro-pin nails. Hang the fluted doors using concealed soft-close Euro hinges, adjusting the alignment screws to achieve uniform three-millimeter reveal gaps. Apply an ultra-matte, non-yellowing waterborne wood sealer across the entire piece, and install a custom-cut ribbed silicone litter mat along the internal baffle walkway to complete the tracking-control system.
Idea 3: Minimalist Slatted Wood Media Console with Vertical Louvers
Execution Process
A minimalist slatted wood media console with vertical louvers delivers continuous 360-degree airflow, making it an exceptional housing solution for multi-cat households. In enclosed pet furniture, stagnant air and moisture buildup can create unpleasant environments that discourage cats from using the space. This design resolves air circulation concerns by replacing solid cabinet doors and side walls with evenly spaced vertical hardwood slats. The narrow gaps between slats allow ambient light and fresh air to filter through while maintaining visual privacy from normal standing eye levels. The upper flat surface serves as an entertainment center or record player stand, while the lower ventilated wooden framework houses scratching posts, resting shelves, and utility litter containers in a clean, contemporary envelope.

To execute this build, construct an open structural box frame using one-and-a-half-inch square solid ash or birch timber rails joined with mortise-and-tenon or dowel joints. Fasten a solid three-quarter-inch plywood base panel and top panel to the perimeter rails to create sturdy horizontal load-bearing surfaces. Mill half-inch by one-inch vertical ash wood slats, spacing them exactly three-quarters of an inch apart across the side panels and front double-door frames using a wooden spacer jig. Secure each slat using wood glue and recessed brad nails driven from the interior side to preserve flawless outer faces. In the right-side wall, omit three consecutive slats to create an open seven-inch vertical entry slot for your pet. Mount the front slatted doors with heavy-duty piano hinges and magnetic push-to-open latches, eliminating the need for external metal hardware. Seal all exposed timber surfaces with food-safe hardwax oil to provide durable, water-repellent protection against pet stains.
Idea 4: Industrial Metal-Framed Plywood Cabinet with Mesh Accents
Setup Method
The industrial metal-framed plywood cabinet with mesh accents pairs rugged structural steel with rich, warm-stained plywood to produce a bold, urban-inspired pet retreat. This concept utilizes an exterior framework made from welded square steel tubing or bolted angle iron that encapsulates warm-toned Douglas fir or birch plywood inserts. The side entry portal and upper door panels incorporate heavy-duty, expanded steel wire mesh coated in matte black enamel. This open mesh facilitates superior ventilation, prevents claw damage on internal wall surfaces, and introduces striking architectural contrast against the rich timber grain. The heavy-duty industrial framing provides exceptional structural weight, ensuring the cabinet remains completely stationary when active, large-breed cats jump onto the top resting platform.

Begin setup by constructing an exterior structural frame using one-inch welded steel square tubing, or assemble an equivalent frame using pre-drilled angle iron bolted with black hex hardware. Cut internal cabinet floor, roof, and divider panels from three-quarter-inch plywood, staining them with an odorless, low-VOC charcoal or dark walnut penetrating stain. Slide the stained wooden panels into the inner frame channels, fastening them securely from the underside with heavy-duty self-tapping structural metal screws. Cut black powder-coated steel diamond wire mesh sheets to size, sandwiching the mesh panels behind solid wood door frames and within the side cat portal cutout. Mount the doors using heavy exterior black steel strap hinges and vintage slide-bolt latches to emphasize the utilitarian aesthetic. Line the interior ceiling with acoustic felt tiles to deaden internal scratching noises, and apply two coats of clear satin polyurethane over all wood panels to protect against moisture.
Idea 5: Scandinavian Birch Plywood Cube with Geometric Entry Cutouts
How to Create
The Scandinavian birch plywood cube with geometric entry cutouts celebrates Nordic minimalism through exposed multi-ply edges, pale blonde timber, and clean geometric forms. This design utilizes premium Baltic birch plywood, celebrated for its void-free core and attractive stacked edge lines. Rather than concealing the layered edges with iron-on banding, this cut leaves all perimeter edges exposed, chamfered, and sealed with clear wax. The pet entry is cut as a crisp geometric shape—such as a modern hexagon, arch, or angled diamond—adding visual interest to the side panel. The interior features a bi-level layout with a lower utility section and a suspended mezzanine lounge platform, maximizing vertical resting space within a compact, square furniture footprint.

To create this Scandinavian cube, cut six matching twenty-four-inch square panels from three-quarter-inch Baltic birch plywood using a table saw equipped with an eighty-tooth carbide blade to eliminate edge tear-out. Use a digital router and an acrylic geometric template to carve a crisp eight-inch hexagonal entry hole through the left side panel. Rout a half-inch-wide horizontal dado groove along the interior right sidewall at twelve inches of height to support a removable mezzanine lounging shelf. Assemble the main cube using internal pocket hole joinery and glue, keeping the top and right sides accessible. Use a plunge router fitted with a forty-five-degree chamfer bit to bevel all exterior exposed plywood edges, creating smooth, touchable perimeter borders. Sand all faces with two-hundred-and-twenty-grit paper, apply two coats of clear waterborne matte sealer, and hang the front slab door on concealed push-to-open hinges for a clean, handle-free look.
Idea 6: Two-Tone Floating Wall-Mounted Wooden Cat Credenza
Step-by-Step Guide
A two-tone floating wall-mounted wooden cat credenza elevates pet furniture off the floor entirely, creating a modern, gravity-defying focal piece that simplifies floor cleaning. By mounting the wooden cabinet directly to wall framing studs using heavy-duty French cleat brackets, the floor space beneath remains open, making daily vacuuming and sweeping effortless. The design features a contrasting two-tone aesthetic, pairing a natural warm oak outer casing with painted matte charcoal or olive green cabinet doors. Cats love elevated perches; this wall-mounted structure provides a secure, high-altitude lookout platform while concealing an internal cat bed, climbing ramps, or hidden litter box safe from small children or curious dogs.

Start by assembling the outer rectangular cabinet shell measuring thirty-six inches wide, sixteen inches deep, and eighteen inches high from three-quarter-inch hardwood plywood. Cut a continuous forty-five-degree bevel along a four-inch-wide hardwood board to create a heavy-duty French cleat mounting system, fastening one half securely to the upper interior rear rail of the cabinet. Use a jigsaw to cut an eight-inch cat portal through the bottom base panel or lower side panel, attaching a small, wrapped sisal rope climbing step directly beneath the opening on the wall. Mount the coordinating wall cleat directly into at least two structural wall framing studs using three-inch heavy lag screws, checking for level with a four-foot spirit level. Hang the credenza onto the wall cleat, locking it with safety set-screws driven through the lower interior back rail. Install painted front cabinet doors on soft-close European hinges to complete the floating installation.
Idea 7: Multi-Level Climbing Tower Hidden Inside a Wardrobe Cabinet
Execution Process

A multi-level climbing tower hidden inside a wardrobe cabinet transforms an ordinary, tall vertical pantry or armoire into an expansive indoor adventure playground. When closed, the tall wooden furniture piece appears as a sophisticated shaker-style linen cabinet or wardrobe that fits into modern living rooms or master suites. When your cat enters through the discreet side entry, they encounter a dynamic vertical playground featuring staggered plywood climbing platforms, a central sisal-wrapped scratching column, a cozy mid-level hammock, and an upper crow’s nest perch. This vertical design is ideal for active indoor cats, satisfying their instinctual urge to climb, scratch, and survey their territory from high vantage points without cluttering the room with synthetic carpet trees.
Begin the execution by selecting or constructing a tall wooden wardrobe cabinet measuring at least sixty inches high, twenty-four inches wide, and twenty inches deep from three-quarter-inch birch plywood. Reinforce the rear panel with a solid half-inch plywood backboard to provide structural rigidity for supporting internal climbing platforms. Cut three horizontal platform shelves, jigsawing alternating eight-inch pass-through corner cutouts on each tier to create a continuous vertical climbing path. Wrap a solid three-inch-diameter wooden closet dowel in four-millimeter natural unoiled sisal rope, fastening it vertically between the lower and mid-tier shelves using heavy lag bolts and washers to serve as a central scratching column. Mount the staggered shelves inside the wardrobe using heavy-duty shelf brackets screwed into internal side cleats. Cut a lower entry hole in the side of the wardrobe, paint the exterior in a modern satin finish, and add matching brass pull hardware to complete the transformation.
Idea 8: Cane Webbing Double-Door Accent Table Cat House

How to Create
The cane webbing double-door accent table cat house blends modern organic textures with vintage warmth, pairing rich wood frames with breathable, natural woven rattan panels. Natural cane webbing has become a staple of modern bohemian and transitional interior design, offering lightweight, organic texture that softens modern rectangular furniture. In a cat cabinet application, woven rattan mesh provides excellent interior airflow and subtle light filtration while fully concealing litter pans and resting cushions from sight. The natural flexibility of the cane mesh prevents hard impacts, and its breathable open weave stops odors from becoming trapped inside the wooden box. The upper tabletop serves as an elegant sofa end table for lamps, books, and ceramic vases.
To construct this cane accent table, build a square wooden box carcass measuring twenty-two inches on all sides using three-quarter-inch solid cherry or maple lumber. Build two front door frames using one-by-two-inch hardwood stock joined with half-lap or pocket hole corner joints, routing a shallow three-eighths-inch rabbet groove around the rear inner perimeter. Soak natural open-weave cane webbing sheets in warm water for thirty minutes to make the fibers pliable, then stretch the wet cane tightly over the rear door grooves, securing the perimeter with pneumatic staples. Trim excess cane with a utility knife and press a pre-glued spline strip or wooden trim over the staples to create a clean rear border. Cut a seven-inch archway entry into the side wood panel, sanding the opening until completely smooth. Hang the cane doors on flush brass butt hinges, apply a clear matte wood finish over all surfaces, and place a washable linen cushion inside the cozy woven retreat.
Idea 9: Sliding Barn Door Wood Siding Cat House Console
Setup Method

A sliding barn door wood siding cat house console introduces rustic warmth, clean craftsmanship, and effortless access to busy utility and living areas. This design features a wide, horizontal wooden console wrapped in clean horizontal tongue-and-groove shiplap or beadboard paneling. The front access is managed via a smooth sliding barn door mounted on a matte black mini-steel track, allowing the door to glide effortlessly sideways without swinging out into narrow room pathways. The expansive interior layout easily accommodates a full-sized high-sided litter box alongside a dedicated storage shelf for extra litter bags, scoops, and cleaning sprays. The sliding door allows you to quickly expose the litter box for daily scooping while keeping utility accessories concealed behind the fixed side panel during normal daily use.
To set up this console build, assemble a forty-eight-inch-wide by twenty-two-inch-deep by twenty-four-inch-high cabinet shell from three-quarter-inch cabinet plywood. Fasten horizontal tongue-and-groove cedar or pine planks across the exterior side and front surfaces with wood glue and headless finish nails, trimming all corners with one-by-two-inch corner casing. Install a vertical interior partition thirty inches from the left side, separating the primary litter area from the narrower supply storage compartment, and cut a smooth seven-inch pass-through hole in the partition. Mount a miniature six-foot black steel sliding barn door hardware track along the upper front header board. Build a matching framed sliding door panel, mount the roller hangers to the top edge, and hang the door on the track, adjusting the rubber stops so it glides smoothly between the left and right compartments. Cut a private entry arch into the far left side panel and seal the entire console with non-toxic, moisture-resistant acrylic enamel paint.
Idea 10: Slanted Geometric Roof A-Frame Wooden Cat Haven
Execution Process
The slanted geometric roof A-frame wooden cat haven reimagines architectural cabin forms to produce a sculptural, standalone accent furniture piece. Moving away from standard boxy rectangles, this design utilizes steep, forty-five-degree angled roof rafters joined at an off-center apex, creating an asymmetrical A-frame silhouette that doubles as a modern side table. The lower base features a deep wooden planter box or concealed utility drawer, while the triangular mid-section provides a cozy, tent-like sleeping nook with open timber crossbeams. The clean geometric lines and exposed wood grain make this piece a distinct sculptural feature in living rooms, providing pets with an angular, secure shelter that complements contemporary Scandinavian and mid-century interiors.

To execute this geometric haven, cut two pairs of angled rafter legs from two-by-two-inch solid oak lumber, mitering the top apex joints at thirty and sixty-degree complementary angles to create an off-center A-frame profile. Join the rafter pairs with a horizontal ridge beam and lower base stretchers using blind dowel joinery and wood glue, clamping the frame until rock-solid. Cut three-quarter-inch oak plywood panels to clad the rear triangle and one side of the slanted roof, leaving the opposite roof face open with three horizontal security slats for light and ventilation. Cut a triangular or arched front entry through the front facade board, smoothing all interior angles with a round-over router bit. Fit the bottom floor with a removable cedar plank deck resting on vibration-damping silicone pads. Sand all timber surfaces to a fine two-hundred-and-twenty-grit finish, apply a coat of natural Danish oil or matte beeswax, and insert a plush faux-fur mat into the triangular den.
Common Beginner Mistakes and How to Avoid Them
The most critical mistake beginners make when building wooden cabinet cat houses is failing to provide adequate internal ventilation. Enclosing a litter box inside a completely sealed wooden box traps ammonia fumes, moisture, and dust, creating a hazardous environment that can cause feline respiratory distress and lead to litter box avoidance. To prevent this, always incorporate multiple ventilation strategies, such as slatted panels, cane webbing inserts, rear louvered vents, or discreet quarter-inch drill arrays along the upper back panel. Another common error is cutting the entry portal too small or positioning it too high off the ground; senior cats or kittens may struggle to step over high thresholds. Keep entry holes between seven and eight inches in diameter and position the bottom lip no higher than three to four inches above the floor. Additionally, many builders use toxic solvent-based varnishes or chemical-heavy glues that emit harsh VOC fumes. Always choose water-based polyurethanes, pure mineral oils, or natural hardwax finishes, and allow the finished cabinet to cure fully in a well-ventilated space for at least five days before introducing your cat.
Practical Tips for Better Results
Achieving professional, long-lasting results with DIY cat cabinets requires planning for durability, easy maintenance, and litter tracking control. Always line the interior floor and lower sidewalls of the litter compartment with removable self-adhesive vinyl floor tiles or a flexible heavy-duty silicone tray. This waterproof barrier protects the underlying plywood from accidental urine spills, moisture stains, and aggressive claw scratching. When designing internal pathways, incorporate an interior baffle wall or a zig-zag entry ramp lined with ribbed carpet or grooved rubber mats; this mechanical obstacle catches loose litter particles from your cat’s paws before they can be tracked onto living room rugs. Use full-overlay soft-close hinges on all access doors to prevent loud bangs that might frighten your cat while they use the cabinet. Finally, install a battery-operated, motion-activated LED puck light inside the ceiling of the utility compartment to provide clear visibility during nighttime scooping and maintenance routines.
Styling, Presentation, or Organization Ideas
Styling a custom wooden cat house involves blending the piece naturally into your room’s overall decor scheme so it reads as authentic furniture. Style the top surface of the credenza with everyday decorative items, such as ceramic table lamps, framed family photographs, architectural coffee table books, and trailing non-toxic indoor houseplants like spider plants or Boston ferns. Choose cabinet door hardware—such as brushed brass edge pulls, matte black knurled knobs, or recessed leather strap handles—that matches the existing metallic finishes throughout your living space. If your cat cabinet features open-slat or cane doors, store litter supplies in matching neutral canvas storage bins, matte ceramic jars, or wire baskets to maintain an organized, boutique aesthetic when the doors are opened. Position the cabinet in a quiet yet accessible corner of the room away from heavy foot traffic paths, creating a calm, dignified retreat that complements your home decor.
Budget or Time Planning
Building a custom wooden cabinet cat house is an economical, highly rewarding weekend project that can be adapted to various budget levels and woodworking skill sets. A basic build utilizing a single four-by-eight-foot sheet of three-quarter-inch birch plywood, basic pocket hole joinery, and stock cabinet hinges can be completed for roughly sixty to ninety dollars in raw materials. Mid-range to high-end builds incorporating premium white oak veneers, solid hardwood fluted moldings, cane webbing, and designer brass hardware typically cost between one hundred and fifty and two hundred and fifty dollars, which remains significantly cheaper than luxury designer pet furniture retailing for upwards of six hundred dollars. In terms of time commitment, plan for an initial four to six-hour session for breaking down sheet goods, cutting joinery, and sanding components. Dedicate a second three-to-four-hour session for carcass glue-up, baffle installation, and applying the first coat of non-toxic finish. Allow twenty-four hours for protective topcoats to cure fully before hanging doors, attaching hardware, and styling your completed home project.
Creative Expansion and Advanced Inspiration
Once you have mastered the fundamentals of wooden cabinet cat houses, you can explore advanced architectural modifications to enhance functionality and pet enrichment. Consider integrating a silent, ultra-quiet USB-powered cooling fan into the rear ventilation port, wiring it to a miniature charcoal air filter to actively pull air through the cabinet and eliminate litter box odors automatically. Another exciting expansion is creating a continuous wall-mounted feline transit system, connecting the cabinet’s roof exit directly to overhead floating wall bridges, sisal-wrapped climbing poles, and high-altitude corner perches. You can also incorporate specialized smart pet technology, such as hidden load-cell weight sensors beneath the interior litter tray that sync with smartphone apps to monitor your cat’s daily weight and bathroom habits. Integrating these creative, advanced ideas transforms a simple weekend DIY cabinet into an interactive, high-performance feline sanctuary that enriches your pet’s life while celebrating modern craftsmanship.