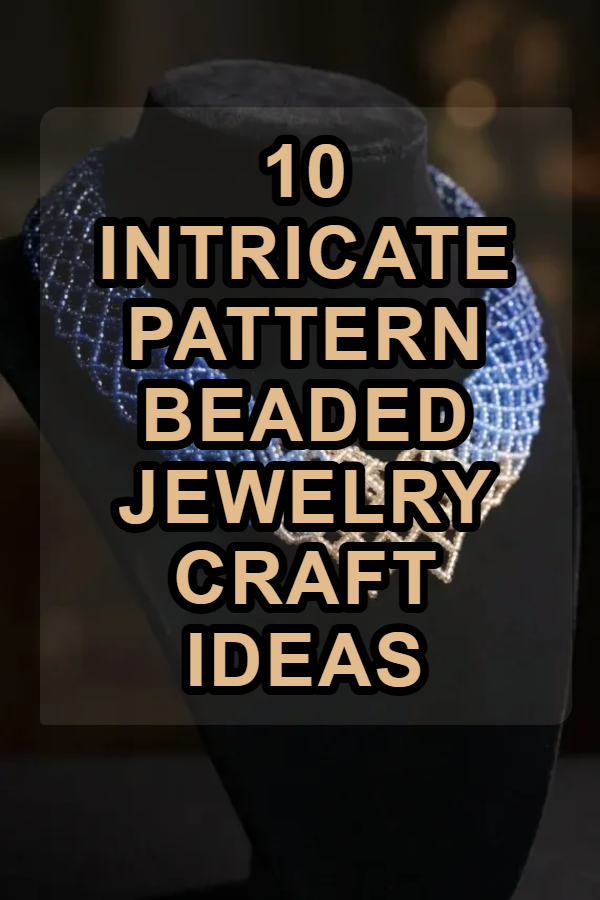
10 Intricate Pattern Beaded Jewelry Craft Ideas

Creating detailed, geometric beaded jewelry through off-loom beadweaving stitches and loom weaving transforms tiny glass elements into wearable works of art. Traditional stringing methods often rely on simple linear sequences that lack structural integrity and dimensional complexity. Mastering intricate beadweaving techniques allows makers to build interlocking structural lattices, flexible textile-like fabrics, and sculpted micro-mosaics using uniform Japanese cylinder seed beads. This comprehensive guide outlines the foundational principles of selecting, threading, tensioning, and finishing complex beaded jewelry projects across a wide range of skill levels. You will explore critical thread mechanics, needle sizing protocols, tension calibration strategies, and seamless closure integrations necessary to create heirloom-quality necklaces, bracelets, and earrings. Understanding aspect ratios, thread abrasion resistance, color theory transitions, and structural reinforcement ensures your handmade designs maintain their shape and drape without breaking under daily wear. Crafting intricate beaded jewelry delivers lasting artistic satisfaction, sharpens fine motor precision, and produces timeless, high-end accessories suitable for any personal style.
Why This Idea Is Trending or Useful
Intricate beaded jewelry has experienced a major resurgence across modern craft platforms and fashion communities because it combines mindful, meditative handwork with sophisticated micro-geometric aesthetics. In an era dominated by mass-produced fast fashion accessories, handmade beadwork stands out for its unmatched craftsmanship, structural durability, and customizable colorways. Precision glass beads—such as Japanese Miyuki Delica and TOHO cylinder beads—feature laser-cut, uniform cylindrical dimensions that lock together like tiny architectural tiles, producing clean pixel-style tapestries that mimic fine textile weaves. Furthermore, off-loom beadweaving requires minimal workspace and portable equipment; an entire studio setup easily fits inside a compact travel pouch with just a bead mat, needles, and a spool of thread. The technique provides infinite creative variety, enabling crafters to experiment with everything from delicate ombre transitions and floral tapestries to bold Art Deco chevron bands. This craft remains deeply rewarding for beginners because foundational stitches scale naturally into complex, museum-grade designs through repetitive, rhythmic thread paths that build confidence and technical mastery with every row.
Materials and Preparation
Crafting intricate beaded jewelry requires selecting uniform glass beads, high-tensile specialty beading threads, flexible ultra-fine needles, and precision finishing findings before beginning any weave. Essential beading materials include size 11/0 Japanese cylinder beads (Miyuki Delicas or TOHO Treasures), size 15/0 round seed beads for structural turns, bonded thermally fused polyethylene thread (such as FireLine in 6lb test) or pre-waxed nylon thread (Nymo or One-G), and fine English beading needles in sizes 10, 12, and 13. For finishing and clasps, gather multi-strand slide tubes, wire protectors (French wire or bead guards), jump rings, and magnetic or lobster claw clasps. Required accessories include a non-slip velvet bead mat to prevent rolling beads, sharp micro-tip embroidery scissors, thread conditioning beeswax, and precision needle-nose pliers. Begin preparation by clearing a flat, well-illuminated workspace equipped with a daylight-spectrum craft lamp. Cut a workable arm’s-length piece of thread (roughly five to six feet) to prevent knotting, and pull the strand across a wax conditioner block to smooth the fibers and eliminate static cling. Thread your size 12 beading needle, secure a temporary stop bead six inches from the thread tail, and review your charted color graph thoroughly before picking up your initial base row.
Idea 1: Cubic Right Angle Weave (CRAW) Ombre Collar Necklace
How to Create

The Cubic Right Angle Weave (CRAW) ombre collar necklace uses a three-dimensional open-lattice beadwork technique to form a flexible, architectural hollow rope that contours naturally around the collarbones. Unlike flat beadwork, CRAW builds four-sided geometric cubes row by row, with each cube sharing interlocking bead walls with its neighbors to produce a fluid, sculptural framework. This design features a subtle color gradient, transitioning gradually from deep midnight navy at the center focal point to soft cornflower blue and pale champagne near the clasp. The hollow cubic structure keeps the necklace lightweight and comfortable to wear while creating a rich, textile-like drape that catches ambient light across every micro-faceted glass bead.
To construct this collar necklace, thread your size 12 needle with five feet of 6lb bonded thread and string four 11/0 cylinder beads to establish the base square, passing through all four beads a second time to knot the ring securely. String three additional beads, step up through the side bead of the base square, and repeat the right-angle thread path across the remaining three vertical faces to form the first four-sided cubic unit. Continue building cubes along the central axis, introducing three-drop color changes every twelve cubes to establish the seamless ombre gradient across the twenty-inch length. Maintain firm, uniform thread tension throughout each pass to prevent the hollow cubic structure from twisting or collapsing. Reinforce the finished CRAW rope by weaving an extra thread path through the top corner edge beads, then anchor multi-strand wire protectors and a custom-fitted magnetic slide clasp onto the reinforced end units.
Idea 2: Tubular Peyote Russian Spiral Bangle with Metallic Accents
Step-by-Step Guide

The tubular peyote Russian spiral bangle combines varying bead sizes and metallic finishes to create a textured, swirling rope bracelet with continuous diagonal ridges. This stitch modifies traditional tubular netting by alternating three-bead clusters of 11/0 matte cylinder beads with a single accent 8/0 metallic glass seed bead or faceted crystal round. The difference in bead sizes forces the larger metallic beads to pop outward in a continuous, spiraling diagonal ribbon around the tube’s perimeter. Because the tube is woven in an endless, seamless circle without a clasp, the finished bangle maintains an uninterrupted, continuous geometric texture that slides effortlessly over the hand while retaining its shape on the wrist.
Begin this bangle by stringing six repeating units of three 11/0 matte cylinder beads followed by one 8/0 metallic bead onto a six-foot conditioned thread, tying the strand into a secure circle with a square knot. Pass the needle through the first three cylinder beads to step up and establish your working position. To start the spiral netting, pick up three 11/0 cylinder beads, skip the next two beads in the base ring, and pass directly through the single 8/0 metallic bead from the previous row, pulling the thread snugly to lock the stitch. Continue this pick-up-three, pass-through-one pattern in a continuous spiral without stepping up at the end of each round, as the offset stitch naturally climbs the tube. Work the spiral pattern until the beaded rope reaches eight inches in total length. Join the starting and ending rounds by weaving the exposed loop beads together in an interlocking seam, weaving the tail threads through several rows of spiral netting before trimming them flush.
Idea 3: Odd-Count Flat Peyote Chevron Cuff with Delica Beads
Setup Method

An odd-count flat peyote chevron cuff utilizes precision cylinder beads to create a flat, dense beaded tapestry featuring bold, symmetrical V-shaped geometric chevrons. Odd-count peyote is ideal for centered geometric patterns because the odd number of columns creates a single central axis bead, allowing perfect bilateral symmetry across zigzags and diamond motifs. The precision cylinder shape of Delica beads ensures that every bead locks securely into the recessed pockets of adjacent rows, creating a flexible, fabric-like band with clean edges. The interplay of high-contrast matte black, burnished bronze, and opaque ivory beads produces a sophisticated Art Deco aesthetic that holds its structure without rolling or curling at the borders.
Set up this cuff by graphing a fifteen-column chevron pattern on peyote bead grid paper, noting color shifts across each diagonal peak. String fifteen base-row beads onto a five-foot conditioned thread, leaving an eight-inch working tail to attach the end clasp later. Pick up the sixteenth bead, skip the fifteenth bead on your base string, and pass the needle through the fourteenth bead, pulling the thread until the new bead settles directly on top of the skipped one. Work your way back across the row, placing one bead into every alternating gap. At the odd-count end turn, use a figure-eight thread pass through the two adjacent edge beads from previous rows to anchor the turn and step up cleanly into the next row without leaving exposed thread. Continue weaving the chevron chart until the band measures six inches in length, and finish both tapered ends by sewing on brass slide-tube bar clasps.
Idea 4: Two-Drop Brick Stitch Sculpted Ginkgo Leaf Earrings
Execution Process

Two-drop brick stitch sculpted ginkgo leaf earrings use specialized bead-stacking mechanics to craft lightweight, fan-shaped botanical drop earrings with stepped geometric edges. Brick stitch naturally offsets each new row of beads by half a bead width, mirroring traditional masonry layouts and making it the ideal stitch for sculpting organic curved profiles, expanding wings, and botanical fans. Using the two-drop variation—picking up two beads together instead of one on each pass—speeds up the weave while creating a textured, pleated appearance that mimics the delicate veins of a natural ginkgo biloba leaf. The finished earrings are ultra-lightweight, swishing naturally with movement while displaying a shimmering gradient of olive green, chartreuse, and gilded gold luster beads.
To execute the ginkgo leaf design, begin by building a ladder stitch base foundation measuring eight double-bead units wide using size 11/0 cylinder beads. Pass your needle out of the top of the end ladder unit, string four beads (two double-drops), pass the needle under the thread bridge between the first and second ladder units below, and pull the needle back up through the second pair of beads to lock the first brick stitch row. Increase the width of the leaf fan across the next five rows by adding two double-drop stitches into the outermost thread loops on each side. Once the widest fan section is reached, begin sculpting the scalloped ginkgo rim by decreasing stitches on the outer edges and creating a center notch with a single-bead turn. Weave the working thread back to the bottom stem of the leaf, attach a small gold-filled jump ring through a three-bead loop, and connect the finished leaf pendant to a hypoallergenic french wire earring hook.
Idea 5: Geometric Herringbone (Ndebele) Twisted Spiral Rope
How to Create

The geometric herringbone twisted spiral rope—traditionally known as Ndebele stitch—aligns cylinder beads in distinct side-by-side vertical pairs that angle inward to form a classic V-shaped herringbone pattern. Introducing a small, consistent structural shift at the end of each round causes the vertical paired columns to twist around a central hollow axis, forming an elegant spiral rope. This stitch provides a smooth, supple drape that rests comfortably against the skin without the stiffness often found in tight peyote tubes. Using contrasting pairs of matte charcoal and metallic copper beads creates an eye-catching, two-tone helix that spirals down the length of the rope, making it an excellent standalone chain or a durable base for mounting larger beaded pendants.
To create this herringbone spiral, string four size 11/0 cylinder beads onto a six-foot thread, passing through all four beads a second time to form a tight circular base ring consisting of two side-by-side bead pairs. Pick up two new beads, pass down through the adjacent bead in the column, pass up through the next column bead, and pick up two more beads to complete the second tier. To create the continuous spiral twist, step up at the end of each round by passing through the first bead of the current round plus one extra bead from the previous round, offsetting the vertical columns by one bead position on every tier. Continue weaving this two-drop paired herringbone stitch, maintaining steady upward tension to keep the spiral twist consistent throughout the eighteen-inch rope. Reinforce the terminal end loops with three passes of thread, weave in all tail ends through internal bead walls, and attach a sleek barrel clasp.
Idea 6: Beaded Kumihimo Braided Lariat with Magatama Drops

Step-by-Step Guide
The beaded Kumihimo braided lariat merges traditional Japanese circular foam-disk braiding with drop-shaped Magatama beads to produce a rich, snake-like rope necklace with textured dragon-scale fringe. Kumihimo uses eight individual weighted cord strands moved across numbered disk slots in a rhythmic diagonal sequence, trapping pre-strung beads securely into the center core of the braid. Long teardrop-shaped Magatama or petal beads rest diagonally against the braided cord, forming an overlapping, textured surface that resembles natural reptile scales or pinecones. The open lariat format omits rigid metal clasps, allowing the supple beaded rope to be tied in a relaxed infinity loop or draped loosely over the shoulders for versatile styling.
Begin by cutting eight equal six-foot lengths of heavy micro-cord (such as Superlon Tex 210) and stringing sixty size 11/0 seed beads followed by forty angled Magatama drop beads onto each individual cord. Secure the beads on each cord with plastic bobbins to prevent tangling, gather all eight strands together, and tie a secure overhand knot at one end. Mount the knot into the center hole of a round foam Kumihimo disk, positioning two cord strands in the top, bottom, left, and right numbered quadrants. Braid an un-beaded half-inch base by moving the top-right cord down to the bottom-right slot, and the bottom-left cord up to the top-left slot, rotating the disk ninety degrees after each cycle. Slide one bead down into the center braiding intersection on each cord movement, trapping the glass drops into the twisting core. Continue the braiding sequence until all beads are woven, finish with a half-inch un-beaded tail, tie off the cords with tight jeweler’s binding wire, and cap the ends with decorative tassel cones.
Idea 7: Multi-Layered Peyote Stitch Stacking Rings with Bicone Crystals
Execution Process
Multi-layered peyote stitch stacking rings with bicone crystals bring high-precision micro-mosaic beadwork to delicate, everyday ring bands. This technique combines a smooth, low-profile tubular peyote inner band crafted from durable 11/0 cylinder beads with an embellished outer surface of three-millimeter Swarovski or Preciosa faceted crystal bicones. The inner cylinder band sits flush against the skin, providing maximum comfort and preventing metal band resizing issues, while the exterior crystal row reflects light with brilliant sparkle. Creating a set of three coordinating bands in champagne, rose gold, and clear AB crystals allows for chic stacking combinations that deliver the brilliance of fine gemstone eternity bands with the durability of woven glass.

To execute a stacking ring, measure the circumference of your finger using a flexible measuring tape and convert the dimension to the exact number of size 11/0 cylinder beads required (typically twenty-eight to thirty-four beads). String an even number of base beads on a three-foot length of 6lb FireLine thread, joining the ends into a loop with a small step-up pass. Weave three continuous rounds of even-count tubular peyote stitch, pulling the thread firmly to build a sturdy, three-row cylindrical foundation band. To add the outer embellishment, weave the needle up through the center row, pick up one three-millimeter crystal bicone, skip one cylinder bead, and sew down through the following center bead. Repeat this embellishment step around the full circumference of the ring, nestling the faceted crystal bicones securely between the raised cylinder peaks. Weave the remaining thread through the interior peyote matrix in multiple figure-eight locking passes before trimming the thread flush.
Idea 8: Loom-Woven Aztec Geometric Tapestry Bracelet
How to Create

A loom-woven Aztec geometric tapestry bracelet uses an adjustable beading frame to weave intricate tribal motifs, sharp diamond step-patterns, and rich Southwestern colorways into a wide, uniform beaded cuff. Bead looms hold parallel high-tension warp threads in place, allowing the crafter to pass a long weft needle underneath the warps with a full row of beads, pressing each bead upward between two warp threads before locking them in place with a return pass above the warp lines. This method produces crisp geometric alignments and flat surfaces that make complex color charts easy to read and follow. Using a harmonious palette of matte turquoise, terracotta, mustard yellow, and antique bronze Delica beads produces a striking, heirloom-quality tapestry cuff with smooth, clean borders.
To create this loom bracelet, warp a metal or wooden bead loom with twenty-one parallel strands of bonded beading thread, spacing the warps evenly across the loom’s threaded spacing coils. Tie a five-foot weft thread onto the leftmost warp strand, threading the opposite end onto a long, thin size 12 loom needle. String twenty size 11/0 cylinder beads according to the first row of your charted Aztec diamond pattern, bring the needle and beads under all warp threads, and use your forefinger to press each individual bead up into its respective warp slot. Pass the needle back through all twenty beads in the reverse direction, ensuring the needle stays entirely above the warp threads to trap the glass cylinders securely. Continue weaving row by row according to the pattern chart until the cuff measures five and a half inches in length. Finish the project by weaving warp ends into the beadwork matrix or securing the raw warp threads inside an embossed multi-strand slide-end ribbon clasp.
Idea 9: Circular Brick Stitch Mandala Fringe Shoulder Duster Earrings
Setup Method

Circular brick stitch mandala fringe shoulder duster earrings combine circular geometric framing with dramatic, flowing seed bead fringe that grazes the collarbones. This design starts from a central raw brass ring or a small circular cluster of seed beads, building outward in concentric radial brick-stitch rings with alternating bead colors and metallic accents. Once the circular mandala foundation is complete, long, free-hanging strands of micro seed beads are attached to the bottom half of the circle to create dynamic, cascading fringe. As the wearer moves, the lightweight fringe strands flow gracefully, creating an eye-catching display of fluid glass movement beneath a structured, geometric center.
To set up this mandala earring, tie a four-foot conditioned beading thread to a twenty-millimeter closed raw brass jewelry ring with a double half-hitch knot. Pick up two size 11/0 cylinder beads, pass the needle around the outer wire of the brass ring, and bring the needle back up through the second bead to lock the initial anchor stitch. Continue brick-stitching around the entire circumference of the brass ring, placing thirty-six uniform beads around the perimeter. Add a second outer round of brick stitch, increasing the count by adding two stitches into every third thread bridge to prevent cupping. Weave the needle down to the bottom quadrant of the circular frame to begin the fringe; string forty-five size 15/0 round seed beads followed by one 8/0 metallic drop bead, skip the drop bead, and pass the needle back up through all forty-five seed beads into the mandala base. Repeat this fringe process across fourteen adjacent base beads, tapering the fringe lengths in a soft V-shape, before securing and trimming all working threads.
Idea 10: St. Petersburg Stitch Floral Vine Wrap Bracelet

Step-by-Step Guide
The St. Petersburg stitch floral vine wrap bracelet uses a historic Russian beadweaving technique that offsets round and cylinder beads to form a flexible, curving vine patterned with delicate leaf sprigs and floral clusters. Unlike rigid geometric stitches, St. Petersburg stitch naturally undulates in a soft, wavy trajectory by combining traditional single-column ladder stitches with angled three-bead petal loops that branch out from the spine. Using soft peridot green cylinder beads for the central vine and iridescent dusty rose and champagne beads for the outer leaf loops creates an organic botanical trail. The supple, lightweight drape of this stitch makes it ideal for a long wrap bracelet that coils comfortably around the wrist multiple times without pinching or binding.
Begin crafting this floral vine by threading a size 12 beading needle with five feet of One-G nylon thread, stringing four size 11/0 green cylinder beads, and passing through the first two beads to create a small two-row ladder stitch spine. Pick up three size 11/0 rose luster beads for the first leaf loop, pass the needle down through the third and fourth beads of the ladder spine, and pull the thread snug so the three rose beads form an angled loop on the right side. Step through the outer edge of the ladder, pick up one metallic accent bead, and weave back up through the center spine to complete the first leaf cluster. Repeat the sequence on the left side of the spine, alternating leaf and petal clusters every four rows to establish a continuous, undulating floral vine. Continue weaving until the flexible vine measures twenty-one inches for a triple-wrap bracelet. Attach a petite button clasp on one end and a reinforced seed bead loop on the other to complete the wrap bracelet.
Common Beginner Mistakes and How to Avoid Them
The most critical mistake beginners make when weaving intricate beaded jewelry is failing to maintain consistent thread tension. Pulling thread too tightly causes flat stitches like peyote and brick stitch to cup, buckle, and warp into uneven shapes, while loose tension leaves unsightly thread gaps between beads that weaken the overall structure. Maintain a relaxed, steady pull on every pass, checking that beads settle flush against neighboring rows without puckering. Another frequent error is using cheap, non-uniform seed beads from craft multi-packs; irregular bead thicknesses and widths prevent geometric patterns from aligning cleanly and will distort intricate charts. Always invest in precision-cut Japanese cylinder beads (such as Miyuki Delica or TOHO Treasure beads) when working geometric designs. Additionally, beginners often use standard cotton sewing thread or cheap monofilament fishing line, which frays easily, stretches, and degrades under friction from sharp glass bead edges. Always use thermally bonded polyethylene threads (like FireLine) or high-grade bonded nylon beading threads paired with specialized thread conditioning wax to ensure lasting strength and smooth passes.
Practical Tips for Better Results
Achieving professional, gallery-quality results with intricate beadwork relies on smart tool choices, needle discipline, and proper thread management. Always work over a padded velvet or microfiber bead mat; the soft textured pile prevents glass beads from bouncing away and keeps tiny cylinder holes oriented horizontally for fast needle pickup. When transitioning between colors in complex charts, scoop beads directly from organized sorting trays using the tip of your needle rather than picking them up with fingers, which speeds up your weaving rhythm and keeps glass clean. Use the thinnest needle possible (size 12 or 13) when working multi-pass stitches like right angle weave and tubular netting; fine needles easily pass through tiny bead channels multiple times without cracking delicate glass walls. When ending a thread or joining a new strand, never tie bulky knots along the outer edges of your beadwork. Instead, weave the working thread through at least ten to twelve internal bead channels following the existing thread path, changing directions across two figure-eight turns to lock the thread in place with friction before trimming with sharp micro-tip scissors.
Styling, Presentation, or Organization Ideas
Styling intricate beaded jewelry involves balancing complex micro-geometric patterns with clean, intentional fashion choices to let the handwoven craftsmanship shine. Pair wide, high-contrast geometric cuffs and chevron tapestry bracelets with solid-color linen blouses, crisp tailored blazers, or minimalist dresses; the solid fabrics provide a clean canvas that highlights the intricate glass beadwork. For statement fringe earrings or architectural collar necklaces, wear your hair swept up in a sleek bun or French twist to keep strands from catching on delicate bead loops while framing your neck and jawline. When organizing your beading workspace, store tiny seed beads in clear, stackable acrylic screw-top jars or flip-top craft storage towers organized by color family and finish (matte, luster, metallic, and transparent). Label each container with the exact manufacturer color code and dye lot number to simplify pattern planning and ensure you can reorder matching beads for future expansions or repairs.
Budget or Time Planning
Creating intricate beaded jewelry is a high-value, cost-effective craft that requires minimal upfront investment while producing stunning, durable accessories. A basic starter kit—including a multi-pack of size 12 English beading needles, a spool of 6lb FireLine thread, a velvet bead mat, and six essential tubes of Japanese Miyuki Delica beads—typically costs between twenty-five and forty dollars. Because a standard five-gram tube contains over one thousand cylinder beads, a modest initial collection provides enough materials to complete multiple pairs of earrings, rings, and several bracelets. In terms of time management, intricate beadweaving is a deliberate, precision-focused craft; a pair of brick-stitch ginkgo earrings typically takes two to three hours, while a wide geometric tapestry cuff or CRAW necklace can require eight to fifteen hours of focused weaving. Break large projects into manageable sessions by charting color milestones, weaving fifteen to twenty rows per sitting to maintain focus, prevent eye strain, and ensure consistent thread tension from start to finish.
Creative Expansion and Advanced Inspiration
Once you have mastered foundational off-loom stitches and loom-weaving setups, you can explore advanced structural techniques to push your jewelry designs even further. Consider incorporating three-dimensional cabochon bezels into your work, using circular peyote or modified netting to trap natural gemstones, sea glass, or dichroic glass crystals inside ornate woven bead bezels without using glue or metal settings. Another exciting direction is experimenting with architectural cellini spiral stitches, which combine varying bead sizes from 15/0 micro seed beads up to large Magatamas within a single tubular peyote rope to create dramatic, ribbed dimensional forms. You can also integrate metal smithing and wirework elements into your craft, mounting handwoven beadwork panels onto forged sterling silver cuff blanks or suspended within geometric wire frames. These advanced techniques transform traditional beading into wearable contemporary sculpture, allowing you to create one-of-a-kind statement pieces that highlight the endless possibilities of precision glass beadwork.
