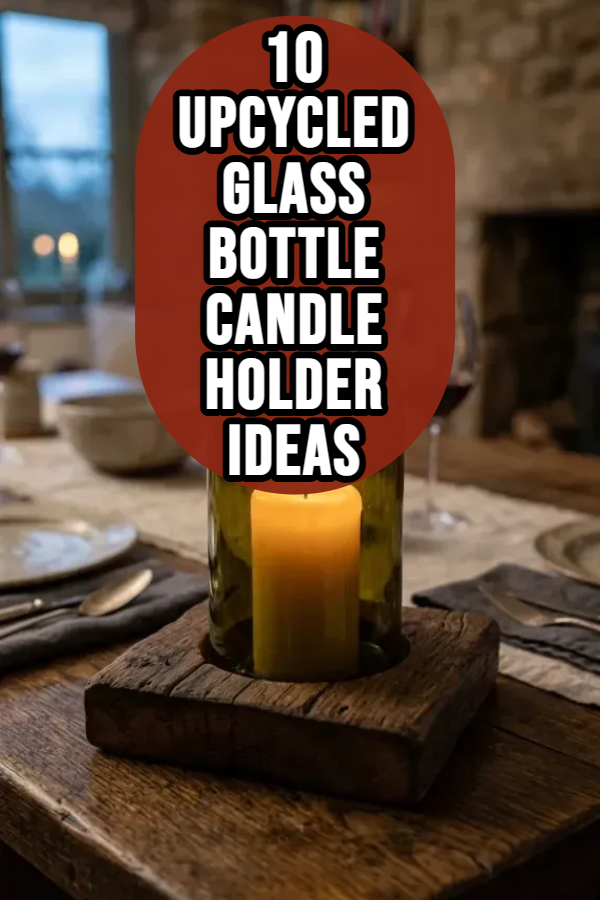
10 Upcycled Glass Bottle Candle Holder Ideas

Spread the love

Transforming discarded glass beverage bottles into customized ambient candle holders turns everyday household recycling into functional, durable, and sophisticated lighting accents. Standard glass bottles provide thick, heat-tolerant cylindrical structures that naturally diffuse radiant illumination, making them an ideal foundation for creating taper holders, hurricane lanterns, and hand-poured container candles. Instead of purchasing mass-produced glass lanterns, upcycling wine, liquor, and vintage soda bottles allows creators to customize shapes, color tints, frost patterns, and metallic accents to match any interior aesthetic. This comprehensive guide outlines the foundational principles of safely scoring, thermal-shock breaking, edge-smoothing, and decorating repurposed glass bottles into practical candle holders. Readers will learn the exact glass scoring mechanics, wet-sanding protocols, thermal stress management strategies, and flame oxygenation requirements necessary to build safe and lasting candle features. Understanding thermal tolerance, air draft ventilation, non-combustible base stability, and proper wick placement ensures your handmade luminaries burn cleanly without cracking or smoking. Crafting your own upcycled glass bottle candle holders provides an accessible, budget-friendly creative project that reduces household waste, elevates tabletop ambiance, and brings warm, handmade light to your home.

Why This Idea Is Trending or Useful

Upcycled glass bottle candle holders have become a prominent design trend across modern DIY and home decor inspiration due to their minimal environmental footprint, low material costs, and rich aesthetic versatility. Glass bottles are freely available in a wide variety of attractive tints, ranging from deep emerald greens and amber browns to antique cobalt blues and crystalline clears. Rather than discarding bottles into the municipal waste stream, direct home upcycling extends the lifecycle of high-grade glass immediately while eliminating consumer spending on expensive boutique lighting. In contemporary interior styling, ambient candlelight plays an essential role in softening hard room angles, creating cozy dining settings, and promoting mental relaxation. Enclosed glass bottle lanterns and cut-top hurricanes also provide functional wind protection for outdoor patio dining, preventing gentle evening breezes from blowing out open flames. The project remains beginner friendly because it can be approached through diverse techniques, ranging from zero-cut taper candle inserts to precision score-and-heat bottle cutting. This combination of sustainable crafting, natural flame safety, high-end optical clarity, and broad customizable styling makes glass bottle upcycling an exceptionally practical home decor craft.

Materials and Preparation

Building safe, long-lasting glass bottle candle holders requires gathering clean bottles, specialized glass cutting tools, progressive wet-sanding abrasives, and flame-safe decorative elements before beginning assembly. Essential materials include an assortment of empty wine, champagne, liquor, or soda bottles, a handheld rotary glass bottle cutter or adjustable bottle-cutting jig, high-temperature heat sources (such as a tea kettle with boiling water or a micro-torch), and an ice water cooling bath. For smoothing and safety, gather silicon carbide wet/dry sandpaper sheets in 120, 220, 400, and 600 grits, safety goggles, cut-resistant work gloves, and an N95 dust mask to prevent inhaling microscopic glass dust. Decorative finishing supplies include soy or beeswax flakes, pre-tabbed cotton candle wicks, natural jute twine, high-heat silicone sealant, and copper or brass accents. Begin preparation by removing paper labels and soaking bottles in warm water mixed with dish soap and washing soda to dissolve residual adhesives. Thoroughly wash the interior and exterior surfaces with isopropyl alcohol to remove grease and food oils, drying completely before scoring. Inspect the glass for pre-existing chips or deep structural fractures that could cause uncontrolled shattering during thermal shock cutting procedures.

Idea 1: Cut-Glass Wine Bottle Hurricane Cloche with Reclaimed Wood Base

How to Create

A cut-glass wine bottle hurricane cloche resting over a solid reclaimed wood base creates a rustic, windproof luminary that elevates standard pillar candles into refined tabletop centerpieces. This design removes the bottom base of a standard 750ml wine bottle, transforming the upper cylinder and neck into an open-bottomed glass bell or cloche that slips down over a burning candle. The natural green or amber tint of the wine glass softens the intensity of the flame, casting a warm, romantic glow across dining surfaces while shielding the flame from drafts. The open neck at the top functions as a natural chimney flue, allowing rising heat and exhaust gases to escape continuously so the candle burns cleanly without flickering or producing excess black soot.

To create this hurricane cloche, clamp a clean wine bottle into an adjustable glass bottle-cutting jig, setting the cutting wheel two inches above the bottom base. Rotate the bottle with light, even pressure to create a single, continuous hairline score line around the circumference without retracing your score. Direct a thin stream of boiling water over the score line for thirty seconds, then immediately immerse the scored section into a bucket of ice water to initiate thermal shock. Repeat this hot-and-cold thermal cycle until the bottom base cleanly separates from the upper cylinder. Place a sheet of 120-grit silicon carbide sandpaper flat in a shallow tray of water, rubbing the cut glass edge in circular motions to grind away sharp spurs, progressively smoothing through 220, 400, and 600-grit papers until velvety smooth. Cut a circular base from a piece of one-inch-thick reclaimed oak plank, routing a shallow groove into the wood to seat the smoothed glass rim securely around a central pillar candle.

Idea 2: Hanging Cut-Bottle Inverted Pendant Lanterns with Brass Chain

Step-by-Step Guide

Hanging cut-bottle inverted pendant lanterns transform suspended glass bottle tops into an aerial canopy of flickering light suited for porches, pergolas, and garden dining areas. This concept utilizes the inverted upper funnel of cut wine or liquor bottles suspended by durable brass or iron chains threaded directly through the open bottle necks. A tea light or small votive candle rests on an internal metal suspended basket suspended within the glass cone, protected completely from cross-breezes. Grouping several suspended lanterns at staggered vertical heights creates a dynamic, floating chandelier effect that draws the eye upward and casts jewel-toned light refractions across outdoor living spaces without taking up valuable table real estate.

Begin by scoring and thermal-shocking the upper half of three matching emerald-green or cobalt-blue wine bottles, cutting each cylinder four inches below the shoulder slope to form deep glass bells. Wet-sand all cut lower edges thoroughly with progressive silicon carbide paper submerged in water until the rims are completely rounded and safe to handle. Cut a three-foot length of decorative solid brass chain and a twelve-inch length of rigid 16-gauge brass wire. Bend the brass wire into a small horizontal cradle basket sized to hold a standard metal-cupped tea light candle, looping the top end of the wire securely to the center link of the brass chain. Drop the brass chain down through the inside of the bottle so the chain extends up through the narrow top neck while the wire candle cradle hangs suspended in the center of the glass bell. Attach a small brass washer and locking ring over the chain at the bottle mouth to hold the lantern level, and hang the completed pendants from ceiling hooks or outdoor pergola beams.

Idea 3: Poured Soy Wax Scented Candle in a Frosted Tumbler Base

Setup Method

A poured soy wax scented candle in a frosted tumbler base repurposes the heavy bottom half of a glass bottle into a long-burning, container candle. This design cuts a wine or whiskey bottle five inches above its base to produce a clean, flat-rimmed tumbler cup, which is then etched with a soft, sea-glass matte frosted finish. The thick, insulating bottom punt of the bottle protects furniture surfaces from excessive thermal transfer, while the custom-scented, hand-poured soy wax core provides dozens of hours of clean, soot-free burn time. The frosted glass exterior softens the internal flame into a glowing lantern effect, producing an artisan, boutique-style home fragrance accessory that looks indistinguishable from luxury designer candles.

Set up this poured candle by scoring a straight-sided wine bottle five inches above the base, cleanly separating the tumbler cup using boiling-and-ice-water thermal shock cycles. Wet-sand the cut top rim under running water through 120, 220, and 400-grit abrasives until smooth and level. Apply a continuous coat of glass etching cream over the exterior glass body using a foam brush, allowing the acid cream to sit for five minutes before washing it off thoroughly under warm water to produce a silky, translucent frosted texture. Center a pre-tabbed natural cotton or crackling wooden wick onto the bottom inside punt of the glass tumbler, securing the metal tab firmly with a dab of high-heat silicone or a wick adhesive sticker. Melt twelve ounces of natural soy wax flakes in a double boiler until reaching one hundred and eighty-five degrees Fahrenheit, stir in non-toxic essential oils, and pour the liquid wax smoothly into the prepared frosted glass base. Use a wick centering clip across the top rim to keep the wick straight while the wax cools undisturbed for twenty-four hours.

Idea 4: Etched Floral Matte Glass Bottle Taper Candelabra

Execution Process

An etched floral matte glass bottle taper candelabra combines delicate surface patterning with dramatic, tall taper candles to form a romantic, multi-bottle tabletop light display. This design retains the complete, uncut structure of vintage clear or amber bottles, transforming their outer surfaces using adhesive vinyl stencils and frosted glass etching treatments to reveal intricate botanical leaf and floral silhouettes. Inserting tall, slim taper candles directly into the narrow bottle necks elevates the flame high above the table, casting dancing shadows through the etched glass patterns below. Grouping five to seven etched bottles along a dining table runner creates a stately, multi-tiered candelabra display with clean vintage charm.

Execute this design by thoroughly degreasing the exterior of four whole vintage glass bottles with rubbing alcohol to ensure strong stencil adhesion. Apply custom-cut self-adhesive vinyl stencils featuring botanical ferns, wild roses, or geometric lace patterns firmly across the curved glass bodies, smoothing down all stencil edges with a plastic burnishing tool to prevent bleed-through. Brush a thick, uniform layer of glass etching cream across the exposed glass sections, allowing the chemical compound to etch the silicate surface for five to ten minutes according to the manufacturer’s directions. Rinse the bottles under cold running water to neutralize the etching cream, peel away the vinyl stencils, and dry the etched glass completely with a lint-free cloth to reveal the crisp, translucent floral motifs. Shave the bottom bases of tall beeswax or paraffin taper candles slightly with a utility knife to fit snugly into the bottle mouths, inserting the candles firmly so they stand straight and secure for your centerpiece display.

Idea 5: Submerged Botanical Floating Candle Water Lantern

How to Create

A submerged botanical floating candle water lantern utilizes water magnification and preserved fresh botanicals to turn an uncut glass bottle into an organic, water-filled light fixture. This design fills a clear glass bottle with distilled water and dense botanical sprigs—such as fresh rosemary stems, eucalyptus branches, sliced citrus rounds, and winter berries—anchoring the plants completely under water. A small, round wax floating candle rests on the water’s surface at the top of the wide mouth, or the top of the bottle is cut down to create a floating pool. The surrounding water acts as a natural lens, magnifying the vibrant green leaves and colorful berries beneath the flame, while ensuring that accidental tipping simply extinguishes the candle in water, creating a safe, refreshing table accent.

To create this water lantern, select a clear, wide-mouthed glass milk bottle or cleanly cut the top three inches off a standard clear wine bottle and wet-sand the rim smooth. Thoroughly clean the interior to eliminate dust and fill the bottom half-inch of the container with washed white quartz river pebbles or clear glass marbles. Slide fresh, sturdy botanical cuttings—such as aromatic rosemary branches, fragrant eucalyptus leaves, or evergreen fir sprigs—down into the bottle, pressing the stem bases securely between the bottom pebbles to keep the buoyant botanicals submerged. Pour distilled water into the container until it reaches one inch below the top rim, adding three drops of clear glycerin to help prevent tiny air bubbles from clinging to the plant leaves. Gently place a circular, non-toxic floating wax candle onto the water surface, ensuring the cotton wick remains completely dry, and light the candle to illuminate the magnified underwater foliage.

Idea 6: Metallic Leaf Gilded Cut-Bottle Tea Light Votives

Step-by-Step Guide

Metallic leaf gilded cut-bottle tea light votives combine modern metallic leafing techniques with the rich color tints of recycled glass bases to create glowing, luxury candle cups. This design cuts wine bottles into shallow, three-inch-tall glass cups, applying genuine or imitation gold, silver, or copper leaf foil across the interior or lower exterior glass walls. When a tea light burns inside the gilded vessel, the flame reflects off the textured metallic flakes, casting an opulent, warm glow through the colored glass. The hand-applied metallic leaf creates organic cracks, fissures, and negative spaces that mimic vintage mercury glass, turning simple recycling into high-end evening mood lighting.

Begin construction by scoring several colorful wine and liquor bottles three inches above their bottom bases, separating the glass cups cleanly using boiling-and-ice thermal cycling. Submerge the cut rims in a water tray lined with 220-grit silicon carbide paper, grinding the edges smooth before finishing with 400 and 600-grit wet sandpaper to produce a soft, rounded lip. Paint a thin, even coat of water-based metal leaf sizing adhesive across the lower half of each exterior glass cup, allowing the glue to become clear and tacky over fifteen minutes. Carefully lay sheets of gold or copper leaf foil onto the tacky adhesive, using a soft, dry camel-hair brush to smooth the metal foil against the glass and sweep away excess loose flakes. Seal the gilded exterior with a coat of high-gloss clear acrylic sealer to protect the metal from tarnishing, and place a standard metal or clear-cup tea light candle inside the base to illuminate the rich metallic textures.

Idea 7: Copper Pipe Wrapped Triple-Bottle Candelabra Trough

Setup Method

A copper pipe wrapped triple-bottle candelabra trough unifies three uncut wine bottles into a sleek, industrial-modern centerpiece using rigid plumbing fittings and warm copper tubing. This design arranges three bottles of uniform height in a linear row, binding them securely within a custom-soldered or pressure-fitted copper pipe framework that wraps around the bottle bodies. The bright, reflective metallic pink tones of polished copper contrast against the dark green or charcoal glass surfaces, creating an architectural centerpiece with structural weight. The top bottle necks are fitted with industrial copper compression couplings that serve as precision-sized metal taper candle sockets, ensuring candles sit perfectly straight while catching any falling wax drips in durable metal collars.

To set up this industrial candelabra, clean three identical green or amber wine bottles with rubbing alcohol to remove dust and fingerprints. Construct a horizontal stabilizing base frame using half-inch rigid copper plumbing pipes, ninety-degree copper elbows, and copper tee fittings, soldering the joints with a micro-torch or assembling them with high-strength structural metal adhesive. Seat the three bottles firmly inside the copper ring saddles, securing the glass to the metal framework using discrete dabs of clear silicone adhesive along hidden contact points. Insert three half-inch to three-quarter-inch copper reducing couplers into the top openings of the three bottle necks, wrapping the lower male threads with plumber’s Teflon tape to ensure a snug, wobble-free press fit into the glass mouths. Insert tall, tapered beeswax candles into the top copper collars, ensuring the candles stand vertically aligned across the three-bottle linear trough.

Idea 8: Vintage Soda Bottle Multi-Taper Chimney Array

Execution Process

A vintage soda bottle multi-taper chimney array uses an eclectic grouping of narrow, embossed glass soda and apothecary bottles to create a playful, historic tablescape. This design uses antique glass bottles featuring embossed lettering, vertical ribbed fluting, and thick, chunky glass bases in nostalgic hues of seafoam green, aqua, and pale flint. The narrow openings of vintage soda bottles naturally accommodate slender bistro-style taper candles, turning a collection of flea-market finds into a functional lighting display. As the taper candles burn down, molten wax drips naturally down the curved glass shoulders and embossed logos, building an authentic, layered patina of colorful wax cascades that enhances the vintage, historic character over time.

Execute this design by collecting five to seven assorted vintage soda, seltzer, or apothecary bottles of varied heights, checking that all bottles sit flat without wobbling. Thoroughly scrub the interior glass using a flexible bottle brush and white vinegar to dissolve mineral haze, drying the bottles completely in a warm oven on low heat. Arrange the bottles in an asymmetrical, organic cluster along a protective slate, zinc, or ceramic tabletop tray that will catch decorative wax drips safely. Select non-drip or intentionally dripping colored taper candles in shades of ivory, sage, and dusty terracotta, shaving the candle bases slightly with a paring knife so they slide one inch deep into the bottle necks. Light the candles in sequence, allowing the varied heights of the bottles to create a staggered, dynamic mountain of light that casts flickering shadows across the vintage embossed glass surfaces.

Idea 9: Macrame Wrapped Cut-Bottle Bohemian Lantern

How to Create

A macrame wrapped cut-bottle bohemian lantern pairs the smooth, clean edges of a cut glass bottle with natural fiber knotting to produce a textured, hanging or tabletop accent. This design cuts a large one-liter wine or liquor bottle four inches above the base, wrapping the upper glass cylinder in an intricate diamond-patterned net woven from unbleached natural cotton twine. The soft, fibrous texture of the cotton cord contrasts against the cool, glossy glass surface, casting dynamic geometric lattice shadows across walls and tabletops when a votive candle burns inside. The protective macrame sleeve also provides a comfortable, tactile grip, allowing users to move warm glass lanterns around evening patio spaces without burning their fingers.

To create this bohemian lantern, score a straight-sided one-liter glass bottle five inches from the base, using hot-and-cold thermal shock cycles to separate the lower glass tumbler before wet-sanding the top rim through 600-grit abrasives until rounded and smooth. Cut eight six-foot lengths of three-millimeter braided natural cotton cord, looping them evenly around a two-inch circular wood ring that rests just beneath the top cut rim of the glass cup. Tie alternating square knots across adjacent cord pairs around the circumference of the glass cylinder, working downward in a repeating open-diamond mesh pattern that hugs the glass contours snugly. Gather all sixteen loose cord tails underneath the heavy bottom punt of the bottle, securing the bundle with a dense, three-inch wrapped gathering knot. Place a scented votive or battery-operated LED pillar candle inside the base to project intricate macrame lattice shadows through the glowing glass walls.

Idea 10: Tinted Sea-Glass Translucent Alcohol Ink Lantern

Step-by-Step Guide

A tinted sea-glass translucent alcohol ink lantern transforms plain clear glass bottles into vibrant, watercolor-stained lighting vessels using fast-drying, dye-based alcohol inks and blending solutions. This technique applies drops of rich magenta, turquoise, citrus yellow, and metallic brass alcohol inks directly onto the glass, allowing the pigments to swirl, bloom, and blend organically across the transparent surface. When illuminated from within by a warm candle flame, the dyed glass acts like a stained-glass prism, casting kaleidoscopic washes of vivid, saturated color across surrounding room walls. The finished piece captures the organic, weathered beauty of antique art glass, bringing expressive, artistic lighting to modern interiors.

Begin fabrication by scoring and cutting a clear 750ml wine bottle four inches below its shoulder, separating the glass cylinder cleanly and wet-sanding the cut rim until completely smooth. Thoroughly wipe down the outside of the glass with 91% isopropyl alcohol to remove all surface oils and dirt. Drop several drops of vibrant alcohol inks—such as deep ocean teal, amethyst purple, and shimmering metallic gold mixative—onto a felt ink-applicator tool, dabbing the felt lightly across the exterior glass surface in overlapping circular patterns. Spritz the wet ink lightly with isopropyl alcohol using a fine-mist spray bottle to create organic watercolor blooms and veined marbling effects. Allow the alcohol ink to dry completely for thirty minutes, then seal the artwork with two coats of UV-resistant, non-yellowing clear gloss spray sealer to protect the delicate dyes from moisture. Place a heavy glass-cupped votive candle inside the finished lantern to cast brilliant, multi-colored light refractions across your space.

Common Beginner Mistakes and How to Avoid Them

The most dangerous and common mistake beginners make when upcycling glass bottles into candle holders is failing to provide adequate oxygen ventilation for burning candles. Placing a solid, uncut glass cloche or an unvented bottle neck over a burning flame traps hot carbon dioxide and starves the flame of oxygen, causing the candle to smoke heavily, sputter, produce hazardous carbon monoxide, and quickly extinguish itself. Always ensure cut hurricane cloches retain an open top neck to serve as a chimney, or elevate the bottom rim slightly on notched wooden blocks or metal risers to promote continuous airflow from below. Another frequent error is scoring the glass multiple times along the same line or using uneven hand pressure during scoring. Double-scoring creates microscopic jagged fractures that lead to uncontrolled, diagonal cracks during thermal shock separation. Always create a single, light, continuous score line with a firm, steady motion. Additionally, beginners often use cheap, dry sandpaper that generates hazardous airborne glass dust and dulls quickly. Always wet-sand glass submerged in a shallow tray of water, wearing cut-resistant gloves, safety goggles, and a dust mask to ensure clean, chip-free edges and safe working conditions.

Practical Tips for Better Results

Achieving professional, boutique-quality results with DIY glass bottle candle holders relies on consistent thermal shock control, precision edge finishing, and intentional flame safety practices. When performing thermal shock separation, use a narrow, controlled stream of boiling water directed exclusively onto the score line, followed immediately by plunging the bottle into an ice-water bath; keeping the temperature differential high ensures clean, instantaneous breaks along the score. If a bottle separates with minor high spots, use an 80-grit diamond hand-polishing pad or wet silicon carbide sandpaper wrapped around a solid sanding block to flatten the edge before progressing to finer polishing grits. When using cut bottles as poured candle containers, always pre-warm the glass containers in an oven on its lowest setting (around one hundred and twenty degrees Fahrenheit) before pouring hot liquid wax; pre-warming prevents thermal shock cracks and eliminates unsightly wax pull-away and sinkholes against the cold glass walls. Finally, place all glass candle holders on non-combustible, heat-resistant surfaces such as slate slabs, ceramic tiles, or solid hardwood trays to catch stray wax drips and protect fine furniture finishes from heat transfer.

Styling, Presentation, or Organization Ideas

Styling upcycled glass bottle candle holders involves coordinating glass tints, candle heights, and surrounding tabletop textures to create balanced, inviting lighting arrangements. Group clusters of three or five cut-bottle hurricanes of varying heights and complementary tints—such as blending antique green, amber, and clear glass—along a dining room table runner to establish rich visual rhythm. Pair dark glass bottle holders with soft, organic materials like rough linen tablecloths, unglazed ceramic dinnerware, and fresh eucalyptus garlands to create a grounded, modern botanical tablescape. For outdoor patio entertaining, place heavy cut-bottle lanterns along stone garden pathways or arrange them inside open galvanized metal trays filled with smooth river pebbles to provide wind-shielded, flickering illumination. When presenting handmade cut-bottle candles as gifts, tie a sprig of dried lavender or a stick of cinnamon around the glass cylinder with natural frayed-edge linen ribbon, tucking a box of wooden strike-on-box matches into the packaging for a complete, artisan presentation.

Budget or Time Planning

Creating custom upcycled glass bottle candle holders is an economical, high-reward DIY craft project that delivers luxury lighting accents on an accessible budget. Because the primary glass vessels are sourced entirely from recycled household bottles or local restaurant donations, the raw container cost is completely free. A basic starter supply kit—including an adjustable glass bottle cutter jig, a variety pack of wet/dry silicon carbide sandpaper, and a bag of natural soy wax flakes with cotton wicks—typically costs between twenty-five and forty dollars, providing enough materials to produce six to eight complete candle holders. Upgraded builds utilizing specialty materials like alcohol inks, metallic leafing kits, or solid copper plumbing fittings generally require an investment of thirty-five to fifty dollars, yielding boutique-quality luminaries that retail for upwards of thirty dollars each. In terms of time management, scoring, separating, and wet-sanding a single bottle takes roughly fifteen to twenty minutes once your workstation is set up. Pouring wax or applying decorative etching finishes requires thirty to forty-five minutes of active crafting time. Dedicating a single weekend afternoon allows you to batch-cut half a dozen bottles and finish a complete set of custom ambient luminaries.

Creative Expansion and Advanced Inspiration

Once you have mastered foundational bottle scoring and candle pouring techniques, you can explore advanced structural modifications to expand your glass lighting creations. Consider integrating traditional stained-glass copper foil and soldering techniques to connect multiple cut-glass bottle rings together into tall, multi-tiered geometric hurricane towers. Another exciting expansion is building specialized tiki torches from uncut vintage liquor bottles, mounting them to outdoor garden fences using heavy-duty black iron split-ring pipe hangers and filling them with citronella oil and fiberglass wicks for mosquito-repelling patio lighting. You can also experiment with precision sandblasting or rotary diamond-burr carving, etching intricate geometric mandalas, family monograms, or celestial constellations directly into the glass surfaces before lighting. Integrating these creative, advanced additions transforms simple household recycling into sophisticated, high-performance ambient lighting features that celebrate craftsmanship and bring warm, tranquil illumination to your home for years to come.

Similar Posts

  • 10 Beaded Embroidery Craft Ideas

    Spread the love

    Spread the loveBeaded embroidery is a timeless craft that blends the softness of thread with the sparkle and dimension of beads. This technique allows crafters to elevate simple embroidery into richly textured works of art that catch the light and add visual depth. Whether you are a beginner exploring beadwork for the first time or…

  • 10 Room Decor Bedroom Pink

    Spread the love

    Spread the lovePink has always been a timeless and charming color when it comes to bedroom decor. Whether you love soft blush tones or bold fuchsia hues, pink can create a cozy, feminine, and welcoming atmosphere. The beauty of pink lies in its versatility—it can be romantic, modern, vintage, or minimalist depending on how you…

  • 10 Storage Ideas for Small Spaces

    Spread the love

    Spread the loveLiving in a small space does not have to feel limiting. With the right storage strategies, even the most compact rooms can feel open, organized, and intentionally designed. Whether you are working with a tiny apartment, a studio, a small bedroom, or a compact home office, maximizing every inch matters. The goal is…

  • 10 Entryway Ideas Apartment

    Spread the love

    Spread the loveWhen you live in an apartment, one of the most important spaces to consider is the entryway. Even though it might seem like a small or overlooked area, the entryway is the first impression your guests have when they step into your home. More importantly, it is the space that welcomes you after…

  • 10 Lace Doily Lamp Ideas

    Spread the love

    Spread the loveLighting plays a crucial role in making a space feel welcoming, warm, and stylish. A well-chosen lamp can completely transform a room, setting the mood and highlighting decor elements. One of the cutest, coziest, and most creative lighting ideas that has gained popularity on Pinterest is the lace doily lamp. These charming lamps…

  • 10 White Kitchen Cabinets Ideas

    Spread the love

    Spread the loveWhite kitchen cabinets are timeless, versatile, and instantly elevate the look of any kitchen. They can make small spaces feel larger, create a clean and fresh atmosphere, and blend seamlessly with any design style. Whether you are renovating your kitchen or just looking for design inspiration, white cabinets are always a safe and…

Leave a Reply

Your email address will not be published. Required fields are marked *