10 Fabric Scrap Rug Crafts DIY Projects Ideas

Spread the love

Upcycling fabric remnants into handmade scrap rugs is one of the most rewarding and sustainable textile crafts. Rather than discarding leftover sewing scraps, worn-out denim, old bedsheets, and discarded cotton t-shirts into landfills, these diverse techniques turn textile waste into durable, tactile floor coverings.

The beauty of scrap rug crafting lies in its versatility. You can match the assembly method to your preferred crafting style: traditional three-strand braided spirals require only basic hand sewing; locker hooking and latch hooking produce deep, plush shags; tooth-brush (Amish knot) coiling creates structural heirloom rugs with zero machine stitching; and woven frame looms yield flat-weave geometric floor mats.
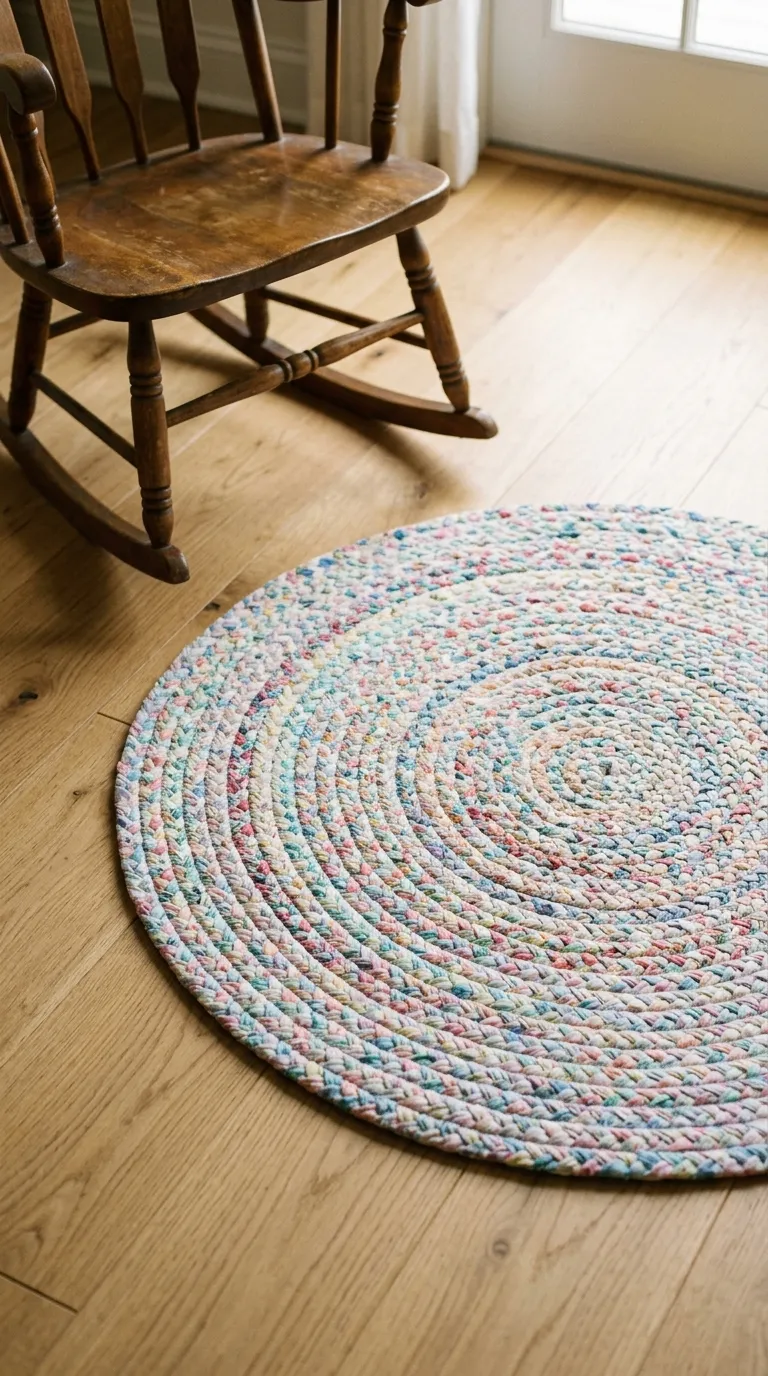
Whether styling an entryway, a bedside runner, or a kitchen mat, these ten curated DIY fabric scrap rug projects provide step-by-step assembly guides, fabric calculations, and production-ready visual prompts.

Why This Idea Is Trending & Flattering

  • Zero-Waste Sustainable Decor: Diverts pounds of post-consumer textiles, old linens, and sewing cutoffs into durable, functional home accessories.

  • Plush, Heavyweight Floor Texture: Layered, braided, and hooked fabrics create thick, sound-dampening floor pads that insulate cold floors and feel soft underfoot.

  • Custom Colorway Curation: Scrap strips can be sorted into coordinated gradients—such as moody denim blues, earthy terracotta blends, or neutral cream palettes.

  • Low-Cost Tooling: Most techniques require only basic household tools: fabric shears, rotary cutters, safety pins, tapestry needles, or simple wooden frame looms.

  • Machine Washable & Hard-Wearing: Rugs constructed from 100% cotton remnants, jersey knits, and denim can be washed repeatedly for years of daily use.

Materials, Fabric Preparation & Assembly Toolkit Guide

Selecting compatible fabric weights and cutting uniform continuous strips is critical to creating flat, buckle-free floor rugs.

Best Fabrics for Scrap Rugs

  • Cotton Jersey / T-Shirt Remnants (T-Shirt Yarn): Stretches softly, curls into smooth seamless cords, and produces plush, non-fraying braided or crochet rugs.

  • Recycled Denim & Chambray: Heavyweight and exceptionally hard-wearing; ideal for high-traffic entryway runners and woven rag rugs.

  • 100% Woven Cotton (Bedsheets & Quilting Scraps): Holds crisp folds; best for traditional braided rugs, tooth-brush knots, and locker hooking.

  • Flannel & Fleece Remnants: Ultra-soft and warm; ideal for latch-hook shags and cozy bedroom floor mats.

Essential Crafting Tools & Hardware

  • Cutting Tools: Rotary cutter with a fresh blade, 24-inch acrylic quilting ruler, self-healing cutting mat, and heavy-duty fabric shears.

  • Joinery & Needles: Bent-tip upholstery needles, heavy-duty bonded nylon/polyester upholstery thread, wooden toothbrush rug needles, and latch hooks.

  • Substrates (For Hooked/Tufted Rugs): Heavy rug canvas (3.75 mesh count), burlap sacking, or non-slip open rug grid pads.

  • Edge Finishing & Safety: Non-slip natural latex rug backing liquid (e.g., Fiber-Lok) or iron-on non-skid rug binding.

Continuous Bias Strip & Slit-Join Technique

  • The No-Sew Slit Join: Cut a 0.5-inch vertical slit 0.5 inches from the ends of two fabric strips. Pass the tail of Strip B through the slit of Strip A, then thread the opposite end of Strip B through its own slit and pull tight to join strips without bulky knots.

1. The Classic Coiled Braided Cotton Rag Rug

1

Project Overview & Aesthetic Design

A traditional, circular or oval farmhouse braided rug made from three-strand braided strips of woven cotton scraps, stitched together edge-to-edge into a flat, reversible floor mat.

Step-by-Step DIY Execution Guide

  • Cut cotton fabric scraps (old bedsheets or quilting cotton) into 2-inch wide continuous strips.

  • Fold the raw outer edges of three strips inward toward the center to conceal frayed edges, securing the top with a safety pin.

  • Braid the three strips into a tight, uniform braid, joining new strips using the no-sew slit-join method as you work.

  • Lay the braid flat on a table, coiling it tightly into a center spiral (for round rugs) or a straight center row (for oval rugs).

  • Thread a bent-tip upholstery needle with heavy-duty carpet thread.

  • Lace the needle back and forth horizontally through the hidden inner loops of adjacent coils to bind them flat.

  • Continue coiling and stitching until the rug reaches 36 inches in diameter, tapering the final braid tail into the underside seam.

Pro Crafter Tip

Keep the coiling rug completely flat on a table while stitching; sewing a braided rug on your lap causes the edges to cup and form an unwanted bowl shape.

2. Upcycled Denim Strip Woven Frame Loom Rug

2

Project Overview & Aesthetic Design

A durable, flat-weave rectangular runner made from strips of recycled blue jeans woven across a sturdy cotton warp on a simple DIY wooden frame loom.

Step-by-Step DIY Execution Guide

  • Build a simple rectangular frame loom ($24times36$ inches) using 1×2 pine boards, hammering finishing nails spaced 0.5 inches apart along the top and bottom rails.

  • String strong cotton rug warp yarn vertically between the nails with firm, even tension.

  • Cut old denim jeans into 1-inch wide horizontal strips (mix light wash, indigo, and dark navy).

  • Using a wooden shuttle or your fingers, weave the denim strips horizontally over-and-under the warp strings in a plain weave pattern.

  • Pack each row down tightly using a wide wooden weaving comb or fork.

  • Weave until the loom is full, cut the warp strings from the nails in pairs, and tie secure surgeon’s knots to create a fringed edge.

Pro Crafter Tip

Alternate light and dark denim strips every two rows to create a classic, textured chambray checkerboard pattern across the runner.

3. Plush T-Shirt Yarn Latch-Hook Shag Mat

3

Project Overview & Aesthetic Design

An ultra-soft, high-pile shaggy bedside mat made by knotting short loops of cotton jersey t-shirt remnants into a heavy-duty mesh rug canvas.

Step-by-Step DIY Execution Guide

  • Cut cotton jersey t-shirt scraps into uniform strips measuring $0.75times4$ inches.

  • Pull the cut strips firmly to make the jersey edges curl naturally into clean, tubular strands.

  • Lay a $20times30$-inch sheet of 3.75-mesh latch-hook rug canvas flat on your table.

  • Slide a latch hook tool beneath a canvas grid bar, hook the folded center of a jersey strip, pull it through the grid, and catch both tail ends through the loop to lock a classic latch-hook knot.

  • Work in continuous horizontal rows across the canvas, packing rows closely for maximum plush density.

  • Fold the 1-inch raw canvas perimeter borders to the back and whip-stitch closed with yarn.

Pro Crafter Tip

Sort your jersey strips by color (e.g., shades of cream, blush, and sage) to create a soft ombré landscape or geometric chevron pattern across the shag mat.

4. Amish Knot “Toothbrush” Oval Scrap Rug

4

Project Overview & Aesthetic Design

An authentic heirloom technique where fabric strips are interlocked using a modified needle (historically made from a carved toothbrush handle), creating a dense, structural rug with zero sewing.

Step-by-Step DIY Execution Guide

  • Cut woven cotton remnants into 1.5-inch wide strips.

  • Thread a strip through a wooden or bone rug needle (or a modified plastic bodkin).

  • Form a base chain of 10 to 15 interlocking blanket-stitch loops to establish the center spine.

  • Work in continuous rounds around the spine: insert the needle into the edge loop of the previous row, wrap the working strip around the needle, and pull through to lock an Amish half-hitch knot.

  • Add two knots into end-curve loops as you turn corners to prevent the edges from curling upward.

  • Continue knotting rounds until the rug reaches 40 inches in length, burying the final tail inside the inner stitches.

Pro Crafter Tip

The Amish knot creates a reversible, thick rug that is structurally locked at every stitch and will never unravel in the washing machine.

5. Locker-Hooked Canvas Scrap Wool & Cotton Trivet Rug

5

Project Overview & Aesthetic Design

A structured, non-stretch textile rug crafted by pulling loops of colorful fabric scraps through canvas mesh using a locker hook needle, permanently locked in place with a hidden twine core.

Step-by-Step DIY Execution Guide

  • Cut cotton or lightweight wool scraps into 0.5-inch wide ribbons.

  • Thread a metal locker hook’s eye with sturdy cotton warping cord or jute twine.

  • Lay a piece of 3.75-mesh rug canvas over your working surface.

  • Insert the locker hook into a canvas square from the front, grab a loop of the fabric strip from underneath, and pull it to the surface (approx. 0.5 inches high).

  • Pull up a row of 6 to 8 fabric loops onto the shaft of the hook.

  • Pull the entire locker hook through the loops, drawing the hidden locking twine through the center of the loops to lock them permanently.

  • Continue working in tight rows across the canvas, finishing the canvas edges with folded cotton binding tape.

Pro Crafter Tip

Locker hooking holds its shape under heavy foot traffic without stretching, making it ideal for kitchen sink runners.

6. Giant Jumbo Crochet Scrap Oval Floor Mat

6

Project Overview & Aesthetic Design

A thick, squishy textured rug made by crocheting rolled t-shirt yarn with an oversized wooden crochet hook (Size S/19mm or larger) in clean single-crochet rounds.

Step-by-Step DIY Execution Guide

  • Prepare 600 yards of continuous 1-inch t-shirt yarn rolled into large center-pull cakes.

  • Using a 20mm wooden crochet hook, chain 12 stitches to form the center foundation row.

  • Single crochet down the chain, working 3 single crochets into the end stitch to curve around the corner.

  • Continue working single crochets along the opposite side of the chain.

  • Work in continuous spiral rounds, increasing by 3 stitches at each rounded end on every round to keep the oval completely flat.

  • Work until the mat measures $28times42$ inches, slip-stitch the final loop, and weave in the tail.

Pro Crafter Tip

If the edges begin to ruffle, you have too many increase stitches; if the rug edges curl upward into a bowl, add more increases around the rounded ends.

7. Shaggy Raggy Canvas Knot Floor Mat

7

Project Overview & Aesthetic Design

A zero-sew, tactile rag rug made by hand-knotting short scraps of mixed woven cotton, linen, and lace strips through a rubber non-slip waffle rug pad.

Step-by-Step DIY Execution Guide

  • Cut a non-slip rubberized waffle rug pad to $24times36$ inches.

  • Cut assorted fabric scraps (cotton prints, linen, denim, and lace) into $1times5$-inch strips.

  • Take a fabric strip, push one end through a grid hole in the rubber mat, and push the other end through the adjacent hole.

  • Tie the two ends together on the top side in a firm double overhand knot.

  • Repeat across every hole in the grid, mixing fabric textures and prints for an eclectic, bohemian shag finish.

  • Trim any stray extra-long strips with scissors to create an even, level pile.

Pro Crafter Tip

The rubber mesh base provides built-in non-skid floor grip, eliminating the need for a separate under-rug pad.

8. Quilted Scrap Strip “Jelly Roll” Spiral Rug

8

Project Overview & Aesthetic Design

A modern, tailored floor mat inspired by quilting techniques. 2.5-inch fabric strips are folded over strips of cotton batting/clothesline and joined with a wide sewing machine zigzag stitch.

Step-by-Step DIY Execution Guide

  • Cut fabric scraps into 2.5-inch strips and sew the short ends together diagonally to create one long continuous ribbon.

  • Cut 2.25-inch wide strips of 100% cotton batting (or use pre-cut cotton batting rolls).

  • Center the batting inside the fabric strip, fold both raw fabric edges inward, and fold in half to enclose the batting completely.

  • Feed the wrapped strip through your sewing machine, stitching down the center with a straight stitch to create a padded rope.

  • Coil the padded rope on a flat table into an oval or round shape.

  • Join adjacent coils using a heavy-duty denim needle and a wide, dense zigzag stitch ($W = 5.0text{ mm}, L = 2.0text{ mm}$), keeping the rug completely flat.

Pro Crafter Tip

Use an extension table on your sewing machine to support the weight of the flat rug coils as the diameter expands.

9. Peg Loom Woven Thick Fleece & Wool Hearth Rug

9

Project Overview & Aesthetic Design

An ultra-chunky, thick hearth rug woven on a wooden peg loom using unspun fleece, wool sweater strips, and flannel remnants to create a heavy woven floor mat.

Step-by-Step Execution Guide

  • Drill a row of 0.5-inch holes spaced 1 inch apart along a 30-inch wooden 2×4 board to create a peg loom.

  • Insert 0.5-inch wooden dowel pegs (each 6 inches tall with a hole drilled through the base) into the board.

  • Thread heavy warp twine through the base hole of each peg.

  • Weave thick strips of fleece and wool scraps over-and-under the upright wooden pegs in a figure-eight weave.

  • Once the pegs are full of woven rows, lift the pegs upward out of the base board; the woven rows will slide off the pegs and settle directly onto the warp strings.

  • Re-insert pegs and continue weaving until the rug reaches 48 inches in length.

  • Tie off the warp cords securely in fringed knots at both ends.

Pro Crafter Tip

Peg loom weaving creates a rug that is twice as thick as standard frame loom rugs, making it ideal for insulating cold tile or hardwood floors.

10. Patchwork Quilted Hexagon Floor Cushion Rug

10

Project Overview & Aesthetic Design

A low-profile floor lounge mat made from English Paper Pieced (EPP) fabric scrap hexagons, padded with high-density batting and quilted with decorative sashiko hand stitching.

Step-by-Step DIY Execution Guide

  • Cut 3-inch cardboard hexagon templates.

  • Wrap fabric scraps around the paper templates, basting the corners with thread.

  • Whip-stitch adjacent hexagons together by hand to form an expansive geometric honeycomb mat ($30times45$ inches).

  • Remove the paper templates and press the patchwork top flat with a steam iron.

  • Layer the patchwork top over a sheet of heavy wool batting and a durable canvas backing fabric.

  • Hand-quilt through all three layers using thick sashiko or embroidery floss in geometric running stitches.

  • Bind the outer edges with a 2-inch wide bias tape cut from scrap denim.

Pro Crafter Tip

English paper piecing allows you to use up tiny, odd-shaped fabric cutoffs that are too small for continuous rag strip rugs.

Project Comparison & Overview

DIY Scrap Rug Project Best Fabric Type Assembly Technique Tool Needed Skill Level Est. Time
Coiled Braided Rug Woven Cotton / Sheets Hand Lacing / Braiding Upholstery Needle Beginner 8–12 Hours
Denim Frame Loom Runner Recycled Denim Jeans Plain Weave Tapestry Wooden Frame Loom Intermediate 6–8 Hours
T-Shirt Latch-Hook Mat Cotton Jersey T-Shirts Latch-Hook Knotting Latch Hook + Canvas Beginner 5–7 Hours
Amish Knot Toothbrush Rug Cotton Prints / Linens Interlocking Half-Hitch Toothbrush Needle Intermediate 10–14 Hours
Locker-Hooked Canvas Rug Mixed Woven / Wool Locker Hook Core Twine Locker Hook Tool Intermediate 8–10 Hours
Jumbo Crochet Floor Mat T-Shirt Yarn (Jersey) Single Crochet Spiral 20mm Crochet Hook Beginner 3–4 Hours
Shaggy Raggy Knot Mat Cotton, Linen, Lace Hand Overhand Knots Rubber Waffle Pad Beginner 4–6 Hours
Quilted Jelly Roll Rug Cotton Scraps + Batting Machine Zigzag Stitch Sewing Machine Intermediate 4–6 Hours
Peg Loom Fleece Hearth Rug Fleece & Wool Sweaters Peg Loom Weaving DIY Peg Loom Advanced 6–8 Hours
Patchwork Hexagon Mat Tiny Cotton Scraps English Paper Piecing Hand Needle + Thread Advanced 12–16 Hours

Common Beginner Mistakes & How to Avoid Them

  • Sewing Braided Rugs on Your Lap: Lacing coils together on an uneven surface forces the outer edges to curl into a bowl. Solution: Always lay the rug completely flat on a wide dining table or hardwood floor while stitching adjacent coils.

  • Mixing Incompatible Fabric Stretches: Braiding stretchy jersey knit directly with stiff woven denim causes irregular tension and lumpy edges. Solution: Group like fabrics together—use all stretchy jersey knits for crochet/latch-hook mats and all rigid woven cottons for braided/Amish knot rugs.

  • Allowing Raw Edges to Fray Excessively: Tearing low-thread-count fabrics on the straight grain produces loose threads that shed over your floor. Solution: Fold raw strip edges inward before braiding, or cut strips on the bias (45-degree angle) to minimize fraying.

  • Skipping Non-Slip Backing Treatments: Lightweight handmade scrap rugs slide easily on smooth hardwood and tile floors. Solution: Paint lines of clear natural latex rug backing (Fiber-Lok) on the underside, or lay the finished rug over a rubberized non-slip pad.

Care & Cleaning Guide for Handmade Scrap Rugs

Rug Construction Washing Method Drying Protocol Maintenance Tip
Braided & Amish Knot Rugs Machine wash cold on delicate cycle inside a mesh bag Lay completely flat on towels in full sun Flip rug over every month for even foot-traffic wear
Woven Frame Loom Rugs Machine wash gentle or hand-wash in a tub Air-dry flat (never machine dry to avoid shrinkage) Re-tighten fringe end-knots after initial wash
Latch-Hook & Shag Mats Shake vigorously outdoors; hand-wash spot stains Air-dry flat over a drying rack Fluff pile with your fingers after drying
Quilted Jelly Roll Rugs Machine wash cold, gentle cycle Reshape and air-dry flat Press lightly with a warm steam iron if edges curl

Similar Posts

Leave a Reply

Your email address will not be published. Required fields are marked *