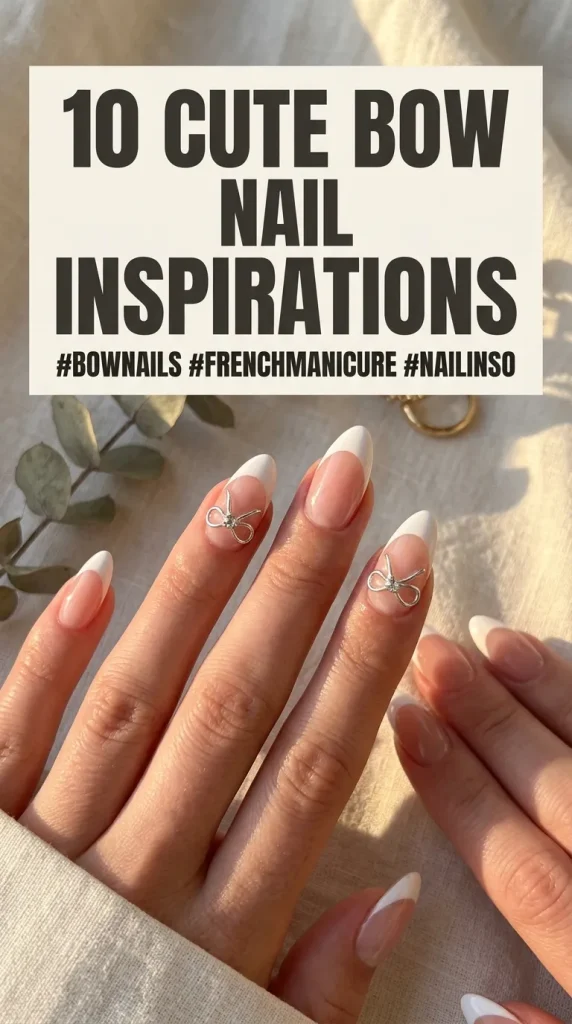
10 Cute Nails Bow Ideas

Adding bows to your nail art is one of the most effective ways to introduce a sweet, coquette-inspired touch to your style. From delicate 3D charms to minimalist painted ribbons, bow designs offer a versatile aesthetic that flatters every nail shape and length. This guide breaks down creative concepts, nail prep essentials, and step-by-step techniques to create high-quality bow nail designs at home or in the salon. You will learn how to select the right color palettes, work with embellishments, and protect your artwork for long-lasting wear. Mastering these methods ensures your manicures remain charming, secure, and impeccably polished.
Why This Idea Is Trending or Useful
Bow nails have surged in popularity across beauty and fashion inspiration boards because they capture the coquette, balletcore, and vintage aesthetics effortlessly. A bow design balances playful charm with subtle elegance, making it easy to style for casual everyday wear or special occasions. The strong DIY appeal comes from the variety of ways to create them: beginners can opt for easy-to-apply 3D resin charms or stickers, while experienced enthusiasts can paint intricate ribbon loops with a fine liner brush. This versatility allows anyone to achieve a high-end, customized look on any budget.
Materials and Preparation
Proper prep work ensures your nail art remains vibrant and intact without premature chipping or peeling. Begin by filing and shaping your nails, gently buffing the surface to remove excess shine and oils, and cleaning the nail plate with a dehydrator or isopropyl alcohol. Key materials include a protective base coat, neutral or colored background polishes, fine-tip nail art liner brushes, dual-ended dotting tools, 3D resin or metal bow charms, nail rhinestone glue or builder gel, and a high-shine or matte topcoat. Investing in quality tools guarantees smooth lines, secure charm placement, and a durable finish.
Creative Bow Nail Ideas
Coquette Pearl and 3D White Bow Nails
Step-by-Step Guide

This design combines soft romanticism with dimensional texture by pairing a milky pink base with 3D accents. Start by applying a protective base coat, followed by two coats of semi-sheer milky pink polish. Once dry, coat the nails with a high-shine gel or lacquer topcoat. Place a small bead of rhinestone glue or builder gel near the center of your accent nail plate, then press a 3D white resin bow charm firmly into place. Using a dotting tool, dab tiny specks of glue around the bow and place small flat-backed pearls along the nail surface. Cure under a UV/LED lamp or allow the glue to set completely, ensuring the edges of the 3D charm are sealed with topcoat to prevent snagging.
Minimalist Fine Line Painted Ribbon Bows
Execution Process

A delicate painted ribbon bow offers an understated, graceful aesthetic suitable for short or natural nails. Prepare your nails with a smooth layer of clear or sheer nude polish to create a clean, minimalist foundation. Dip an ultra-fine detail liner brush into opaque white or soft pink nail polish, removing any excess paint from the bristles. Draw two small, teardrop-shaped loops touching at the center of the nail, then pull two thin, slightly curved tail lines downward to form the ribbon ends. Add a tiny dot of polish in the middle to represent the knot. Finish the look with a clear glossy topcoat to protect the fine lines and seal the design.
Classic French Tips with Red Satin Bow Accents
Setup Method

Infuse classic elegance with a pop of color by pairing crisp French tips with dainty red satin-style bows. Begin by applying a natural nude base coat across all nails. Using a curved smile-line brush or nail vinyls, paint crisp white French tips along the free edges of your fingertips. On the ring finger or index fingernails, use a fine liner brush dipped in rich cherry-red polish to paint a thin, delicate bow right at the intersection of the white tip and nude base. The red accent provides a striking, classic contrast against the clean white tips. Seal all nails with a high-gloss topcoat for a smooth, cohesive finish.
Velvet Cat-Eye Nails with Silver Metal Bows
How to Create

The dimensional shimmer of cat-eye magnetic polish creates a mesmerizing backdrop for modern metallic bow charms. Apply a layer of dark rose or silver magnetic gel polish over a cured base coat. Hover a magnetic wand over the wet polish for a few seconds to pull the shimmer particles into a velvety diagonal line or velvet halo effect, then cure immediately under a UV/LED lamp. Apply a layer of topcoat, then anchor a sleek silver metal 3D bow charm into a bead of builder gel near the cuticle or center of your chosen accent nail. Cure thoroughly to lock the metallic charm tightly into the magnetic shimmer base.
Vintage Black Lace and Dainty Black Bows

How to Make
For a moody, gothic-chic variation, dainty black bows painted over sheer black or nude bases evoke romantic vintage lace. Apply two coats of a sheer nude or light beige polish to create a clear backdrop. Dip a fine liner brush into black gel or acrylic paint to draw small, neat black ribbon bows across one or two accent nails. For added vintage flare, create a delicate black polka dot border or a sheer black “stocking” wash across the neighboring nails using a drop of black polish mixed with topcoat. Seal the complete manicure with a velvety matte topcoat to give the black bows a soft, fabric-like appearance.
Pastel Gradient Gingham with Pink Bows
Step-by-Step Guide

Combine sweet pattern work with cute ribbon accents by pairing a pastel gingham grid with soft pink bow details. Paint your nails with a light cream or white base coat. Using a striping brush and diluted pastel pink or lavender polish, paint thin intersecting horizontal and vertical lines to build a soft gingham picnic pattern. Once the grid sets, use a liner brush and a slightly darker shade of pink to hand-paint a small ribbon bow right in the center of the accent nail. The combination of classic gingham grid lines and dainty bows creates a charming, springtime aesthetic. Apply a glossy topcoat to smooth out the layers.
Glitzy Rhinestone Bow Centerpiece

Execution Process
If you prefer glamour and sparkle, creating a bow motif entirely out of glittering rhinestones delivers maximum eye-catching shine. Apply an opaque nude, soft white, or pale pink background polish across all fingertips. On your accent nail, place a small dab of thick gem glue in the middle. Arrange two larger marquise-shaped (eye-shaped) rhinestones horizontally with their inner points touching to form the main loops of the bow. Place one small round crystal directly in the center for the knot, and line up smaller teardrop or round rhinestones extending downward to form the ribbon tails. Cure under an LED lamp and float a coat of topcoat around the crystal edges to lock them into place.
Cute Baby Pink Jelly Nails with Floating Bows
Setup Method

Jelly polishes offer a translucent, glass-like finish that makes painted bow artwork appear as if it is floating inside the nail. Apply two to three coats of a translucent baby-pink jelly polish, curing or letting each layer dry completely to achieve a squishy, sheer depth. Using an opaque white painting gel or dense acrylic paint, draw simple, soft ribbon bows across different positions on each nail—some near the tip, others near the cuticle. The strong contrast between the opaque white paint and the see-through pink background creates a cute, three-dimensional floating illusion. Top with a super-shiny topcoat to enhance the glass-like effect.
Gold Foil Embossed Baroque Bows
How to Create

Embossed textures paired with metallic gold foil offer a sophisticated, antique-inspired take on traditional bow nail art. Coat your nails in a rich dark shade, such as deep burgundy, forest green, or opaque black, and apply a matte topcoat. Using a clear 3D gel or thick sculpting gel, paint raised, dimensional bow shapes over the matte surface to build a tactile relief pattern. Cure the gel briefly, then press a sheet of gold transfer foil over the raised gel lines to transfer the metallic gold shine exclusively onto the raised bow shapes. Seal the gold-embossed details with a precise application of glossy topcoat over the raised areas while leaving the background matte.
Chromed Silver Bows over Sheer Blush Base
How to Make

Futuristic chrome accents meet sweet coquette elements in this high-shine, trend-setting manicure. Apply two coats of a soft sheer blush or translucent peach polish to keep the background clean and clean-looking. Paint raised 3D ribbon bows using a clear, non-wipe sculpting gel and cure completely under an LED lamp. Using a silicone tool or eyeshadow applicator, rub metallic silver chrome powder vigorously over the raised gel bow shapes until a mirror-like shine develops. Dust away excess powder from the surrounding nude base, then seal the raised chrome bow with a layer of glossy topcoat to maintain a brilliant reflective finish.
Common Beginner Mistakes and How to Avoid Them
Working with bow motifs and 3D charms requires precision to avoid premature wear or messy application. A frequent mistake is using standard topcoat as an adhesive for 3D charms, which lacks the strength needed to hold heavier resin or metal pieces, leading to lost charms within days. Always use dedicated rhinestone glue, builder gel, or sculpting gel to secure physical embellishments. Another common error when painting bows is using a brush loaded with too much polish, which causes the loops to bleed together into an unrecognizable blob. Keep your liner brush lightly coated and flash-cure or let individual loops dry before adding ribbon tails to maintain crisp, defined lines.
Practical Tips for Better Results
Achieving clean, salon-quality bow art relies on proper tool maintenance, steady hand control, and strategic sealing. Anchor your pinky finger on your opposite hand or table surface to stabilize your movement when painting fine ribbon lines. If you struggle with hand-painting symmetrical loops, practice drawing the central knot first, using it as an anchor point to extend equal-sized loops outward. When applying 3D bow charms, cap the tiny gaps underneath the charm edges with a fine detail brush dipped in topcoat or clear gel; this prevents hair, sweater fibers, and debris from catching underneath the embellishment during daily tasks.
Styling, Presentation, or Organization Ideas
Organizing your nail art supplies efficiently ensures a seamless workflow during intricate manicure sessions. Keep 3D bow charms, flat-backed pearls, and rhinestones sorted by color and size in clear compartment storage trays so you can quickly preview options against your base polish. Store fine detail liner brushes horizontally or hanging vertically head-down to prevent brush hairs from bending or fraying. When styling your finished bow manicure for photos or daily wear, pair your nails with dainty stackable rings, lace sleeves, or soft knit textures that highlight the sweet, romantic aesthetic of your nail design.
Budget or Time Planning
Planning your manicure session ensures optimal results without unnecessary rush or unexpected delays. A basic hand-painted bow manicure usually takes thirty to forty-five minutes to complete at home. However, intricate sets involving 3D charms, chrome powders, or multi-layered gel art can take up to ninety minutes. Sourcing a multi-pack of resin or metal bow charms online is extremely budget-friendly, often providing dozens of reusable charm pieces for the cost of a single salon add-on. If working with gel polish, curing each step under a LED lamp speeds up the overall process by eliminating wait times between color layers and fine-line details.
Creative Expansion and Advanced Inspiration
Once you are comfortable with basic bow applications, you can explore advanced mixed-media techniques to elevate your nail sets. Experiment with combining matte backgrounds with high-shine chrome 3D bows, or integrate tiny hand-painted floral bouquets tied together with delicate ribbon bow knots. You can also tailor your bow themes seasonally, such as using red glitter bows for winter holiday sets, pastel pastel ribbons for spring, or translucent iridescent charms for summer beach vacations. Blending different textures—like velvet cat-eye polishes, lace details, and physical pearls—allows you to craft personalized, high-fashion nail sets that reflect your creative style.
Frequently Asked Questions
How do I make 3D bow charms stay on my nails longer?
To keep 3D bow charms securely attached, use a thick nail glue, builder gel, or gem gel instead of regular topcoat. Apply the adhesive to the nail, press the charm into place, and cure or let it set. Use a thin liner brush to apply topcoat around the base edges of the charm to seal all gaps where hair or clothes could catch.
Can I do cute bow nail art on short natural nails?
Yes, bow nail art looks fantastic on short nails. Fine-line hand-painted bows, micro-stickers, or smaller flat-backed 3D bow charms work best for shorter nail beds because they add detail without crowding or visually shortening the nail.
How do I draw a symmetrical bow on my nails with polish?
Start by painting a tiny dot in the center of the nail to serve as the knot. Draw two small, matching triangle or teardrop loops extending outward from the dot. Finish by pulling two thin, curved lines downward from the center knot to form the ribbon tails, keeping your brush pressure light for clean, crisp lines.
What base colors look best with white bow nail art?
White bow nail art pairs beautifully with soft, translucent base shades like sheer milky pink, nude, blush, and jelly pastel tones. Darker contrasting shades like burgundy, black, or navy blue also make white bows pop for a vintage or gothic-chic look.