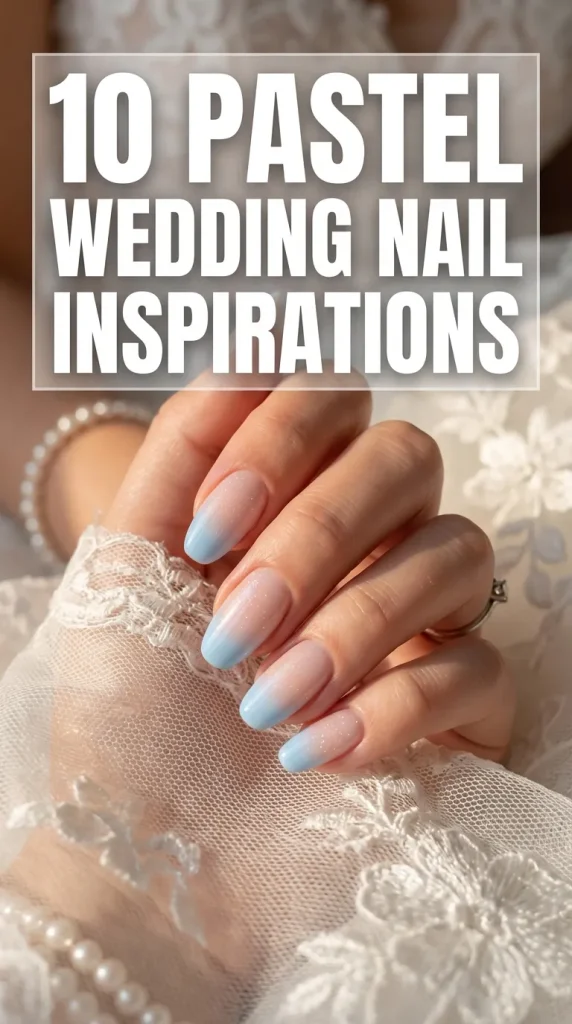
10 Pastel Wedding Nails Ideas

Spread the love

Few beauty details carry as much personal significance or appear in as many photos on your special day as your bridal manicure. From the moment you slip on your robe to get ready, to the bouquet toss, the cake cutting, and the closeup photos of your wedding bands, your hands are under constant spotlight. While classic sheer pinks and traditional French tips will always hold a place in bridal history, modern brides are increasingly embracing a soft, romantic, and modern alternative: pastel wedding nails.

Pastel wedding nails offer the ideal middle ground between timeless bridal traditions and modern personality. Soft hues—such as romantic blush pink, airy buttercup yellow, icy powder blue (“something blue”), dreamy lavender, and delicate sage green—add a whisper of color without competing with your gown or floral arrangements. When combined with sophisticated techniques like pearlescent chrome powders, 3D pearl encapsulation, delicate lace stamping, and subtle ombre blends, pastel manicures transform into wearable bridal art.

Whether you are a bride-to-be curating your wedding mood board, a bridesmaid looking for cohesive party inspiration, or a DIY nail creator preparing for wedding season, this masterclass guide is designed for you. We will walk through why pastel bridal aesthetics are dominating wedding trends, outline every tool and surface prep step required for zero lifting on your big day, and detail 10 step-by-step pastel wedding nail ideas complete with pro application hacks, troubleshooting solutions, and longevity secrets.

Why This Idea Is Trending or Useful

Pastel nail aesthetics have become a staple across wedding mood boards, Pinterest boards, and bridal runways for several compelling reasons:

1. The Modern “Something Blue” & Color Coordination

Incorporating tradition with a modern twist, soft powder blue pastel nails offer an elegant way to include your “something blue.” Additionally, pastel shades can be seamlessly matched to your bridal party dresses, wedding floral palette, or venue decor theme.

2. Flattering Across All Skin Tones & Nail Shapes

Unlike harsh neon or ultra-dark shades, muted pastel tones soften the appearance of the hands, enhancing skin undertones and photograph beautifully under both natural sunlight and indoor venue lighting.

3. Ultimate Versatility Across Bridal Styles

Whether your wedding vibe is a formal black-tie ballroom affair, a bohemian garden party, a coastal beach ceremony, or a minimal modern city hall wedding, there is a pastel design—from chrome finishes to floral accents—that complements your overall bridal look.

Materials, Preparation & Setup Guide

A bridal manicure must withstand endless handshakes, ring exchanges, popping champagne corks, and days of travel into your honeymoon. Achieving long-lasting, picture-perfect results requires professional products and meticulous natural nail prep.

       NATURAL NAIL PREPARATION & ART WORKFLOW
       
[Cuticle Removal] âž” [Surface De-gloss] âž” [Dehydrate & Prime]
                                                │
[Top Coat & Cure] ◄─ [Gel Painting/Art] ◄─ [Base Gel Cure]

Required Supplies Checklist

Prep & Structural Building

  • 180/240-Grit Nail File & Buffer Block: For gentle shaping and surface preparation without thinning the nail plate.
  • Cuticle Pusher & Alcohol Wipes: For removing non-living tissue and degreasing the nail bed.
  • Dehydrator & Acid-Free Gel Primer: Essential bonding agents that prevent premature edge lifting.
  • Rubber Base Coat or Builder Gel (In-a-Bottle): Adds the apex strength and smooth surface needed under light pastel shades.

Soft Pastel Gel Palette & Specialty Finishes

  • Pastel Gel Shades: Blush Pink, Milky Powder Blue, Soft Lavender, Sage Green, Sheer Cream, and Buttercup Yellow.
  • Specialty Products: White Pearl Chrome Powder, Fine Gold Foil Leaf, 3D Sculpting Gel, and Micro Half-Pearls/Rhinestones.
  • Top Coats: High-Gloss No-Wipe Top Coat and Soft Velvet Matte Top Coat.

Precision Fine-Art Tools

  • Liner Brushes: 5mm (micro floral/details), 9mm (French tip arches), and Ombre Sponge/Brush.
  • Dotting Tools & Silicone Applicators: For chrome rubbing, pearl placement, and floral petals.
  • Rhinestone/Pearl Glue Gel: High-viscosity resin for securing 3D pearl or crystal embellishments.

Step-by-Step Preparation Protocol

  1. Shape & De-gloss: File natural nails or gel extensions into a graceful bridal shape (Soft Almond, Oval, and Squoval are highly recommended). Lightly buff the shiny natural nail surface using a 240-grit buffer block.
  2. Dehydrate & Cleanse: Scrub the nail plate clean using a lint-free wipe saturated with 91% isopropyl alcohol. Apply a thin layer of Nail Dehydrator followed by an Acid-Free Gel Primer.
  3. Base Coat Foundation: Apply a thin layer of Rubber Base or Builder Gel, cap the free edge tip, and cure for 60 seconds under a 48W+ UV/LED lamp.

10 Detailed Main Ideas / Concepts

1. The Glazed Pearl Blush (Hailey-Bridal Edition)

Concept Overview & Aesthetic Appeal

Inspired by the viral glazed donut trend, this bridal variation combines a sheer pastel blush-pink base with a luminous white-pearl chrome overlay. It creates a soft, pearlescent glow that reflects sunlight like real silk or Mother-of-Pearl, making it one of the most requested looks for modern brides.

+-----------------------------------------------------------------+
|                    GLAZED PEARL BLUSH LAYOUT                    |
+-----------------------------------------------------------------+
| Base Layer: 2 Coats Sheer Pastel Blush Pink                     |
| Chrome Layer: Non-Wipe Top Coat + Rubbed Pearl White Chrome    |
| Finish: Sealed with Ultra-Glossy No-Wipe Top Coat               |
+-----------------------------------------------------------------+

Step-by-Step Execution Guide

  1. Base Layer: Apply two thin coats of a sheer pastel blush pink gel polish, curing each layer for 60 seconds.
  2. Chrome Prep: Apply a thin, even coat of non-wipe top coat and cure for 30 seconds (curing time is crucial for chrome adhesion).
  3. Pearl Chrome Application: Using a soft silicone tool or eyeshadow sponge, rub white pearl chrome powder over the cured top coat until a smooth, glowing pearl finish appears.
  4. Dust & Cap: Gently dust away excess powder with a soft fan brush. Apply a thin layer of clear builder gel or base coat to cap the chrome.
  5. Final Top Coat: Seal with a glossy no-wipe top coat and cure for 60 seconds.

Pro Styling & Application Tips

  • Preventing Chrome Peeling: Always seal chrome powder with a thin layer of clear rubber base coat before applying your final top coat. This prevents the chrome from rubbing off along the free edge during the wedding weekend.

2. “Something Blue” Micro-French & Pearls

Concept Overview & Aesthetic Appeal

A subtle nod to the age-old bridal tradition! This design replaces traditional white French tips with ultra-fine powder-blue pastel arches, anchored at the cuticle bed with delicate micro-pearl accents over a sheer milky base.

Step-by-Step Execution Guide

  1. Milky Base: Apply two coats of a sheer milky-white or sheer nude pink base gel; cure for 60 seconds.
  2. Micro-French Line:
    • Dip a 9mm fine liner brush into opaque pastel powder-blue gel paint.
    • Draw an ultra-thin, delicate arch along the free edge tip of each nail. Keep the line under 1.5mm thick for an elegant, elongated look. Cure 30s.
  3. Pearl Placement:
    • Place a tiny dot of gem glue in the center of the cuticle line on accent nails.
    • Press a 1mm flat-back micro-pearl into the glue.
  4. Finish: Cure for 60 seconds and cap with a high-shine glossy top coat.

Pro Styling & Application Tips

  • Ultra-Thin Micro Arches: Keep very little product on the tip of your liner brush when drawing micro-French lines to ensure the arch stays whisper-thin and uniform across all ten fingers.

3. Pressed Botanical Garden Sage & White Florals

Concept Overview & Aesthetic Appeal

Perfect for outdoor, garden, or bohemian weddings. This romantic concept features a muted pastel sage green base accented with delicate hand-painted white wild botanicals, gold leaf flecks, and subtle green leaves.

Step-by-Step Execution Guide

  1. Pastel Sage Base: Apply two coats of creamy pastel sage green gel polish; cure 60s per layer.
  2. Gold Foil Accents: Press small specks of gold leaf foil onto the sticky layer of the ring and middle fingers.
  3. Hand-Painted Florals:
    • Using a 5mm detail brush and opaque white gel paint, draw tiny 5-petal wild flowers and delicate stem tendrils drifting across the nail plate.
    • Add micro-dots of gold gel paint to the center of each flower using a fine dotting tool.
  4. Finish: Seal with a velvet matte top coat for a soft watercolor feel, or a glossy top coat for garden brilliance.

Pro Styling & Application Tips

  • Dimensional Leaves: Flash cure your white flower petals for 5 seconds before adding green stem details so the colors don’t bleed together into a soft blur.

4. Soft Lavender & Opal Iridescence

Concept Overview & Aesthetic Appeal

Dreamy, fairytale-inspired, and romantic. This look features a translucent pastel lavender base topped with crushed opal film fragments that shift color from soft violet to pink and ice blue as your hands catch the light.

+-----------------------------------------------------------------+
|                  LAVENDER OPAL LAYER STRUCTURE                  |
+-----------------------------------------------------------------+
| [Base]: Translucent Pastel Lavender / Soft Lilac                |
| [Effect Layer]: Iridescent Opal Flakes / Mylar Film Fragments   |
| [Structure]: Builder Gel Overlay to smooth crushed film texture|
+-----------------------------------------------------------------+

Step-by-Step Execution Guide

  1. Lavender Base: Apply two thin layers of sheer pastel lavender gel polish; cure 60s.
  2. Opal Placement:
    • Apply a thin, uncured layer of clear base coat.
    • Press flat, tiny crushed iridescent opal film pieces onto the wet gel using a wax pencil or dotting tool.
    • Flash cure for 15 seconds to lock the opal flakes flat against the nail curve.
  3. Smoothing Overlay: Apply a thin layer of clear builder gel over the opal flakes to ensure the nail surface is completely smooth.
  4. Final Cure: Top coat and cure for 60 seconds under your LED lamp.

Pro Styling & Application Tips

  • No Raised Edges: Ensure all opal film pieces are kept away from the outer sidewalls and free edge so they remain fully encapsulated under the gel layer without catching on fine dress fabrics or lace veils.

5. Creamy Buttercup & Gold Foil Ombre

Concept Overview & Aesthetic Appeal

Warm, radiant, and cheerful. Ideal for spring and summer weddings, this design features a seamless ombre transition from a sheer nude cuticle bed into a creamy pastel buttercup yellow tip, highlighted with fine 24K gold foil flakes.

Step-by-Step Execution Guide

  1. Nude Foundation: Apply one coat of sheer pink-nude gel polish across all nails; cure 60s.
  2. Ombre Gradient:
    • Sponge pastel buttercup yellow gel onto the upper half of the nail using a mini gradient sponge.
    • Tap gently at the transition line to diffuse the yellow into the nude base. Cure 30s.
    • Repeat with a second sponge layer for full yellow tip opacity.
  3. Gold Leaf Accents: Dab small fragments of gold foil leaf along the ombre transition line.
  4. Top Coat: Apply a glossy top coat, self-level for 5 seconds, and cure for 60 seconds.

Pro Styling & Application Tips

  • Seamless Ombre Blending: Dampen your gradient sponge with a drop of gel cleanser before dipping into polish. A slightly damp sponge diffuses gel smoothly without leaving harsh air bubbles on the nail plate.

6. Bridal Silk Lace & Pastel Pink

Concept Overview & Aesthetic Appeal

A classic homage to bridal gown lace and silk embroidery! Delicate hand-painted or stamped white lace patterns layer over a soft pastel bridal pink base, creating an intricate textile effect on accent nails.

Step-by-Step Execution Guide

  1. Bridal Pink Base: Apply two coats of pastel soft pink gel polish; cure for 60 seconds.
  2. Lace Stamping or Freehand:
    • Stamping Method: Apply white stamping gel to a fine bridal lace steel plate, scrape excess, roll with a stamper, and transfer the lace pattern directly onto the accent nail.
    • Freehand Method: Draw intricate criss-cross mesh lines and micro-dot arches using a 5mm detail brush and white painting paste.
  3. Pearl Border: Place tiny white micro-pearls along the cuticle edge of the lace accent finger using gem glue.
  4. Sealing: Cap with a soft-touch velvet matte top coat to give the lace a realistic, soft fabric texture.

Pro Styling & Application Tips

  • Non-Wipe Painting Paste: When painting freehand lace lines, use non-wipe white gel painting paste. Its thick viscosity prevents fine lace lines from running or losing their sharp detail.

7. Minimalist Pastel Aura Vows

Concept Overview & Aesthetic Appeal

Contemporary, ethereal, and chic. Designed for the modern minimalist bride, this concept features a soft aura circle of pastel peach or powder blue glowing softly from the center of a sheer milky-white nail.

+-----------------------------------------------------------------+
|                    PASTEL AURA COLOR PALETTE                    |
+-----------------------------------------------------------------+
| Base Tone: Sheer Milky Coconut White                            |
| Center Aura: Soft Pastel Peach / Powder Blue / Lilac Mist      |
| Accents: Optional Micro Gold Starbursts or Clear Crystals       |
+-----------------------------------------------------------------+

Step-by-Step Execution Guide

  1. Milky White Base: Apply two coats of semi-sheer milky white gel; cure for 60 seconds.
  2. Aura Gradient:
    • Using a mini airbrush tool or an aura sponge, spray/blend a soft circle of pastel peach gel in the exact center of the nail plate.
    • Keep the edges soft and diffused so it glows gradually outward. Cure 30s.
  3. Center Accent: Place a single tiny clear Swarovski crystal in the very center of the aura cloud on the ring finger.
  4. Top Coat: Seal with a crystal-clear high-gloss top coat and cure for 60 seconds.

Pro Styling & Application Tips

  • Airbrush Alternative: If you don’t own an airbrush machine, use a damp round eyeshadow sponge to tap a small circle of pastel gel onto the nail, blending in circular motions from the center outward.

8. Something Old, Something New 3D Pearl Cascades

Concept Overview & Aesthetic Appeal

Opulent, glamorous, and heirloom-inspired. Designed for brides wearing pearl-embellished gowns or vintage jewelry, this set features varying sizes of flat-back pearls cascading down a sheer pastel blush base.

Step-by-Step Execution Guide

  1. Base Layer: Paint all nails with a sheer pastel blush or nude-pink builder gel; cure 60s.
  2. Pearl Cascade Arrangement:
    • Apply a line of thick rhinestone glue resin diagonally across the ring and thumb nails.
    • Arrange flat-back pearls in graduating sizes (3mm near the cuticle, down to 1mm near the tip).
    • Fill small gaps between pearls with mini gold micro-caviar beads.
  3. Curing: Cure under an LED lamp for 90 seconds to lock the 3D pearl structure in place.
  4. Sealing: Use a fine detail brush to trace top coat neatly around the base of each pearl without covering their rounded tops.

Pro Styling & Application Tips

  • Preserving Pearl Luster: Never paint top coat directly over the top of imitation pearls! Top coat can cause synthetic pearl coatings to peel or lose their delicate luster over time.

9. Coastal Sea-Glass Pastel Blue & Gold Wave

Concept Overview & Aesthetic Appeal

Ideal for beach, oceanfront, or tropical destination weddings. This design replicates the frosted, translucent look of sea glass using pastel turquoise-blue gel, matte finishes, and fluid 3D gold chrome wave lines.

Step-by-Step Execution Guide

  1. Sea-Glass Base: Apply one thin layer of jelly pastel sea-foam blue polish to create a translucent glass effect; cure 60s.
  2. Matte Texture: Apply a velvet matte top coat over the blue base and cure for 60 seconds to achieve the frosted sea-glass finish.
  3. 3D Gold Chrome Wave:
    • Using clear non-wipe 3D sculpting gel, paint smooth, fluid wave lines sweeping across the nail surface. Cure 30s.
    • Rub gold chrome powder onto the raised 3D wave lines until shiny and metallic.
  4. Finish: Dust away excess chrome. Carefully seal only the gold chrome wave lines with a detail brush dipped in glossy top coat.

Pro Styling & Application Tips

  • Contagious Chrome Control: Applying chrome over a matte base prevents loose chrome dust from sticking to unwanted areas, ensuring your gold waves remain crisp against the frosted blue background.

10. Tuscan Vineyard Olive & Soft Pistachio

Concept Overview & Aesthetic Appeal

Inspired by destination weddings in Italy, Provence, or wine country. Soft pastel pistachio and olive green tones pair with delicate white olive branch paintings and gold leaf accents for an organic, earthy elegance.

+-----------------------------------------------------------------+
|                   TUSCAN VINEYARD PALETTE & ART                 |
+-------------------+--------------------+------------------------+
| BASE COLOR        | ART ELEMENTS       | FINISH                 |
+-------------------+--------------------+------------------------+
| Pastel Pistachio  | White Olive Leaves | Semi-Matte Satin or    |
| Soft Muted Cream  | Gold Leaf Flecks   | High-Gloss Mirror      |
+-------------------+--------------------+------------------------+

Step-by-Step Execution Guide

  1. Pastel Pistachio Base: Apply two coats of pastel pistachio green polish across index, pinky, and thumb nails; cure 60s.
  2. Accent Background: Apply a warm cream nude base on the middle and ring fingers; cure 60s.
  3. Olive Branch Art:
    • Using a 5mm detail liner brush and white painting gel, paint a sweeping, delicate olive branch vine down the cream accent nails.
    • Add tiny oval leaf shapes along the stem line.
  4. Gold Accents: Press small specks of gold leaf foil around the olive branches.
  5. Sealing: Apply a glossy top coat and cure for 60 seconds under your LED lamp.

Pro Styling & Application Tips

  • Subtle Muted Greens: If a pastel pistachio shade feels too bright, mix a drop of sheer nude gel into your pastel green polish to soften the intensity into an earthy tone.

Common Beginner Mistakes & How to Avoid Them

Bridal nails leave no room for error. Working with sheer pastel shades, chrome powders, and 3D embellishments presents technical challenges that can impact durability if not handled correctly:

+---------------------------------------------------------------------------------------------------+
|                                COMMON BEGINNER MISTAKES & SOLUTIONS                               |
+----------------------------------+----------------------------------+-----------------------------+
| MISTAKE                          | CONSEQUENCE                      | EASY PREVENTATIVE SOLUTION  |
+----------------------------------+----------------------------------+-----------------------------+
| 1. Streaky Pastel Application    | Uneven color bands, shadow lines | Use builder gel base first; |
|                                  | visible in ring photos           | apply 2-3 paper-thin coats  |
+----------------------------------+----------------------------------+-----------------------------+
| 2. Unsealed Chrome Edges         | Chrome rubs off along edges,     | Seal chrome with rubber base|
|                                  | exposing bare color underneath   | before applying final top   |
+----------------------------------+----------------------------------+-----------------------------+
| 3. Snagging 3D Pearl Borders     | Pearls pop off during gown       | Trace builder gel around    |
|                                  | changes; catches on lace veils   | pearl bases to form a ramp  |
+----------------------------------+----------------------------------+-----------------------------+
| 4. Getting Gel on Cuticle Skin   | Edge lifting within 48 hours;    | Maintain a 1mm gap from skin|
|                                  | ruins manicure before wedding    | and clean before curing     |
+----------------------------------+----------------------------------+-----------------------------+

1. Streaky Application of Pastel Gel Polishes

  • The Error: Applying thick layers of pastel gel polish in an attempt to hide streaks in a single coat.
  • Why It Kills Your Set: Pastel gels contain dense white pigments that self-level slowly. Applying them thickly causes uneven curing, wrinkling, or noticeable shadow bands in ring photos.
  • The Solution: Apply a self-leveling builder gel base coat first to create a perfectly flat canvas. Then apply pastel colors in two to three paper-thin layers, allowing 5 seconds for each layer to self-level before placing your hand in the lamp.

2. Chrome Powder Rubbing Off at the Tips

  • The Error: Applying top coat directly over pearl chrome powder without a protective bonding layer underneath.
  • Why It Kills Your Set: Top coat struggles to adhere directly to slick chrome powder, causing the metallic finish to chip or peel at the tips within 24 to 48 hours.
  • The Solution: Always apply a thin coat of clear rubber base coat or builder gel over cured chrome powder, ensuring you cap the free edge before applying your final top coat.

3. Pearl Embellishments Snagging on Lace Veils and Gowns

  • The Error: Sticking 3D pearls onto the nail surface with standard top coat.
  • Why It Kills Your Set: Top coat lacks the depth to secure 3D charms. Sharp borders remain underneath the pearls, catching on delicate tulle, lace veils, or dress silk during gown changes.
  • The Solution: Use thick rhinestone resin glue to secure pearls. Once set, trace around the base of each pearl with a detail brush dipped in builder gel to create a smooth, catch-free slope.

4. Flooding Cuticle Borders

  • The Error: Painting polish too close to the cuticle line, allowing liquid gel to pool on surrounding skin.
  • Why It Kills Your Set: Cured gel on skin breaks away as your natural nails grow, creating lifting gaps that moisture and oils can enter, ruining the set before the ceremony.
  • The Solution: Keep a strict 1mm gap between your gel polish and the cuticle skin. Wipe away any accidental skin contact with an alcohol-soaked brush before curing under the lamp.

Pro Tips, Maintenance & Longevity Strategies

To keep your bridal set looking pristine from your rehearsal dinner through your honeymoon, follow these professional care protocols:

1. Schedule Your Nail Appointment 2 to 3 Days Before the Wedding

Book your bridal nail appointment 48 to 72 hours before your wedding day. This ensures your nails look fresh without any visible growth, while giving you time to adapt to new nail lengths or 3D embellishments.

2. Daily Cuticle Hydration (Oil Selection Matters)

Apply a high-quality jojoba-based cuticle oil twice daily leading up to and after your wedding. Jojoba oil penetrates deep into the natural nail bed, keeping the gel coating flexible and resistant to chipping.

  • Important Bridal Tip: Use clear, uncolored cuticle oil in the 48 hours leading up to your ceremony. Deeply tinted yellow or pink oils can temporarily stain light pastel or white French tips!

3. Protect Your Hands During Wedding Setup

Carrying boxes of venue decor, adjusting floral arrangements, and opening luggage tabs can chip or stress nail tips. Wear fitted cotton gloves during setup tasks, and use the pad of your fingers—never your nail tips—when opening tabs or boxes.

4. Honeymoon Maintenance Strategy

Pack a small emergency bridal nail kit in your honeymoon bag containing:

  • A mini 240-grit nail file (to smooth any accidental catches).
  • Clear gel top coat or quick-dry regular top coat (for emergency touch-ups).
  • Pre-cut alcohol prep wipes (to clean away sunscreen dullness from glossy top coats).

Styling, Presentation & Accessory Pairings

Your bridal manicure should harmonize with your wedding rings, dress details, bouquet flowers, and overall event aesthetic.

+-----------------------------------------------------------------+
|                  BRIDAL STYLING & PAIRING GUIDE                 |
+-------------------+--------------------+------------------------+
| PASTEL SHADE      | METAL & RINGS      | BOUQUET FLOWERS        |
+-------------------+--------------------+------------------------+
| Blush Pink        | Rose Gold / Platinum| Peonies, Garden Roses  |
| Powder Blue       | White Gold / Silver | Hydrangeas, Delphinium |
| Sage Green        | Yellow Gold        | Eucalyptus, Olive Leaf |
| Buttercup Yellow  | Yellow Gold        | Sunflowers, Daisies    |
+-------------------+--------------------+------------------------+

Matching Metal Settings to Pastel Tones

  • Platinum & White Gold: Pairs exceptionally well with icy Powder Blue, Soft Lavender, and Glazed Pearl Blush shades.
  • Yellow Gold: Complements Tuscan Sage, Buttercup Yellow, and warm Creamy Ombre palettes.
  • Rose Gold: Beautifully enhances Blush Pink, Peach Aura, and Champagne Pearl designs.

Coordinating with Wedding Florals

  • Blush & Peony Bouquets: Accentuate your floral bouquet by choosing Glazed Pearl Blush or Silk Lace designs.
  • Eucalyptus & Wildflower Greens: Match natural greenery with Sage Botanical or Olive Branch motifs for a cohesive aesthetic.
  • White & Blue Coastal Arrangements: Complement blue hydrangeas or coastal venue vibes with a “Something Blue” Micro-French set.

Photography & Hands-in-Frame Poses

  • The Ring Exchange Closeup: Keep your fingers relaxed and slightly curved when showing off your wedding bands to avoid skin tension across the knuckles.
  • The Bouquet Hold: Place your dominant hand gently across the front stems of your floral bouquet, slanting your fingers at a 45-degree angle toward the camera lens to highlight your nail art alongside the flowers.

Budgeting & Time Planning

Planning your time and beauty budget ahead of time guarantees a seamless, stress-free experience during your wedding week.

ParameterDIY at HomeProfessional Salon Appointment
Initial Investment$60 – $120 (Starter kit & pastel gels)$0
Cost Per Set$5 – $10 (Using kit inventory)$75 – $160+ (Varies by 3D/chrome detail)
Time Commitment2 – 3.5 Hours (Includes careful prep)1.5 – 2 Hours
Skill RequiredIntermediate control & steady handMaster nail technician
Value AssessmentGreat for Practice SetsRecommended for Big Day (Zero stress)

Budget Breakdown Strategy

  • Pre-Wedding Trial Set ($50 – $80): Book a trial appointment with your nail technician 3 to 4 weeks before the wedding (ideally paired with your dress fitting or bridal shower). This lets you test the exact pastel shade, shape, and chrome finish against your skin tone and gown fabric.
  • Wedding Set ($75 – $160): Your final wedding set, applied 2 to 3 days before the ceremony, ensuring flawless application and stress-free longevity.

Creative Expansion & Advanced Inspiration

If you want to personalize your pastel bridal set further, consider these creative twists:

1. Monogrammed Cuticle Vows

Paint subtle, micro-fine initials of you and your partner’s first names on your thumb or ring finger cuticles using delicate gold chrome gel paint.

2. Reception Quick-Change Effects

Apply a subtle glow-in-the-dark top coat over your pastel lavender or blue manicure. Your nails will look understated and traditional during daylight vows, then illuminate under reception dance floor lighting!

Frequently Asked Questions (FAQs)

Q1: How far in advance of my wedding should I get my nails done?

The ideal window is 2 to 3 days before your wedding ceremony. This ensures your cuticle area looks clean with no visible nail growth, while giving you ample time to settle into your nail length before handling your gown and veil.

Q2: What nail shape is most flattering for bridal photography?

Soft Almond and Oval shapes are universally flattering for bridal photos. They visually elongate the fingers, soften the knuckle area, and frame wedding bands gracefully without creating sharp corners that might catch on fine dress fabrics.

Q3: Should I match my toes to my pastel wedding nails?

While exact matching isn’t required, your pedicure should belong to the same color family. If you wear a detailed pastel blue or sage design on your hands, opt for a clean, complementary sheer blush or soft neutral tone on your toes for an effortless look.

Q4: Can I achieve a long-lasting pastel bridal set on natural nails without extensions?

Yes! You can achieve strong, long-lasting results on natural nails by using a Structured Builder Gel (BIAB) or Rubber Base overlay. This adds protective strength and a smooth surface, preventing natural nails from breaking or bending under gel polish.

Similar Posts

  • 10 Wheelchair Ramps Ideas

    Spread the love

    Spread the loveCreating an accessible home is more than just a necessity—it’s a way to enhance independence, comfort, and safety for those with mobility challenges. One of the most important additions to any accessible home is a wheelchair ramp. Whether you’re looking to improve accessibility for yourself, a family member, or a guest, a well-designed…

  • 10 Small Wedding Ideas

    Spread the love

    Spread the loveDesigning an intimate, smaller-scale wedding—often referred to as a micro-wedding or elopement celebration—requires an intentional focus on spatial engineering, curated detailing, and guest comfort. Shifting away from expansive, chaotic spaces, a small wedding allows couples to transform tight residential footprints, private restaurant alcoves, or hidden natural clearings into highly tailored environments. This comprehensive…

Leave a Reply

Your email address will not be published. Required fields are marked *