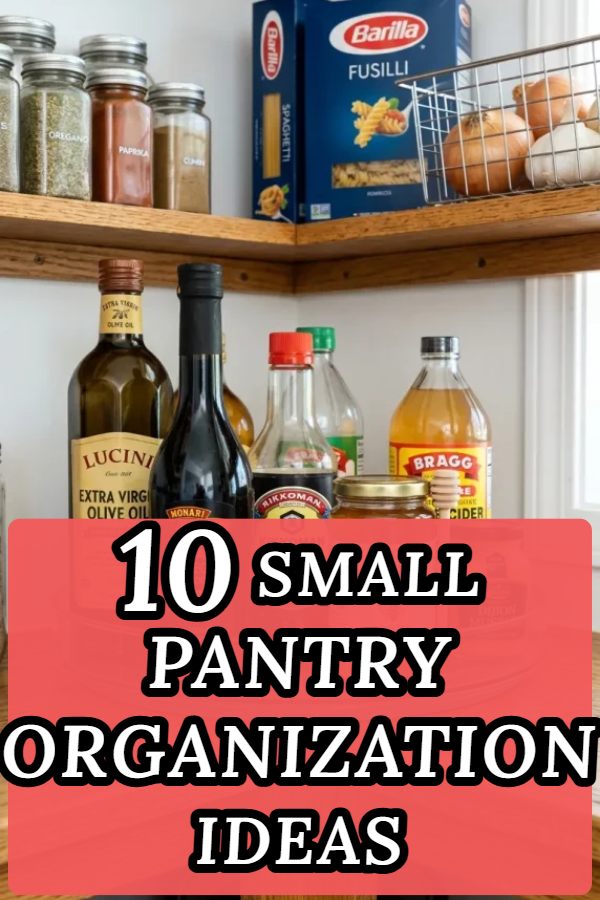
10 Small Pantry Organization Ideas

Spread the love

Introduction

Organizing a small pantry or shallow kitchen cabinet requires maximizing every vertical inch and hidden spatial void. When shelf space is limited, food items—such as canned goods, dry baking staples, snack bags, and spice jars—can easily clutter shelves, leading to expired food, duplicate purchases, and daily meal prep friction.

The key to sustainable small pantry organization lies in clear visibility, vertical stacking, and zone-based decanting: converting deep shelf voids, cabinet door backs, and floor spaces into accessible, labeled storage hubs. This comprehensive guide details 10 high-efficiency small pantry organization ideas across various budgets and layouts. You will learn actionable techniques for selecting airtight canisters, mounting damage-free door racks, choosing multi-tier turntables, and maintaining an organized kitchen inventory.

Key Rules & Spatial Preparation

Before buying containers and organizational bins, follow these foundational preparation steps:

  • Purge & Categorize: Empty the pantry completely. Toss expired cans, stale dry goods, and half-empty boxes. Group remaining items into clear functional categories: Baking Staples, Dinner Prep/Grains, Breakfast/Cereal, Snacks, Canned Goods, and Baking Supplies.
  • Measure Shelf Depth & Height: Measure exact shelf depth, height clearance between tiers, and door frame clearances before purchasing bins or door racks.
  • Decant into Uniform Containers: Transferring bagged dry goods (flour, sugar, rice, pasta) into uniform clear airtight canisters eliminates bulky commercial packaging and keeps pests out.
  • Follow the “First-In, First-Out” Rule: Place newer groceries behind older items so ingredients get used before expiring.

Idea 1: Clear Airtight Canisters with Uniform Minimalist Labels

Concept and Design Overview

Bulk cardboard boxes and plastic food bags consume space while hiding remaining ingredient quantities. Decanting dry baking staples (flour, sugar, oats, rice, pasta) into uniform, stackable clear acrylic or glass airtight canisters maximizes shelf depth and height.

Square or rectangular canisters stack flush against one another, eliminating dead air space caused by round jars. Clear walls allow you to monitor food levels at a glance. Applying waterproof minimalist labels creates an organized visual look. The color palette features crystal-clear acrylic, white or bamboo lids, and black typography labels.

+-------------------------------------------------------------+
|              SMALL PANTRY UPPER SHELF                       |
|                                                             |
|   +-------------------+  +-------------------+              |
|   | CLEAR ACRYLIC CAN |  | CLEAR ACRYLIC CAN |              |
|   | [Flour - 4 lbs]   |  | [Sugar - 4 lbs]   |              |
|   +-------------------+  +-------------------+              |
|   +-------------------+  +-------------------+              |
|   | Stacked Canister  |  | Stacked Canister  |              |
|   | [Rolled Oats]     |  | [White Rice]      |              |
|   +-------------------+  +-------------------+              |
|                                                             |
|         [ Flush Stacking Eliminates Dead Space ]            |
+-------------------------------------------------------------+

Step-by-Step Implementation Method

  1. Select Square/Rectangular Canisters: Choose BPA-free acrylic or glass canisters with square bases and silicone airtight locking lids.
  2. Decant Bulk Ingredients: Pour dry goods out of original bags into clean, dried canisters.
  3. Apply Minimalist Labels: Apply waterproof vinyl labels onto the front center of each canister at a uniform height.
  4. Note Expiration Dates: Cut expiration dates or cooking instructions from original packaging and tape them to the underside of canister lids.

Idea 2: Over-the-Door Multi-Tier Steel Wire Rack System

Concept and Design Overview

The back of a pantry door offers substantial vertical storage real estate that often goes completely unused. Installing an over-the-door heavy-duty steel wire rack system converts a plain door into a full-length pantry extension.

Adjustable wire basket tiers hold small, lightweight items like spice jars, oil bottles, foil boxes, pasta sauce jars, and snack pouches. Keeping small items on the door prevents them from disappearing onto deep shelves. The color scheme pairs white or matte black wire baskets, clear glass bottles, and colorful spice labels.

Step-by-Step Implementation Method

  1. Check Door Frame Clearance: Measure distance between the door face and internal shelf edges when closed (requires at least 5 to 6 inches of clearance).
  2. Mount Vertical Track: Hang a heavy-duty vertical steel spine over the top of the door, securing the bottom base with screws or adhesive pads to prevent swinging.
  3. Adjust Basket Heights: Hook wire baskets into track slots, spacing taller baskets at the bottom for oil bottles and shallow baskets at the top for spice jars.
  4. Load by Weight: Place heavy glass jars in lower baskets and lightweight spice containers in upper tiers.

Idea 3: Tiered Expandable Can Risers

Concept and Design Overview

Canned goods stacked flat on pantry shelves quickly block one another from view, making it difficult to see what is stored in the back. Installing 3-tiered expandable step risers elevates back rows higher than front rows, making every can label visible.

Expandable bamboo or plastic step risers adjust horizontally to match your exact shelf width. Stacking cans on steps prevents duplicate buying of ingredients you already own. The color palette pairs natural bamboo or white plastic steps with colorful canned food labels.

       +-------------------------------------------------+
       |           PANTRY CANNED GOODS SHELF             |
       |                                                 |
       |   +-----------------------------------------+   |
       |   | TIER 3 (TOP):   [Tomato Paste] [Beans]  |   |
       |   | TIER 2 (MIDDLE):[Corn Cans]  [Soup]     |   |
       |   | TIER 1 (BOTTOM):[Tuna Cans]  [Olives]   |   |
       |   +-----------------------------------------+   |
       |     (3-Tier Step Riser Makes All Labels Visible)|
       +-------------------------------------------------+

Step-by-Step Implementation Method

  1. Measure Shelf Depth: Ensure your shelf depth is at least 10 to 12 inches to accommodate a 3-tier step riser.
  2. Expand Riser Width: Slide the expandable step riser out to fit your shelf width.
  3. Category Sorting: Group cans by type—vegetables on the left, soups in the center, sauces on the right.
  4. Load Front-to-Back: Place shorter cans on Tier 1 (front step) and taller or duplicate cans on Tiers 2 and 3 (middle and back steps).

Idea 4: Pull-Out Wire & Wooden Basket Drawers

Concept and Design Overview

Fixed deep pantry shelves can cause items stored in the back to become unreachable. Installing retrofitted pull-out sliding drawer baskets on smooth telescoping ball-bearing slides turns deep, dark shelves into fully accessible pull-out trays.

Sliding wire or wooden crate drawers bring the back of the shelf out into the light with a gentle pull. They are particularly effective for storing heavy items like bags of potatoes, onions, flour sacks, and boxed baking mixes. The color scheme features warm wood drawer fronts, silver metal slides, and organized produce.

Step-by-Step Implementation Method

  1. Measure Cabinet Interior: Measure internal cabinet opening width, depth, and vertical shelf clearances.
  2. Mount Sliding Base Rails: Screw heavy-duty ball-bearing drawer slides directly onto existing shelf surfaces or cabinet side walls.
  3. Attach Storage Baskets: Fasten wire or wooden crate storage baskets securely onto sliding rail arms.
  4. Load Heavy Staples: Fill sliding drawers with heavy produce, flour sacks, or boxed meal kits.

Idea 5: 360-Degree Rotating Turntables (Lazy Susans)

Concept and Design Overview

Corner zones and upper pantry shelves are prime spots for items to get lost. Placing 360-degree rotating turntables (Lazy Susans) in corners or on eye-level shelves brings back-row items to the front with a simple spin.

Featuring raised outer rims, turntables prevent bottles from tipping over during rotation. They are ideal for organizing oils, vinegars, condiment bottles, peanut butter jars, and spice containers. The color scheme focuses on clear acrylic, natural bamboo, or white nonskid rubber turntables.

       +-------------------------------------------------+
       |            PANTRY CORNER SHELF                  |
       |                                                 |
       |   +-----------------------------------------+   |
       |   | 360-DEGREE ROTATING LAZY SUSAN          |   |
       |   |  [Olive Oil]  [Vinegar]  [Soy Sauce]    |   |
       |   |  [Honey Jar]  [Hot Sauce]               |   |
       |   +-----------------------------------------+   |
       |   (Brings Deep Corner Items to Front Easily)|   |
       |                                                 |
       +-------------------------------------------------+

Step-by-Step Implementation Method

  1. Select Correct Diameter: Measure shelf depth to select an 11-inch, 12-inch, or 14-inch turntable that spins freely without hitting closed doors.
  2. Position in Corner Void: Set the Lazy Susan in deep pantry corners or center shelves.
  3. Arrange Bottles by Height: Place taller oil and vinegar bottles in the turntable center; arrange shorter condiment jars around outer edges.
  4. Spin to Test: Rotate 360 degrees to verify all bottle necks clear upper shelf bottoms.

Idea 6: Stackable Natural Wire & Wood Open Crate Bins

Concept and Design Overview

When shelf height is generous but fixed, vertical air space above items goes underutilized. Using stackable open-front wire or wooden crate bins allows you to build custom vertical storage towers without installing new shelves.

An open-front “scoop” design lets you reach inside to grab items (like fruit, snack bars, or chip bags) without unstacking bins. Using natural materials introduces warmth to utility pantries. The color palette pairs matte black or copper wire, acacia wood handles, and natural snacks.

Step-by-Step Implementation Method

  1. Measure Vertical Gap: Measure vertical distance between shelves to calculate how many lidded or scoop-front bins can stack safely.
  2. Select Open-Front Bins: Choose stackable wire or wood bins featuring front scoop cutouts and fold-in stacking handles.
  3. Stack Bins Systematically: Stack bins 2 to 3 high on sturdy lower pantry shelves.
  4. Assign Categories: Use bottom bins for heavy root vegetables (potatoes/onions); middle bins for bagged snacks; top bins for bread and wraps.

Idea 7: Under-Shelf Hanging Wire Storage Baskets

Concept and Design Overview

The empty vertical air space underneath solid pantry shelves often goes unused. Under-shelf hanging wire baskets slide directly onto existing shelf boards without tools, creating an instant secondary under-hanging shelf level.

These slide-on wire baskets provide a low-profile spot for flat, lightweight items—such as wrap boxes (aluminum foil, parchment paper, plastic wrap), snack pouches, flatbreads, or kitchen towels. The color palette features white or silver wire grids holding neat paper boxes.

+-------------------------------------------------------------+
|              EXISTING SOLID PANTRY SHELF                    |
|=============================================================|
|   [SLIDE-ON UNDER-SHELF WIRE BASKET]                        |
|   +-----------------------------------------------------+   |
|   | Holds: Foil Boxes, Parchment Paper, Plastic Wrap    |   |
|   +-----------------------------------------------------+   |
|                                                             |
|           [ Main Shelf Surface Remains 100% Usable ]        |
+-------------------------------------------------------------+

Step-by-Step Implementation Method

  1. Check Shelf Thickness: Ensure your solid pantry shelf thickness (typically 3/4 inch) matches the under-shelf basket bracket arm opening.
  2. Slide Arms onto Shelf: Slide the basket’s rubberized support arms directly over the front edge of the shelf.
  3. Load Flat Items: Fill the hanging wire basket with food wrap boxes, sandwich bags, or flat snack packs.
  4. Ensure Door Clearance: Verify the front edge of the basket clears closed pantry doors.

Idea 8: Uniform Spice Drawer/Wall Grid with Matching Jars

Concept and Design Overview

Mismatched grocery store spice bottles of varying shapes and sizes create visual clutter and are hard to organize. Decanting spices into uniform glass jars fitted with matching shaker lids and custom labels transforms spice storage into an organized grid.

Arranging glass spice jars in a shallow drawer on angled tier inserts—or mounting a magnetic spice grid on the wall—makes finding spices fast while cooking. The color palette features clear glass bottles, wooden or bamboo caps, black/white minimalist labels, and vibrant colorful spices.

Step-by-Step Implementation Method

  1. Source Uniform Glass Jars: Purchase a set of 12 to 24 matching 4-oz glass spice bottles with sifter caps and airtight bamboo/metal lids.
  2. Decant Bulk Spices: Transfer spices into uniform jars using a small collapsible silicone funnel.
  3. Apply Minimalist Labels: Apply waterproof category labels onto jar tops (if storing in a drawer) or jar fronts (if storing on a wall rack).
  4. Arrange Alphabetically: Lay jars on an angled drawer insert or wall rack alphabetically for fast meal prep access.

Idea 9: Floor-Level Rolling Produce & Recycle Carts

Concept and Design Overview

The bottom floor level of a pantry often becomes a messy landing pad for heavy items. Installing a heavy-duty rolling cart with lockable caster wheels converts bottom floor space into a mobile storage zone for heavy produce or recycling.

Sliding a rolling wire cart under the bottom shelf keeps heavy bags of potatoes, onions, butternut squash, or beverage cases off the floor while allowing easy rolling access for sweeping and cleaning. The color palette pairs industrial dark metal carts, brown burlap liners, and fresh produce.

       +-------------------------------------------------+
       |           PANTRY BOTTOM FLOOR LEVEL             |
       |                                                 |
       |   +-----------------------------------------+   |
       |   | HEAVY-DUTY ROLLING WIRE CART            |   |
       |   |  [Tier 1: Potatoes & Onions (Burlap)]   |   |
       |   |  [Tier 2: Beverage Cases & Soda Cans]   |   |
       |   +-----------------------------------------+   |
       |   (Locking Caster Wheels Roll Out for Cleaning) |
       +-------------------------------------------------+

Step-by-Step Implementation Method

  1. Measure Floor Clearance: Measure height from the pantry floor to the underside of the lowest fixed shelf.
  2. Select Rolling Caster Cart: Choose a 2- or 3-tier metal wire utility cart with locking rubber wheels.
  3. Add Burlap Liners for Produce: Line produce bins with breathable burlap or fabric to catch soil and allow ventilation for onions and potatoes.
  4. Roll In and Out: Roll the cart under the bottom shelf, engaging wheel locks to keep it stationary when not in use.

Idea 10: Clear Snack Zone Bins with Removable Dividers

Concept and Design Overview

Snack bags, granola bars, and juice pouches easily create clutter when left loose in original cardboard boxes. Establishing a dedicated “Snack Zone” using clear acrylic bins with internal dividers organizes loose snacks into accessible categories.

Positioning clear snack bins on lower pantry shelves allows children to reach healthy after-school snacks independently. Removing bulky outer cardboard boxes frees up space while making inventory levels obvious. The color palette highlights crystal-clear acrylic bins, colorful snack wrappers, and bold category labels.

+--------------------------------------------------------------------------+
|                       PANTRY SNACK ZONE SHELF                            |
|                                                                          |
|       Clear Acrylic Bin 1 |  Clear Acrylic Bin 2 |  Clear Acrylic Bin 3  |
+--------------------------------------------------------------------------+
                                     |
                                 FEATURED:
                                     v
+------------------+------------------+------------------+-----------------+
| GRANOLA BARS     | DRIED FRUIT      | CHIP BAGS        | CLEAR LABELS    |
| Internal Divider | Pouch Section    | Upright Slot     | Kid-Accessible  |
+------------------+------------------+------------------+-----------------+

Step-by-Step Implementation Method

  1. Select Deep Acrylic Bins: Choose deep, open-top clear acrylic bins featuring built-in handles and removable vertical dividers.
  2. Unpack Outer Boxes: Unpack individual snack pouches, fruit bars, and nut bags from bulk cardboard packaging.
  3. Divide by Category: Adjust internal dividers to create slots for granola bars, fruit snacks, and pretzels.
  4. Place on Accessible Shelves: Set snack bins on lower or eye-level shelves so family members can grab items easily.

Common Beginner Mistakes and How to Avoid Them

  • Buying Containers Before Inventorying: Purchasing storage bins without measuring shelf dimensions and counting food categories leads to ill-fitting containers. Always purge food, measure shelves, and plan categories first.
  • Decant Everything Indiscriminately: Trying to decant every single food item into glass jars creates unnecessary maintenance work. Only decant frequently used bulk dry staples (flour, sugar, rice, oats, pasta); leave specialty or rarely used items in original packaging inside labeled bins.
  • Forgetting Expiration Dates: Throwing away food packaging without saving expiration dates leads to spoiled food. Cut expiration dates from original packaging and tape them underneath canister lids.
  • Ignoring Door Clearances: Installing deep over-the-door racks without measuring shelf depth prevents pantry doors from closing properly. Ensure at least 5 to 6 inches of clearance between closed doors and shelf edges.
  • Storing Potatoes and Onions Together: Storing potatoes and onions in the same bin causes potatoes to sprout prematurely due to ethylene gas released by onions. Store onions and potatoes in separate open-weave baskets.

Practical Tips for Sustainable Pantry Organization

  • The 80/20 Pantry Rule: Only fill pantry shelves to 80% capacity, leaving 20% open space to accommodate extra groceries and bulk shopping purchases.
  • Use Washable Shelf Liners: Line wire or wood pantry shelves with non-adhesive, washable grip liners to catch sugar spills, flour dust, and onion skins for easy cleaning.
  • Incorporate Motion-Sensor Lighting: Install inexpensive USB-rechargeable LED motion-sensor light strips under shelves to illuminate dark corners automatically when doors open.
  • Quarterly Pantry Audits: Schedule a 15-minute pantry audit at the start of every season to toss expired items and wipe down canisters.
  • Group Meal-Prep Kits: Use dedicated bins for “Meal Kits” (e.g., a Taco Night bin holding taco shells, seasoning packs, and canned beans) for fast dinner assembly.

Similar Posts

  • 10 DIY Wedding Centerpiece Ideas

    Spread the love

    Spread the loveDesigning your own wedding centerpieces is one of the most effective ways to personalize your reception tables while significantly trimming your overall floral budget. Florist-designed arrangements often carry high labor, delivery, and setup fees. By taking a do-it-yourself approach, couples can reallocate funds toward catering, photography, or live music without sacrificing visual elegance….

  • 10 Red Rose Table Centerpieces Ideas

    Spread the love

    Spread the loveCreating an unforgettable table arrangement relies on balancing dramatic floral color, structural vessel choices, and harmonious surrounding accents. Red rose table centerpieces remain an enduring symbol of elegance, passion, and timeless sophistication across formal galas, romantic dinners, and festive holiday gatherings. This comprehensive guide explores foundational floral design techniques, practical step-by-step assembly methods,…

  • 10 Baby Shower Table Decor Ideas

    Spread the love

    Spread the loveDesigning a welcoming, joyful celebration space for expectant parents relies heavily on organizing structured, visually balanced tabletop arrangements. The modern baby shower table aesthetic has emerged as a premier choice for hosts seeking to blend organic floral elements, soft color palettes, whimsical accents, and layered textiles into an elevated dining experience. This comprehensive…

  • 10 Rustic Wedding Table Decorations Ideas

    Spread the love

    Spread the loveA rustic wedding table captures the perfect balance of effortless charm, organic beauty, and cozy intimacy. Defined by raw textures—like distressed wood, burlap, lace, and weathered metals—paired with soft florals and warm candle glow, rustic tablescapes create a welcoming, family-style atmosphere that feels both grounded and high-end. Whether you are hosting your reception…

  • 10 Kids Room Design Boys Ideas

    Spread the love

    Spread the loveMaximizing a limited architectural footprint while creating an imaginative, functional, and clutter-free sanctuary for a young boy requires a strategic fusion of multi-purpose furniture, smart vertical storage, and intentional color theory. Far from relying on overwhelming commercial cartoon motifs or single-note primary colors, a contemporary boy’s bedroom balances playful energy with a serene,…

Leave a Reply

Your email address will not be published. Required fields are marked *