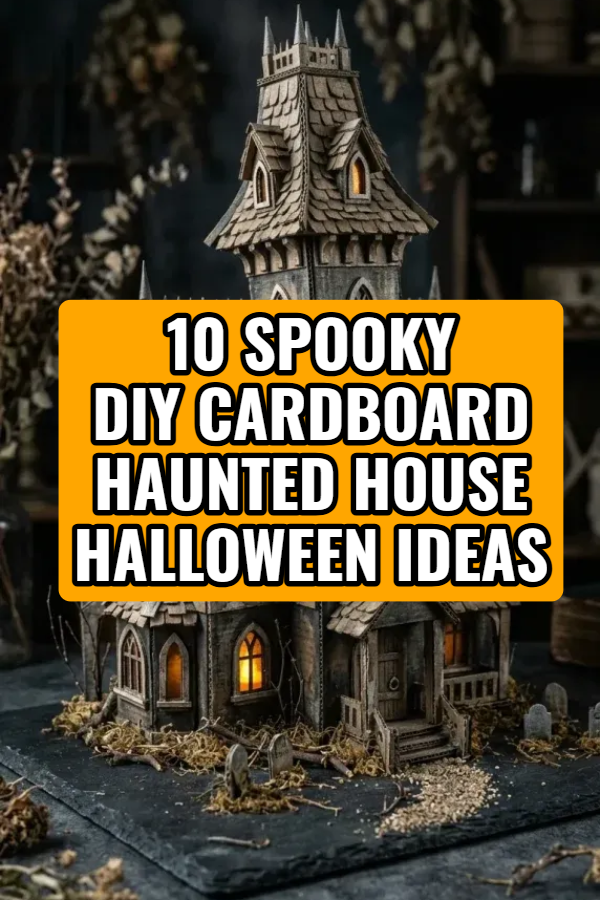
10 Spooky DIY Cardboard Haunted House Halloween Ideas

Transforming everyday corrugated cardboard boxes into atmospheric miniature haunted houses turns simple packaging waste into intricate, handcrafted seasonal decor. Standard packaging cardboard provides a rigid, easily manipulated structural medium that naturally accepts heavy acrylic washes, carved architectural profiles, and textured stone treatments. Rather than investing in mass-produced plastic Halloween villages, upcycling shipping cartons allows creators to fabricate bespoke Victorian manors, crooked witches’ cottages, and decaying gothic clocktowers tailored to their home aesthetic. This comprehensive guide outlines the foundational principles of drafting, cutting, texturing, illuminating, and assembling multi-level cardboard haunted estates. Readers will explore structural scoring mechanics, hot-glue reinforcement methods, distress-painting techniques, and low-voltage illumination integrations necessary to build durable haunted displays. Understanding proper scaling proportions, fluting stability, battery-powered lighting ventilation, and textured plaster applications ensures your handmade creations maintain structural integrity and visual depth. Fabricating your own cardboard haunted houses provides an accessible, budget-friendly creative project that reduces household waste, sharpens miniature craft skills, and brings festive handmade charm to your autumn tabletop decor.
Why This Idea Is Trending or Useful
Cardboard haunted house crafting has surged across modern DIY and seasonal home decor inspiration because it combines accessible upcycling with expressive gothic design. Shipping cartons and cereal boxes are freely available in modern households, offering an abundant structural resource that eliminates the high material costs of commercial miniature kits. Building with cardboard gives crafters complete creative freedom over architectural silhouettes, allowing for exaggerated angles, sagging rooflines, and dilapidated porches that capture authentic spooky charm. In contemporary seasonal decorating, handmade tabletop villages allow decorators to curate cohesive palettes—from matte charcoal and mossy stone to distressed whitewash and metallic verdigris—that harmonize with existing interior themes. Furthermore, cardboard miniature crafting is beginner-friendly and safe for family participation because it utilizes non-toxic water-based paints, basic craft glues, and simple household tools. The lightweight nature of cardboard models makes them easy to display along fireplace mantels, bookshelf alcoves, and dining table centerpieces without risk of surface damage. This combination of zero-cost raw materials, expressive architectural modeling, low storage weight, and customizable styling makes cardboard haunted house construction an exceptionally rewarding Halloween craft.
Materials and Preparation
Building safe, long-lasting cardboard haunted houses requires gathering clean cardboard sheets, precision cutting instruments, durable adhesives, and non-flammable lighting supplies before starting fabrication. Essential crafting materials include single-wall corrugated shipping boxes, lightweight chipboard or cereal box cardstock, high-tack hot glue sticks with a dual-temperature glue gun, wood glue, and multi-surface matte acrylic paints in black, charcoal, raw umber, and antique white. For finishing and eerie textures, gather lightweight spackling paste, fine-grit sand, preserved craft moss, black cheesecloth, and battery-operated warm-amber LED tea lights or fairy light strands. Required tools include a precision craft utility knife with extra replacement blades, a metal straightedge ruler, a cutting mat, a scoring stylus or bone folder, and flat-bristled distressing brushes. Begin preparation by breaking down cardboard boxes flat along existing glue seams, wiping away packaging dust with a dry cloth. Inspect the cardboard for warped water-damaged sections or deep unintended creases that could weaken the structural walls. Draft your architectural floor plans and wall elevations onto graph paper first to verify roof pitches and window clearances before transferring measurements onto the corrugated sheets.
Idea 1: Crooked Gothic Manor with Distressed Shingle Roof
Setup Method
A crooked gothic manor with a distressed shingle roof utilizes exaggerated vertical proportions and sagging lines to capture the classic silhouette of a decaying Victorian mansion. This design relies on an off-kilter multi-tier central tower flanked by a crooked main hall, featuring arched lancet windows covered in torn vellum and an overhanging mansard roof. Individual layered cardstock shingles are curled and chipped to simulate centuries of weather decay, while uneven timber siding strips add rich tactile depth to the exterior walls. When illuminated from within by a flickering amber LED light, the jagged window silhouettes and weathered architectural details cast eerie shadows across mantels and console tables, anchoring your tabletop Halloween village with vintage haunted atmosphere.

To set up this gothic manor, draw your front, back, and side wall templates onto heavy corrugated cardboard, deliberately skewing vertical lines by five to ten degrees to achieve the crooked silhouette. Cut out the four primary wall panels using a sharp craft knife held against a metal ruler, cutting arched gothic window openings into the front and tower facades. Bevel the vertical joining edges at forty-five degrees and join the four walls using high-temperature hot glue along the interior seams, reinforcing joints with internal cardboard corner gussets. Cut hundreds of half-inch by one-inch rectangular shingles from lightweight cereal box cardstock, using scissors to snip tiny irregular notches along the bottom edges. Starting from the bottom eaves of the cardboard roof pitch, glue the shingles in overlapping horizontal rows, curling random shingle edges upward with your fingertips. Coat the entire structure in matte black acrylic gesso, dry-brushing the raised textures with charcoal gray and warm beige before mounting warm LED tea lights inside the open base.
Idea 2: Dilapidated Clocktower with Translucent Webbed Dials
How to Create
A dilapidated clocktower with translucent webbed dials creates a striking vertical centerpiece featuring illuminated clock faces covered in miniature spiderweb filigree. This concept uses a tall, slender four-sided cardboard tower topped with an overhanging belfry and a steep pyramidal spire. The upper belfry houses four circular clock cutouts backed with translucent tracing paper printed with Roman numerals and cracked glass fractures. An internal battery-operated LED light shines through the translucent clock faces, casting a ghostly green or amber glow across the surrounding miniature grounds. The weathered exterior features peeling faux-wood siding cut from thin chipboard strips, giving the entire tower the appearance of an abandoned town square monument left to decay.

To create this clocktower, cut four matching cardboard rectangles measuring four inches wide by fourteen inches tall from clean single-wall corrugated board. Use a circle cutter or two-inch hole punch to cut circular clock openings three inches below the top edge of each panel. Cut squares of translucent parchment paper slightly larger than the openings, drawing cracked clock faces and cobwebs onto the paper using a fine-point black pen before gluing them behind the openings. Assemble the four vertical panels into a tall rectangular column using wood glue and painter’s tape along the exterior seams to hold the shape while drying. Build a flared belfry platform atop the column, capping it with four triangular cardboard panels joined into a steep roof spire. Base-coat the tower in dark slate gray, stipple lightweight spackling paste mixed with fine sand across the base walls to mimic crumbling stone, and glue wisps of dark cheesecloth around the roof eaves.
Idea 3: Abandoned Hillside Mausoleum with Crumbling Stone Texture
Step-by-Step Guide

An abandoned hillside mausoleum with crumbling stone texture brings the solemn architecture of cemetery crypts into your miniature Halloween display. This design features a wide, symmetrical neoclassical facade with faux-stone corner columns, an arched entry gate barred with wooden dowel ironwork, and a triangular pediment etched with a cracked family crest. The flat cardboard walls are coated in a gritty stucco paste that transforms smooth paper faces into realistic, decaying limestone blocks complete with deep mortar lines and chipped masonry corners. Placing miniature urns and creeping preserved green moss across the stone steps completes the aged cemetery aesthetic, making it an excellent standalone accent for bookshelves and entry tables.
Begin fabrication by cutting a central facade panel measuring eight inches wide by six inches tall from dense double-wall cardboard, carving a three-inch wide central Roman arch doorway. Cut two matching side wall panels measuring five inches deep and a rear wall to complete the box enclosure, gluing the perimeter together with heavy-duty hot glue. Cut thin wooden craft skewers to fit vertically across the open archway to simulate rusted wrought-iron crypt bars, securing them with glue behind the opening. Mix equal parts lightweight spackling paste, sand, and gray acrylic paint to create a thick masonry paste, spreading a thin layer over all exterior surfaces with a palette knife. Before the paste dries, score horizontal and vertical grid lines with a toothpick to define individual stone blocks, carving irregular cracks into random bricks. Once cured, apply a dark brown-and-black water wash over the stone to accentuate the mortar grooves, and adhere patches of dried green craft moss around the roofline and base steps.
Idea 4: Twisted Witches’ Cottage with Sagging Thatched Roof
Execution Process

A twisted witches’ cottage with a sagging thatched roof uses organic curves and exaggerated proportions to evoke folklore and fairy-tale sorcery. This design abandons straight angles entirely, featuring curved outer walls that bow outward at the center, a crooked stone chimney spiraling up one side, and a dramatic swaybacked roof that sags heavily in the middle. The roof surface is covered in dense layers of frayed natural burlap or shredded cardboard corrugation that mimics rotten, weathered thatch. A tiny glowing green potion window cut into the side wall casts a mystical ambiance, creating an enchanting cottage that pairs naturally with miniature pumpkins, broomsticks, and dried autumn botanicals.
Execute this design by cutting front and back cottage wall profiles from flexible cereal box cardboard, sketching curved side contours that flare out like an hourglass. Cut two rectangular roof panels, scoring them horizontally every half-inch so the cardboard bends into a smooth, sagging U-shaped curve over the roof gables. Assemble the curved wall body using wood glue along interior paper tabs, clamping the curved seams with painter’s tape until cured. To create the textured thatch roof, peel the flat paper liner away from scrap corrugated cardboard to expose the wavy internal fluting, tearing the corrugated strips into irregular two-inch lengths. Glue the torn corrugated strips in overlapping layers along the sagging roofline, fraying the bottom edges with a stiff wire brush to mimic decomposing straw. Paint the roof in deep olive-brown tones, distress the cottage walls with an antique white dry-brush over dark brown gesso, and tuck preserved reindeer moss into the chimney crevices.
Idea 5: Boarded-Up Farmhouse with Porch and Peeling Siding
How to Create

A boarded-up farmhouse with a wraparound porch and peeling siding captures the unsettling aesthetic of rural ghost stories and abandoned country estates. This multi-level model features a traditional two-story gabled farmhouse base wrapped with a ramshackle front porch supported by crooked toothpick posts and broken floorboards. The windows are crisscrossed with miniature cardboard planks to simulate emergency boarding, while jagged holes cut through the walls reveal glowing internal light. The exterior is clad in hundreds of overlapping cardboard siding strips, with random boards pried loose and snapped in half to showcase structural decay. This design adds rich narrative storytelling to your Halloween village, evoking forgotten backroads and haunted homesteads.
To create this farmhouse, assemble a two-story rectangular cardboard box measuring ten inches wide, six inches deep, and eight inches tall, cutting a pitched gable roof profile onto the side walls. Cut multiple rectangular window openings across both floors, gluing crossed wooden coffee stirrer sticks or narrow cardboard strips across the frames to create weathered window boards. Glue horizontal strips of thin cardstock measuring a quarter-inch wide across the entire house body to create clapboard siding, allowing occasional strip ends to lift and warp outward. Build the front porch platform from a raised cardboard slab, supporting the porch roof with matchsticks or wooden dowels glued at crooked angles. Base-coat the entire house in matte black, followed by a heavy dry-brush of distressed barn-wood gray and rotting brown. Dust the porch roof with fine sand fixed with matte spray sealer to simulate accumulated dust, placing an LED tea light inside to illuminate the cracked window boards.
Idea 6: Creepy Greenhouse Conservatory with Broken Glass Panes
Step-by-Step Guide

A creepy greenhouse conservatory with broken glass panes introduces botanical horror and architectural elegance using transparent plastic packaging inserts framed in blackened cardboard. This design features a Victorian-style curved or angled conservatory hall with expansive window walls and a pitched glass roof. Clear plastic from blister packs or bakery containers is framed with narrow cardboard mullions, with realistic cracks, shattered holes, and grime painted across the transparent panes. Inside the illuminated glass structure, blackened twigs and twisted faux-vines climb the interior walls, creating the appearance of an overgrown, haunted botanical laboratory where sinister flora has taken over the manor grounds.
Begin by building an open structural framework from heavy three-quarter-inch wide cardboard strips, assembling four window wall frames and two sloping roof gable supports. Cut panels of clear, rigid recycled plastic packaging to match the wall dimensions, securing the clear plastic sheets behind the cardboard framework with clear-drying craft glue. Cut dozens of narrow one-eighth-inch cardstock strips, gluing them across the plastic sheets in a grid pattern to create window mullions. Use a fine-tip permanent marker or white paint pen to draw spiderweb fractures and shattered glass lines across random panes, cutting out tiny triangular plastic shards to create realistic broken window voids. Glue the four framed window walls and roof pitches together around a sturdy cardboard base plinth. Paint all cardboard framing with distressed verdigris bronze or cast-iron black paint, weave dried moss and tangled black wire vines through the broken glass openings, and place a flickering green LED puck light inside the base.
Idea 7: Haunted Lighthouse with Broken Glass Lantern Room
Setup Method
A haunted lighthouse with a broken glass lantern room combines coastal isolation with eerie ghost lore, standing as a dramatic high-altitude focal point in your Halloween display. This model features a tapering cylindrical or octagonal tower built from curved cardboard, topped by an overhanging observation catwalk and a faceted glass lantern room. The rotating light beam is replaced with a flickering ghostly purple or cool blue LED light that shines through cracked acrylic window panes. Faux-brick scoring and patches of decaying masonry wrap the tower, while the rocky cardboard base is layered to simulate a jagged sea cliff where phantom ships run aground.

Set up this coastal build by cutting a tapering curved wall section from flexible single-face corrugated cardboard measuring twelve inches tall, curving the sheet into a conical cylinder with a four-inch bottom diameter and a two-and-a-half-inch top diameter. Glue the vertical back seam securely with hot glue, reinforcing the internal cylinder with two circular cardboard spacer disks inserted at the mid-point and top. Construct the upper observation deck by gluing a circular cardboard disc atop the tower, wrapping the perimeter with a cardstock handrail detailed with matchstick posts. Build the hexagonal lantern room atop the deck using clear plastic strips framed with cardstock columns, capping the room with a conical cardboard roof. Spread textured stone paste across the lower half of the tower to simulate salt-weathered bricks, scoring horizontal block lines with a wooden stylus. Paint the tower in decaying whitewash over dark gray primer, and seat the structure onto a stacked, jagged cardboard cliff base painted in sea-foam slate tones.
Idea 8: Overgrown Cemetery Chapel with Flying Buttresses

Execution Process
An overgrown cemetery chapel with flying buttresses uses classical ecclesiastical gothic architecture to create a miniature cathedral ruined by time and dark forces. This design features soaring pointed arches, exterior flying buttress support arches, a recessed entry portal with carved gothic tracery, and a decaying pitched roof with exposed ceiling rafters. The exterior walls are detailed with embossed stone textures and encroaching vines that snake up the buttresses. When illuminated from within, light spills through an intricate rose window cut into the front gable, casting geometric lace patterns across the table surface and creating a solemn, sacred atmosphere within your haunted village.
Execute this design by cutting front and back cathedral gables measuring six inches wide by ten inches tall from sturdy double-wall cardboard, carving a three-inch circular rose window in the front gable and tall lancet arch windows along the side walls. Cut matching exterior flying buttress arches from thick cardboard, gluing three curved buttress supports along each side wall at right angles to reinforce the structural verticality. Cut an intricate floral rose window insert from thin cardstock using a precision craft knife, backing the cutout with translucent purple vellum before mounting it inside the front circular opening. Assemble the chapel walls and pitched roof, leaving the rear roof section open with exposed internal cardboard rafters to simulate a collapsed ceiling. Coat the entire model with textured stone gesso, dry-brush with ash gray and raw umber, and adhere dried lichen and green moss along the buttress seams to mimic centuries of botanical overgrowth.
Idea 9: Industrial Steam-Plant Asylum with Corrugated Metal Roof
How to Create

An industrial steam-plant asylum with a corrugated metal roof pairs gritty urban decay with industrial gothic elements to produce a cold, institutional haunted facility. This design utilizes a sprawling, angular multi-wing cardboard structure detailed with external exhaust pipes, barred rectangular institutional windows, and rusted corrugated metal roof panels made from peeled cardboard fluting. The weathered paint scheme replaces traditional gothic stone with oxidized brickwork, peeling industrial yellow paint, and dripping rust stains around pipe fittings. The imposing institutional facade evokes mid-century asylum lore, creating a stark, unsettling architectural contrast against traditional Victorian haunted houses.
To create this asylum model, construct an asymmetrical three-section cardboard box complex consisting of a tall central administration block flanked by two lower hospital wings. Cut small, uniform rectangular windows arranged in strict institutional grid rows across all walls, gluing wire mesh or crossed toothpick bars behind each window void. Peel the outer liner off scrap corrugated boxes to expose the internal wavy corrugation, cutting the textured sheet into roof panels and painting them with metallic copper and dark brown acrylics to mimic rusted sheet metal. Build exterior ventilation ducts and chimneys using rolled cardboard tubes and plastic bottle caps, mounting them along the walls and roofline. Paint the building walls in mottled industrial brick-red, stippling patches of peeling mint green and chalky white paint across the facade. Apply heavy rust-colored washes of burnt sienna and orange along all metal seams, housing a cool-white strobe or flickering amber LED inside the complex.
Idea 10: Stacked Cereal Box Brownstone Townhouse Row
Step-by-Step Guide
A stacked cereal box brownstone townhouse row transforms narrow food packaging into a modular city street of decaying, haunted urban residences. This design uses two or three upright cereal boxes glued side-by-side, detailed with layered cardstock stoops, overhanging roof cornices, and ornate window pediments that capture classic urban brownstone architecture. The front facades feature high-relief architectural moldings made from rolled paper and layered cardstock strips, while the front basement lightwells and iron railings add depth to the street plane. Displayed together, the row forms a continuous haunted streetscape that fits along narrow fireplace mantels and deep window sills, adding sophisticated urban gothic atmosphere to your seasonal decor.

Begin by taping the top and bottom flaps of three matching empty cereal boxes closed, wiping all outer glossy surfaces with fine sandpaper to provide tooth for paint adhesion. Cut varying window and door openings across the three boxes to create unique facade layouts for each townhouse while maintaining consistent floor heights across the row. Cut decorative window headers, triangular pediments, and wide roofline cornices from lightweight chipboard, layering three thicknesses of cardstock to build architectural relief before gluing them above windows and along the roof edge. Construct front entrance stoop stairs from folded cardboard risers, gluing them to the base of each front door and detailing the railings with thin wire or coffee stirrers. Glue the three cereal boxes side-by-side onto a continuous cardboard base board. Prime the entire street block with textured terracotta or slate gray paint, apply a dark antiquing wash to deepen the window crevices, and install battery-operated LED fairy lights through holes cut in the rear panels.
Common Beginner Mistakes and How to Avoid Them
The most dangerous and critical mistake when building and displaying cardboard haunted houses is using real open-flame candles inside paper structures. Cardboard, hot glue, dry moss, and paper vellum are highly flammable; an open flame will ignite the structure within seconds and cause serious fire hazards. Always use battery-operated LED tea lights, low-voltage fairy light strings, or remote-controlled LED puck lights that produce zero heat. Another frequent error is using excessive liquid craft glue or unthinned water-based paints directly on thin cardboard without proper priming. Excess water saturates paper fibers, causing cardboard walls to warp, buckle, and lose structural squareness. To prevent warping, prime cardboard panels with acrylic gesso or fast-drying spray primer on both sides, and use high-temperature hot glue or fast-setting tacky glue for structural joints. Additionally, many beginners make window openings too small or forget to plan light diffusion, resulting in harsh light hotspots. Back window cutouts with frosted vellum, parchment paper, or scratched plastic packaging to diffuse the internal LED light evenly across the entire window frame.
Practical Tips for Better Results
Achieving professional, gallery-quality results with DIY cardboard haunted houses relies on surface texturing, careful edge joinery, and layered dry-brush painting techniques. Always bevel or miter the joining edges of thick corrugated cardboard at forty-five-degree angles before gluing; this hides the unsightly hollow fluting holes along wall corners and produces crisp architectural edges. When texturing walls to look like ancient stone or peeling plaster, mix lightweight drywall spackling paste with a few drops of black acrylic paint and fine playground sand to create a gritty paste that can be applied with a palette knife and scored before drying. When painting your finished model, avoid flat solid black; instead, base-coat the entire house in very dark charcoal or raw umber, followed by progressive dry-brushing using medium gray, warm taupe, and antique white across raised edges. Dry-brushing catches raised shingles, wood grains, and stone textures, creating realistic highlights and dramatic architectural depth. Finally, cut access trapdoors or leave the base of the house completely open so you can easily replace LED batteries throughout the Halloween season without disturbing your display.
Styling, Presentation, or Organization Ideas
Styling your cardboard haunted houses involves coordinating lighting, natural textures, and miniature accessories to build an immersive tabletop scene. Arrange a cluster of three to five haunted buildings of varying heights along a fireplace mantel, deep bookshelf, or dining table runner, placing taller towers at the back to establish visual depth. Spread a layer of shredded black cheesecloth, dark gauze, or dried Spanish moss around the base of the buildings to conceal battery packs, wiring, and floor edges while creating a misty, overgrown graveyard landscape. Scatter miniature accessories across the grounds—such as painted twig trees, miniature polymer clay pumpkins, tiny wooden grave markers, and plastic skeleton figurines—to add narrative storytelling to the scene. Use warm amber, ghostly violet, or eerie emerald LED lighting inside the houses, syncing the battery units with automatic timers so your miniature village illuminates automatically at dusk. When the Halloween season ends, wrap each delicate cardboard structure in bubble wrap and store them in a single sturdy plastic storage bin to protect the roof shingles and moss textures for future years.
Budget or Time Planning
Crafting custom cardboard haunted houses is an economical, high-reward seasonal DIY project that delivers high-end decorative results on an accessible budget. Because the primary structural materials come from household recycling bins, your base cardboard cost is completely free. A basic starter supply kit—including a dual-temperature hot glue gun with glue sticks, a bottle of acrylic gesso, basic acrylic craft paints, and a pack of six battery-operated LED tea lights—typically costs between fifteen and twenty-five dollars. Specialty accessories like preserved forest moss, translucent vellum paper, and lightweight spackling paste add ten to fifteen dollars, yielding enough materials to build a complete four-to-six-piece haunted village suite. In terms of time management, drafting, cutting, and assembling a single detailed haunted house takes roughly two to three hours of hands-on crafting time. Painting, texturing, and shingling the exterior requires an additional two hours, plus overnight drying time for plaster pastes and washes. Dedicating a weekend to your project allows you to construct and assemble all structural cardboard shells on Saturday and spend Sunday painting, detailing, and illuminating your completed Halloween village.
Creative Expansion and Advanced Inspiration
Once you have mastered foundational cardboard construction and dry-brushing techniques, you can explore advanced structural and electronic expansions to elevate your Halloween village. Consider integrating specialized micro-electronics into your builds, such as sound-activated miniature smoke generators, micro-servos that make miniature cemetery gates creak open, or addressable RGB LED light strips programmed to simulate lightning flashes and storm flickers against window panes. Another exciting expansion is building interactive multi-level terrain bases, using stacked rigid foam boards carved with hot-wire tools to create winding cliffside staircases, subterranean crypt tunnels, and murky swamp rivers surrounding your cardboard mansions. You can also experiment with mixed-media modeling, incorporating miniature 3D-printed gothic gargoyles, real tree bark roof shingles, laser-cut window tracery, or intricate wirework weather vanes atop roof spires. Integrating these creative, advanced additions transforms simple packaging recycling into museum-grade seasonal kinetic art installations that captivate guests and celebrate Halloween craftsmanship for years to come.