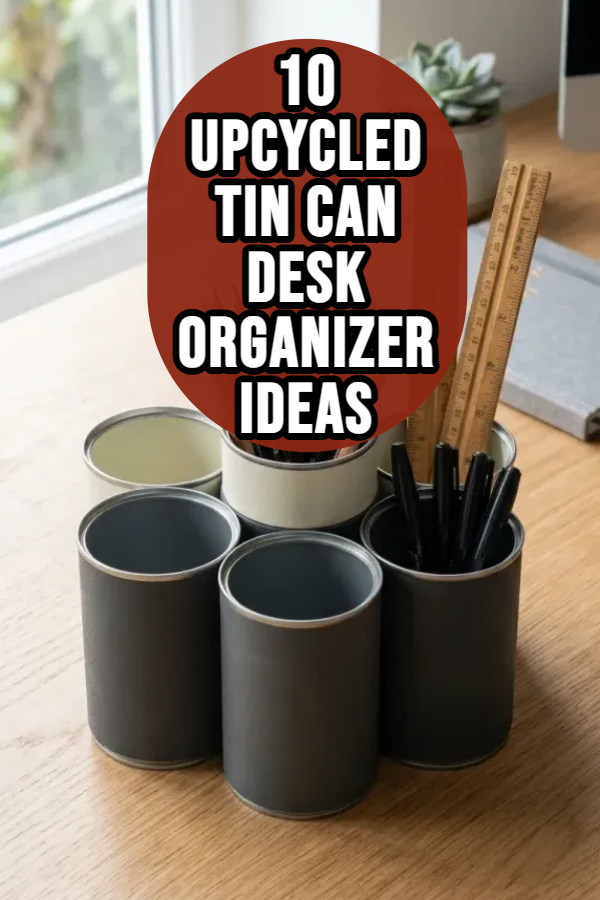
10 Upcycled Tin Can Desk Organizer Ideas

Spread the love

Transforming discarded food tins into customized desk organizers turns everyday household recycling into functional, durable, and stylish office storage. Standard metal cans provide a rigid, cylindrical structure that naturally resists crushing, making them an ideal foundation for storing heavy pens, scissors, paintbrushes, and crafting tools. Instead of relying on mass-produced plastic organizers, upcycling aluminum and steel tins allows creators to customize finishes, textures, and spatial layouts to match any interior aesthetic. This comprehensive guide outlines the foundational principles of safely cutting, smoothing, painting, wrapping, and mounting repurposed tin cans into practical desktop storage systems. Readers will learn the exact metal preparation techniques, edge-deburring methods, adhesive selections, and multi-tier mounting strategies necessary to build safe and lasting organizers. Understanding rust prevention, weight distribution, surface priming, and modular grouping ensures your handmade desk accessories withstand daily office use. Crafting your own upcycled tin can organizers provides an accessible, budget-friendly creative project that reduces household waste, clears desktop clutter, and brings functional handmade design to your home workspace.

Why This Idea Is Trending or Useful

Upcycled tin can organizers have become a staple across modern DIY and home organization inspiration due to their minimal environmental footprint, high utility, and versatile design potential. Metal food containers are freely available, exceptionally sturdy, and infinitely adaptable with basic household supplies. Rather than sending recyclable metals through complex industrial processing, direct home upcycling extends the lifecycle of materials immediately while reducing consumer spending. In compact work-from-home setups, vertical desk organization is critical for preserving usable writing and computer surfaces. Grouping varying heights of tin cans creates multi-level storage that organizes desktop items by frequency of use. Metal containers also hold taller tools like heavy drafting rulers, fabric shears, and styling markers without tipping over. The project remains beginner friendly because it requires no specialized workshop equipment—only basic craft adhesives, paints, textured fabrics, or scrap timber. This blend of zero-cost raw materials, rugged durability, sustainable living appeal, and complete aesthetic customization makes tin can upcycling an exceptionally practical organizational craft.

Materials and Preparation

Building safe, long-lasting tin can desk organizers requires thorough cleaning, careful edge smoothing, and proper surface priming before decorative assembly begins. Essential materials include an assortment of clean steel and aluminum food cans (ranging from small tomato paste tins to large coffee and soup cans), metal-bonding spray primer, multi-surface craft adhesive or hot glue, fine-grit sandpaper, and metal deburring files. For finishing and styling, gather decorative wraps such as natural jute twine, self-adhesive cork sheets, linen fabric scraps, matte acrylic paints, and reclaimed wood mounting blocks. Required tools include safety gloves, needle-nose pliers, a rotary tool or metal hand file, measuring tape, and a craft utility knife. Begin preparation by removing paper labels and soaking cans in warm water mixed with dish soap and baking soda to dissolve residual label adhesive. Thoroughly wash the interior to eliminate food oils, and dry completely to prevent flash rust. Inspect the interior rim for sharp burs left by can openers, using needle-nose pliers to press down jagged metal edges and a metal file to sand the rim completely smooth and safe to touch.

Idea 1: Magnetic Hexagonal Honeycomb Tin Can Cluster

Setup Method

The magnetic hexagonal honeycomb tin can cluster combines modular versatility with industrial efficiency, allowing individual cans to detach and rearrange across a geometric desktop matrix. This design utilizes seven standard soup cans wrapped in matte monochromatic tones, clustered around a central core to form a balanced six-sided honeycomb shape. Rare-earth neodymium magnets are adhered between the cans, allowing the organizer to lock firmly into a solid unit during daily use while allowing individual canisters to be pulled away for focused task work across your desk. The compact geometric arrangement maximizes internal tool capacity while maintaining a remarkably small desktop footprint. The modern minimalist aesthetic looks intentional and refined, turning simple food cans into a contemporary architectural desk sculpture.

To set up this modular organizer, prepare seven equal-sized clean soup cans, deburring all top rims until smooth. Spray each can with two coats of self-etching metal primer, followed by an ultra-matte charcoal, sage, or cream spray paint. Mark three contact points along the outer vertical sidewalls of each exterior can where they will meet the central core can and neighboring perimeter cans. Adhere small, powerful neodymium disc magnets to these marked points using a drop of high-strength two-part epoxy putty or industrial metal adhesive, ensuring magnetic polarities are aligned to attract adjacent units. Once the adhesive cures fully for twenty-four hours, place the central can on your desk and snap the six outer cans around it to form the tight hexagonal cluster. Fill each canister with categorized supplies like fine-liners, graphite pencils, and highlighters.

Idea 2: Rotating Reclaimed Wood Base Lazy Susan Carousel

How to Create

A rotating reclaimed wood base Lazy Susan carousel pairs rustic weathered timber with varied sizes of painted tin cans to create a 360-degree spinning desk organizer. This design mounts an asymmetrical collection of small, medium, and tall tin cans onto a smooth-spinning circular wooden turntable base. Users can spin the organizer with a light finger push, bringing markers, erasers, scissors, and paperclips directly to the front without stretching across the desk. The rustic wooden platform adds organic warmth and physical weight to the base, preventing the carousel from sliding or tipping when loaded with heavy drafting instruments. This revolving organizer is ideal for central placement on shared family craft tables or compact home office workstations.

Begin by cutting a ten-inch-diameter circular base from a piece of three-quarter-inch reclaimed pine, hardwood, or plywood, sanding the edges smooth and sealing the wood with natural furniture wax. Fasten a low-profile six-inch ball-bearing Lazy Susan turntable hardware mechanism to the underside of the wooden base using short wood screws. Prepare five to six tin cans of varying heights: a large coffee tin for the center core, surrounded by four medium soup cans and two shallow tuna tins for small items. Paint the cans in coordinating earthy tones or wrap them in textured linen fabric. Apply a thick bead of structural polyurethane construction adhesive or heavy-duty mounting tape to the bottom of each can, pressing them firmly onto the top wooden disc in a balanced radial arrangement. Let the adhesive cure for twelve hours before stocking the spinning carousel with office supplies.

Idea 3: Rustic Twine and Burlap Wrapped Farmhouse Caddy

Step-by-Step Guide

The rustic twine and burlap wrapped farmhouse caddy utilizes natural plant fibers and earthy textures to transform utilitarian metal cans into warm, country-inspired desk decor. This design wraps the cylindrical metal bodies in tightly coiled natural jute twine, textured burlap ribbon, and delicate cotton lace trims. Grouping three or four wrapped cans inside an open wooden produce crate or binding them together with a thick hemp rope handle creates a portable desktop caddy. The fibrous texture of the twine conceals the underlying metal ribs of the food cans, adding tactile softness that contrasts with sleek modern computers and office electronics. The natural materials also dampen sound, eliminating metallic clattering noises when dropping pens into the organizers.

Start by wiping down three clean, deburred soup cans with rubbing alcohol to ensure a clean bonding surface. Anchor the tip of a spool of natural three-ply jute twine to the bottom outer edge of a can using a dab of high-temperature hot glue. Slowly rotate the can while wrapping the twine upward in tight, continuous horizontal coils, applying thin lines of glue every four to five rows to prevent gaps or slipping. Continue wrapping until the twine reaches the top rolled rim, securing the cut end with a discreet dab of glue on the back seam. For accent cans, wrap a two-inch-wide band of natural burlap ribbon around the center, topping it with a strip of white vintage cotton lace. Join the three finished cans side-by-side in a triangular cluster using hot glue along their touching seams, and tie a wide jute ribbon bow around the entire bundle to finish the farmhouse caddy.

Idea 4: Industrial Matte Black Tiered Angled Can Organizer

Execution Process

An industrial matte black tiered angled can organizer cuts metal food tins on steep diagonal angles to create low-profile, forward-facing cubbies for small office supplies. Rather than standing tall cans upright, this design trims cans at a forty-five-degree slant, stacking them horizontally in a tiered pyramid or mounting them side-by-side. The angled front openings provide immediate visibility and effortless fingertip access to short items like binder clips, erasers, sticky note pads, and USB drives that often get lost at the bottom of deep containers. Coated in a uniform coat of textured matte black or cast-iron spray paint, the organizer takes on a rugged, industrial appearance that complements modern loft and urban minimalist desk setups.

Execute this design by marking a forty-five-degree diagonal cut line across the upper half of three medium soup cans and three shallow tuna cans using painter’s tape as a straight guide. Wearing protective gloves and eye protection, carefully cut along the tape line using a handheld rotary tool fitted with a reinforced metal cut-off wheel. Use a half-round metal deburring file and fine-grit emery cloth to thoroughly smooth the diagonal cut edges until completely free of sharp metal burs. Wipe away metal shavings, prime the cans with metal etching primer, and apply two coats of textured matte black enamel paint. Arrange the cans horizontally in a pyramid—three cans on the bottom base, two in the middle, and one on top—bonding the touching side walls with industrial epoxy. The finished tiered unit sits horizontally on the desk, providing forward-facing angled cubbies.

Idea 5: Minimalist Self-Adhesive Real Cork Wrapped Tins

How to Create

Minimalist self-adhesive real cork wrapped tins combine the warm, tactile texture of natural cork with the structural stability of steel food cans. Thin sheets of flexible natural cork are wrapped smoothly around the exterior metal walls, creating a clean, modern aesthetic inspired by Scandinavian stationery design. Beyond its visual warmth, the cork surface serves a functional purpose: users can push standard thumb tacks and map pins directly into the cork walls to pin urgent notes, daily reminders, and postage stamps to the outside of the pen pot. This creates a dual-purpose desk accessory that functions simultaneously as a stationery cup and a miniature 360-degree bulletin board.

To create this cork-wrapped organizer, measure the precise height and outer circumference of your tin can with a flexible measuring tape. Transfer these dimensions onto a sheet of one-sixteenth-inch-thick flexible natural cork roll, using a metal straightedge and sharp utility knife to cut a clean rectangle. Peel the protective backing from self-adhesive cork, or apply an even coat of spray adhesive across the back of standard cork sheeting. Align one edge of the cork rectangle along the vertical seam of the can, slowly rolling the can forward while smoothing the cork down with your fingers to prevent air pockets. Trim any microscopic overhang along the top and bottom rims with your craft knife for a flush edge. Finish the rim by slipping a small strip of split automotive rubber trim or clear vinyl tubing over the top edge, and place the finished organizer on your desk with push pins ready for use.

Idea 6: Vertical Wooden Wall-Mounted Pegboard Can Sconces

Step-by-Step Guide

Vertical wooden wall-mounted pegboard can sconces elevate stationery storage off the desk entirely, clearing valuable workspace in compact offices. This design mounts an array of painted tin cans directly onto a vertical wooden pegboard, wood plank, or grid-wire wall rail hanging above the workstation. Mounting the containers vertically clears the entire desktop for laptops, writing blotters, and monitors while keeping pens, markers, scissors, and charging cords visible and accessible at eye level. The combination of light natural timber backdrops and pastel or monochromatic metal sconces turns functional storage into an eye-catching vertical art display.

Begin by selecting four clean, deburred food cans of varying diameters and heights. Drill two vertical quarter-inch pilot holes through the rear sidewall of each can, spacing the holes two inches apart vertically. Smooth the interior drill holes with a round needle file to remove sharp metal shavings. Spray the cans inside and out with a rust-inhibiting satin enamel paint in complementary tones like dusty rose, slate blue, and warm cream. Cut a fifteen-inch vertical mounting backboard from a three-quarter-inch pine or oak plank, routing mounting keyholes on the back face. Fasten the painted cans to the wooden backboard by driving short, pan-head brass wood screws through the interior drill holes into the timber. Mount the finished wooden organizer securely to wall studs or heavy-duty drywall anchors directly above your desk surface.

Idea 7: Embossed Metallic Foil and Vintage Patina Paint Pots

Setup Method

Embossed metallic foil and vintage patina paint pots give humble recycling tins the opulent, antique look of aged copper, verdigris bronze, or hammered pewter vessels. This technique wraps the metal cylinders in dimensional aluminum embossing foil pressed with intricate geometric, floral, or damask patterns. The textured foil is then coated with reactive metallic paints and dark antiquing waxes that settle into the stamped grooves, creating authentic highlights and shadows. The finished containers appear as heavy, antique metal artifacts from a vintage apothecary or artist’s atelier, adding timeless sophistication and rich character to traditional wood desks and executive workspaces.

To set up this vintage craft, cut a strip of heavy-gauge craft aluminum tooling foil to match the circumference and height of a clean soup tin. Place the foil face-down on a soft rubber mat or foam pad, using a wooden stylus or embossing tool to press raised geometric or damask patterns firmly into the metal sheet. Wrap the embossed foil around the tin can, securing the overlapping rear seam with heavy-duty double-sided mounting tape. Paint the entire textured surface with rich copper, brass, or bronze acrylic paint, allowing it to dry completely. Brush a thin wash of turquoise patina paint or dark brown antiquing wax over the textured surface, immediately wiping the raised ridges with a damp rag so the dark patina remains trapped inside the recessed grooves. Seal the antique finish with a light coat of clear satin spray sealer.

Idea 8: Geometric Cut-Out Leather Sleeve Pen Tumblers

Execution Process

Geometric cut-out leather sleeve pen tumblers wrap industrial tin containers in rich vegetable-tanned leather accented with laser-cut or hand-punched geometric patterns. The thick leather sleeve slips snugly over the metal can, softening its profile and adding a luxurious, tailored look found in high-end leather goods. Geometric diamond, triangular, or linear cut-outs in the leather expose the underlying metal can, which can be painted in contrasting gold, copper, or bright color pops for dramatic visual depth. The natural leather patinas beautifully over time with daily handling, while the internal metal core ensures the pen pot retains its shape and wipes clean effortlessly.

Execute this design by cutting a rectangular strip of two-to-three-ounce vegetable-tanned craft leather to fit the height and circumference of a clean metal can, leaving a half-inch overlap for stitching or riveting. Use a rotary punch or leather chisel to cut clean geometric patterns—such as staggered diamond grids or chevron slots—along the central body of the leather wrap. Use a rotary hole punch to create clean stitching holes along both vertical short ends. Paint the underlying tin can with high-gloss metallic gold or deep emerald paint to provide a bold backdrop for the leather cutouts. Wrap the carved leather sleeve tightly around the painted can, lacing the rear vertical seam with waxed linen thread using a cross-stitch or securing it with antique brass screw rivets. Buff the finished leather sleeve with natural beeswax leather balm to seal the surface.

Idea 9: Tiered Wooden Dowel Toolbox Caddy with Wire Handle

How to Create

The tiered wooden dowel toolbox caddy groups multiple tin cans into a portable, multi-compartment carrier modeled after classic vintage hardware toolboxes. This layout arranges six varied-sized tin cans in two parallel rows of three, fastened to a central vertical wooden partition topped with a thick wooden dowel handle. The entire caddy can be lifted by its handle and carried from desk to conference table, craft room, or outdoor patio workstation with ease. The central wooden spine provides structural stability, while the varied can sizes accommodate long rulers, scissors, paintbrushes, glue sticks, and small paper clips in dedicated compartments, keeping all project essentials organized in a single portable station.

To create this portable caddy, cut a central vertical divider board measuring twelve inches long by eight inches high from half-inch plywood or pine. Cut the top two corners at forty-five-degree angles, drilling a three-quarter-inch hole through the top center to hold a twelve-inch wooden closet dowel handle. Slide the wooden dowel through the top hole, securing it firmly with wood glue and small finish nails. Sand the wooden frame smooth and apply a warm oak or dark walnut wood stain. Prepare six clean tin cans (four medium soup cans and two tall vegetable tins), painting them in matching olive green or industrial gray. Fasten the cans directly to both sides of the central wooden spine by driving short pan-head sheet metal screws through the interior can walls into the wood. Attach four small rubber feet to the underside of the wooden base to protect desk surfaces from scratches.

Idea 10: Terracotta Clay Wrapped and Textured Ceramic Style Pots

Step-by-Step Guide

Terracotta clay wrapped and textured ceramic style pots use air-dry modeling clay to give lightweight tin cans the heavy, tactile feel of handmade Mediterranean pottery. The metal can is completely encapsulated in a thin layer of natural air-dry terracotta or stoneware clay, which is then textured with pottery ribs, woven burlap, or carved ribbed lines before drying. Once cured and sealed, the containers look and feel like artisanal ceramic pots from a boutique pottery studio, but with the shatter-proof internal durability of a steel core. The earthy terracotta tones and raw ceramic textures pair naturally with indoor greenery, natural wood desks, and linen desk mats, bringing an artisanal, organic warmth to modern office environments.

Begin by rolling out a quarter-inch-thick slab of natural terracotta air-dry clay on a clean craft mat using a rolling pin with guide rings. Cut the clay slab to match the dimensions of a clean soup tin, scoring the back of the clay sheet with cross-hatch marks. Brush the outer metal can with a thin layer of PVA craft glue or tacky white glue to help the clay adhere to the smooth metal surface. Wrap the wet clay slab around the can, blending the vertical meeting seam with wet fingertips until completely smooth. Roll the top lip of the clay slightly over the interior metal rim to hide the top edge. Use a pottery rib, a stiff-bristled brush, or the edge of a ruler to carve horizontal grooves or stippled textures across the clay surface. Allow the clay to dry undisturbed for forty-eight hours until rock hard, then apply two coats of water-resistant matte stone sealer to protect against dust and moisture.

Common Beginner Mistakes and How to Avoid Them

The most critical mistake beginners make when upcycling tin cans is failing to properly deburr and smooth the sharp internal metal rims. Standard mechanical can openers often leave razor-sharp burs and microscopic jagged edges along the interior lip that can easily cut fingers when reaching for pens. Always use needle-nose pliers to crimp down sharp metal flaps, and run a half-round metal hand file or rotary grinding bit along the entire inner rim until it is smooth to the touch. Another common error is applying water-based acrylic paints directly onto bare metal without an oil-based or self-etching primer. Bare steel contains natural oils and oxidizes rapidly; unprimed water-based paint will chip, peel, and cause surface rust to bleed through within weeks. Always degrease the tin with isopropyl alcohol and spray a dedicated metal primer before applying color coats. Additionally, many crafters make organizers too top-heavy by placing tall, heavy tools in lightweight, shallow cans without reinforcing the base. Always weight down tall cans by gluing a heavy wooden disc, ceramic tile, or steel washer to the bottom to prevent tipping.

Practical Tips for Better Results

Achieving professional, boutique-quality results with DIY tin can desk organizers relies on smart surface preparation, proper adhesive selection, and intentional finishing details. When wrapping cans with paper, fabric, or cork, always apply a thin layer of primer to the bare metal first; this prevents dark metal ribs from showing through light-colored materials while providing extra tooth for glue adhesion. When joining multiple cans together into clusters, use high-strength, flexible two-part epoxy or structural polyurethane adhesive rather than basic low-temperature craft hot glue, which can become brittle and pop apart under temperature changes. To eliminate the loud metallic clattering sound when dropping metal pens or scissors into the cans, cut small circles of soft craft felt, cork, or dense EVA craft foam and drop them into the inside bottom of each can. Finally, attach small, self-adhesive clear silicone bumper feet to the bottom underside of your completed organizers; these rubber feet elevate the metal off the desk, preventing scratching on delicate wood finishes while providing non-slip grip.

Styling, Presentation, or Organization Ideas

Styling upcycled tin can organizers involves coordinating container finishes with your workspace decor to create a cohesive, clutter-free desk setup. Group sets of three or five coordinating tins together on a low-profile ceramic tray, brass catchall, or live-edge wooden board to give the collection an intentional, curated presence on your desk. Coordinate the color palette of your painted or wrapped cans with surrounding office elements—such as matching matte charcoal cans to your desk lamp, or pairing warm terracotta clay pots with natural wood desk shelves and green desktop plants. Sort your office supplies intentionally by color and material, placing wooden pencils in one can, metal drafting instruments in another, and fine-line markers in a third to keep daily tools organized and easy to spot. For an elevated presentation when gifting handmade desk caddies, fill the compartments with premium stationery, such as brass rulers, cedar pencils, and vintage washi tapes, wrapping the finished organizer in raw linen ribbon with a personalized craft tag.

Budget or Time Planning

Crafting custom upcycled tin can desk organizers is one of the most economical, high-reward DIY projects available, making it accessible on virtually any budget. Because the primary structural containers come from recycled household food waste, the raw container cost is completely free. A basic starter supply kit—including a can of metal spray primer, a multi-surface matte acrylic paint, a bottle of waterproof craft glue, and a roll of natural jute twine—typically costs between ten and twenty dollars, providing enough materials to build a dozen finished desk organizers. Upgraded builds utilizing specialty materials like flexible real cork sheets, air-dry terracotta clay, or reclaimed wood Lazy Susan hardware generally require a modest investment of twenty-five to thirty-five dollars. In terms of time management, cleaning, deburring, and priming a batch of cans takes roughly thirty to forty minutes. Applying decorative wraps, paints, or clay textures requires one to two hours of hands-on crafting time. Dedicating a single Saturday afternoon to your project allows you to prep, paint, and assemble a complete, multi-piece desk organization suite ready for use by evening.

Creative Expansion and Advanced Inspiration

Once you have mastered basic tin can organizers, you can explore advanced structural expansions to build comprehensive workspace organization systems. Consider scaling up your designs by mounting an entire grid array of varied tin cans onto a large framed magnetic metal board hung on the wall, creating a modular vertical craft station that holds hundreds of art supplies, brushes, and stationery tools. Another exciting expansion is integrating smart technology into your desk caddies, such as embedding a low-profile wireless smartphone charging coil into the wooden base of a multi-can organizer, or adding hidden USB power cables through the back of a container to charge styluses and electronic accessories. You can also experiment with mixed-media woodworking, building custom mortise-and-tenon hardwood frames with circular cutouts designed to hold drop-in painted tin cups like laboratory test tubes. Integrating these creative, advanced additions transforms simple household recycling into sophisticated, high-performance office furniture that brings lasting order and artisan style to your daily workspace

Similar Posts

  • 10 Kids Room Ideas for Boys

    Spread the love

    Spread the loveDesigning a boys room is one of the most enjoyable projects for any parent or decorator. A kids room is more than just a space for sleeping; it is where imagination grows, creativity blossoms, and countless adventures begin. Whether you are designing for a toddler, a school-aged child, or a growing pre-teen, there…

  • 10 Valentines Crafts For Adults

    Spread the love

    Spread the loveValentines Day is often associated with cards, chocolates, and flowers, but for many adults, the holiday is also an opportunity to slow down, get creative, and make something meaningful with their hands. Crafting is not just for kids. It is a powerful way for adults to express emotions, reduce stress, and create personalized…

  • 10 Toca Boca House Ideas

    Spread the love

    Spread the loveToca Boca has become one of the most loved digital playgrounds for kids, teens, and even adults who enjoy open-ended creative games. With the Toca Life World app, players can design homes, decorate spaces, and bring their dream worlds to life. One of the most enjoyable aspects is designing houses in Toca Boca….

  • 10 Creative House Ideas

    Spread the love

    Spread the loveCreating a home is not just about building walls and adding furniture. A truly creative house reflects personality, lifestyle, and imagination. In today’s world, homeowners are looking beyond traditional layouts and predictable decor. They want spaces that feel inspiring, functional, and unique while still being comfortable and welcoming. Creative house design blends architecture,…

  • 10 Barn Style House Decor

    Spread the love

    Spread the loveBarn style house decor has become one of the most loved interior design trends in recent years. Inspired by classic countryside barns, this decor style blends rustic charm with modern comfort. It is warm, inviting, practical, and full of character. Whether you live in a farmhouse, suburban home, or even an apartment, barn…

  • 10 Cute Swag Outfits

    Spread the love

    Spread the loveIf you love fashion that balances comfort, confidence, and a hint of street attitude, swag outfits are the perfect choice. These looks combine everyday essentials with bold accessories, oversized fits, and trendy layers to create a style that’s effortlessly cool and uniquely yours. Whether you are heading out with friends, going to class,…

Leave a Reply

Your email address will not be published. Required fields are marked *