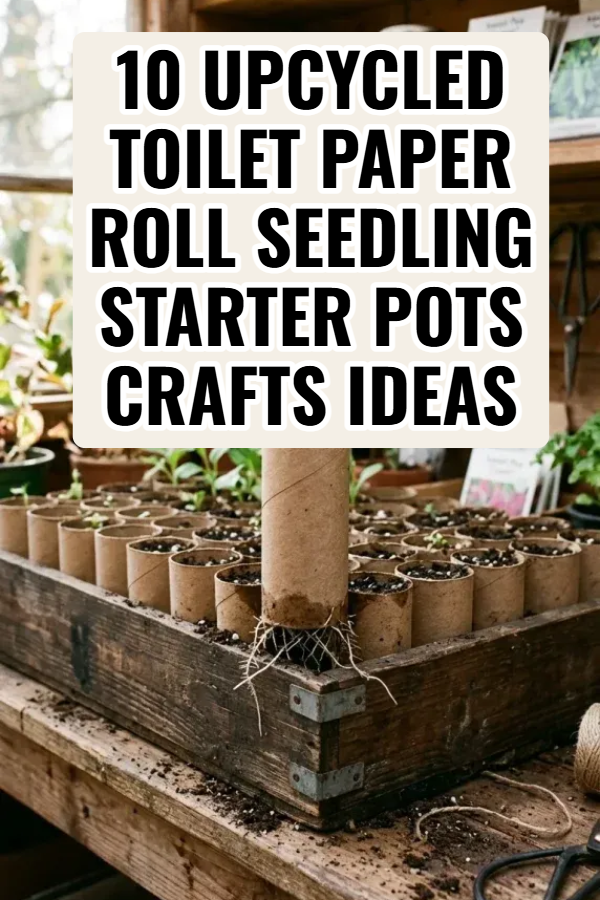
10 Upcycled Toilet Paper Roll Seedling Starter Pots Crafts Ideas

Building functional, sturdy toilet paper roll seedling pots requires gathering clean cardboard rolls, nutrient-balanced seed-starting mix, waterproof bottom trays, and appropriate seeds before planting begins. Essential gardening materials include clean, unbleached cardboard toilet paper rolls or paper towel tubes, fine-textured seed-starting mix (a blend of peat moss or coco coir, fine perlite, and vermiculite), clean water with a fine-mist spray bottle, plant variety markers, and non-draining plastic or aluminum drip trays (such as upcycled plastic berry containers, aluminum baking pans, or takeout trays). Required tools include sharp utility scissors, a ruler, a flat wooden tamper or small wooden dowel, and a waterproof permanent marker. Begin preparation by collecting cardboard tubes that are free of plastic coatings, colored inks, synthetic glues, or chemical fragrances. Inspect each roll to ensure the cardboard is firm and dry. If using tall paper towel rolls, measure and cut them into two-and-a-half to three-inch lengths using sharp shears. Prepare your seed-starting soil mix in a large bucket, adding warm water and stirring thoroughly until the mixture feels like a wrung-out sponge before packing it into the cardboard pots.
Idea 1: Self-Locking Four-Flap Origami Fold Seed Pot
Setup Method
The self-locking four-flap origami fold seed pot uses four simple vertical base cuts folded inward like a cardboard box bottom to create a stable, flat base that requires no tape, glue, or metal staples. This clean geometry creates a self-contained seedling cup that stands upright on its own without tipping, while allowing excess watering moisture to drain through the tiny center seam. The overlapping bottom flaps retain fine seed-starting soil during watering and handling, yet loosen effortlessly in damp garden soil so roots can push downward unobstructed once planted outside.

To set up this origami fold pot, take a standard clean toilet paper roll and make four equidistant vertical cuts, roughly three-quarters of an inch deep, around one end of the cylinder using sharp scissors. Fold each of the four flaps inward at a ninety-degree angle toward the center. Lock the base closed by folding flap one over flap two, flap two over flap three, flap three over flap four, and tucking the edge of flap four underneath the first flap in a classic four-way box-top weave. Press the folded base firmly against a flat table surface to flatten the bottom. Fill the standing cardboard tube with pre-moistened seed-starting soil to within a quarter-inch of the top rim, tamping the soil lightly with your fingers or a flat wooden dowel to eliminate large air pockets before planting your seeds.
Idea 2: Shallow Half-Height Micro-Pots for Herbs and Brassicas
How to Create
Shallow half-height micro-pots cut standard toilet paper rolls in half horizontally to create compact two-inch seedling cells tailored for shallow-rooted culinary herbs, brassicas, and salad greens. Slicing tubes in half doubles your total pot yield from a single collection of cardboard rolls, creating shallow starter cups that prevent soil waste and reduce moisture buildup for quick-germinating seeds like basil, lettuce, kale, and thyme. These shorter cylinders dry out more evenly and sit closer together in shallow seed trays, making them ideal for high-density propagation under indoor fluorescent or LED grow lights.

To create these half-height micro-pots, measure the midpoint of a four-inch toilet paper roll at two inches, cutting cleanly across the diameter with a sharp craft knife or kitchen shears to create two identical mini cylinders. Make three half-inch vertical relief cuts around the bottom base of each mini-tube. Fold the three small tabs inward over one another to form a shallow, triangular bottom closure that holds soil securely. Arrange dozens of these compact half-pots tightly inside a recycled clear plastic strawberry or salad clamshell container, which serves as both a bottom water tray and a clear greenhouse humidity dome. Fill each micro-pot with light seed-starting medium, sow two to three small herb seeds per cell, and mist the soil surface with water before snapping the clear lid closed to trap germination humidity.
Idea 3: Deep Taproot Sleeve for Sweet Peas and Taproot Crops
Step-by-Step Guide

The deep taproot sleeve uses full-length, uncut cardboard tubes with completely open, un-folded bottoms to provide deep vertical root channels for long-rooted seedlings. Plants like sweet peas, broad beans, taproot carrots, parsnips, and squash send a single, thick taproot straight down within days of germination; standard shallow seed trays force these roots to hit a plastic wall and spiral, permanently weakening the plant. Leaving the full four-to-six-inch cardboard tube open at both ends provides an uninterrupted vertical root run, allowing the taproot to grow straight down until it reaches the air at the bottom, which naturally air-prunes the tip and stimulates vigorous secondary lateral root branching.
Begin setup by selecting full-length four-inch toilet paper rolls or cutting wrapping paper and paper towel cores into deep five-inch sleeves without folding or closing the bottom ends. Take a deep, solid plastic nursery tray or bread loaf pan and line the bottom with a half-inch layer of coarse vermiculite or washed pea gravel to facilitate drainage. Pack the open cardboard sleeves tightly side-by-side inside the tray so the snug arrangement keeps the tubes standing upright. Fill each vertical sleeve with damp seed-starting mix, tapping the tray against your potting table to settle the soil without over-compacting it. Sow pre-soaked sweet pea or bean seeds one inch deep into the top of each sleeve. When transplant time arrives, lift each vertical sleeve directly from the tray and plant the entire cardboard tube intact into your garden trench, ensuring the top rim sits flush with the outdoor soil surface.
Idea 4: Egg Carton Caddy Modular Cardboard Nursery
Execution Process

The egg carton caddy modular cardboard nursery pairs cut cardboard toilet paper roll pots with the molded cups of recycled paper pulp egg cartons to create a stable, fully biodegradable seedling nursery. Standard cardboard tubes can sometimes wobble or separate when moved around grow shelves; nesting individual rolled pots into the twelve individual cups of an open cardboard egg carton locks the entire system into a secure grid. Because both the egg carton and the toilet paper rolls are made of compostable paper pulp, the entire modular unit can be separated and planted directly into garden soil without generating a scrap of non-biodegradable waste.
Execute this design by cutting an empty paper pulp egg carton in half lengthwise to create a twelve-cell open base tray. Cut twelve toilet paper rolls down to three-inch heights, folding a basic two-flap flat bottom on each. Nest one folded cardboard pot snugly inside each egg cup of the pulp tray; the curved egg hollows hold the bases securely, preventing accidental tip-overs during watering. Fill each pot with fine seed starting compost, sowing companion seeds—such as marigolds, cherry tomatoes, and sweet basil—in organized rows. When bottom-watering, pour warm water directly into the spaces between the egg cups; the moisture wicks upward through the bottom paper pulp into the cardboard pots evenly. At planting time, snip the connected egg carton cups apart with shears and bury each pot-and-cup unit straight into the garden bed.
Idea 5: Sub-Irrigated Capillary Mat Tray System
How to Create

A sub-irrigated capillary mat tray system positions dozens of open-bottom cardboard tube pots atop a moisture-wicking capillary mat or thick recycled cotton felt blanket inside a shallow reservoir tray. Surface watering from above can disturb delicate newly sown seeds, wash away fine soil, and encourage damping-off fungal disease by keeping the cardboard tube walls continuously saturated. Sub-irrigation delivers water exclusively to the bottom base of the cardboard tubes, where the porous paper and soil mix draw moisture upward through capillary action directly to developing roots while keeping the upper seed bed and air around the stems dry.
To create this sub-irrigated system, line a solid two-inch-deep plastic drip tray or cafeteria tray with a piece of specialized horticultural capillary matting, recycled natural wool felt, or two layers of thick cotton flannel fabric. Prepare twenty to thirty toilet paper rolls with open, slotted bottoms, packing them in dense, honeycomb rows on top of the wet fabric mat. Fill the tubes with soil mix and plant your target vegetable and flower seeds. Pour room-temperature water directly into the bottom of the tray so the felt mat remains consistently saturated without creating standing water pools around the upper cardboard tubes. The cardboard bases will absorb water from the mat and wick it upward evenly through the soil column, maintaining optimal moisture levels for germination while reducing the risk of mold growth on the upper cardboard walls.
Idea 6: Woven Base Hexagonal Honeycomb Block

Step-by-Step Guide
A woven base hexagonal honeycomb block binds multiple toilet paper rolls together into a single, cohesive geometric block using natural jute twine, creating a self-supporting seedling grid that optimizes tray space and structural stability. Arranging round cylinders in staggered, interlocking rows forms a natural hexagonal honeycomb where each tube supports its neighbors on six contact points. Binding the cluster with natural jute twine eliminates loose, rolling pots and prevents moisture loss by insulating the outer cardboard walls against dry indoor air.
Begin by preparing twelve clean toilet paper rolls, using the four-flap origami fold to seal the bottom of each tube. Arrange the twelve pots on a flat surface in a staggered honeycomb pattern: a first row of four pots, an interlocking second row of four pots, and a third row of four pots. Wrap a four-foot length of natural three-ply jute twine twice around the entire perimeter of the honeycomb cluster, pulling the cord snug so the cylinders press firmly against each other, and tie the twine ends into a secure square knot. Fill all twelve interconnected tubes simultaneously by dumping seed-starting mix across the top of the cluster, brushing excess soil across the openings with your hand until all pots are filled evenly. Set the bound honeycomb block inside a drip tray, sow your seeds, and label individual rows with wooden craft sticks tucked into the side twine.
Idea 7: Perforated Tear-Away Hardened Cardboard Pots
Setup Method

Perforated tear-away cardboard pots add strategic vertical perforations and tear lines down the sides of the cardboard tubes to ensure rapid root release for slow-decomposing or heavy-walled rolls. While thin paper tubes break down rapidly in warm, biologically active compost soils, dense commercial cardboard rolls can occasionally persist for several months in cool, dry soils, temporarily slowing the lateral spread of fine root hairs. Adding vertical perforations along the cylinder walls allows the gardener to easily rip open the side of the pot like a zipper at planting time, exposing the root ball while keeping the soil column intact for zero-shock planting.
To set up these tear-away pots, use a sewing tracing wheel, a leather rotary punch wheel, or the sharp tip of an awl to punch a straight vertical line of closely spaced pinholes down one side of a clean toilet paper roll from top to bottom. Make four half-inch base cuts on the opposite end, folding the tabs inward to create a secure bottom seal. Fill the tube with damp potting soil and plant your seeds as normal. During the indoor growth period, the perforated seam remains strong enough to contain soil and water. When transplant day arrives and your seedling is ready for outdoor soil, simply grasp the cardboard along the top perforation and tear downward along the punched holes, opening the cardboard collar like a sleeve and setting the root ball directly into the garden planting hole with zero root disturbance.
Idea 8: Paper Mache Base Dipped Moisture-Lock Starter Pots

Execution Process
Paper mache base dipped moisture-lock starter pots coat the bottom third of folded cardboard tubes in a thin slurry of blended paper pulp and water to create a seamless, leak-proof bottom seal that prevents soil sift. While dry-folded cardboard flaps can occasionally drop loose soil particles when lifted individually, dipping the base of the folded tube into wet paper pulp welds the paper fibers together as it dries, forming a unified, solid paper cup base. This technique creates exceptionally durable seed pots that hold their shape through frequent handling, making them ideal for school gardening projects and community seedling swaps where pots are transported before planting.
Execute this design by blending shredded newspaper or unbleached paper towels with warm water in an old blender until it forms a smooth, watery paper pulp slurry. Prepare ten toilet paper rolls with four-flap folded bottoms. Dip the bottom inch of each folded cardboard tube into the wet paper pulp mixture, pressing the wet base lightly onto a flat wire cooling rack or absorbent towel so the pulp fills the bottom seams. Allow the dipped paper bases to dry completely for twenty-four hours in a warm, ventilated room; as the pulp dries, the cellulose fibers interlock with the cardboard flaps, creating a flat, reinforced, sift-proof paper bottom. Fill the reinforced pots with organic potting soil, plant your vegetable seeds, and place them on your grow light shelves with complete confidence that no soil will leak from the bottoms.
Idea 9: Windowsill Citrus Crate Cardboard Nursery

How to Create
A windowsill citrus crate cardboard nursery upcycles small wooden Clementine citrus crates lined with cardboard toilet paper rolls to construct a charming, rustic seed-starting nursery sized for sunny window ledges. Small wooden fruit crates provide solid, high-walled wooden frames that contain up to twenty cardboard starter pots in a compact, portable box with built-in airflow slats. Lining the interior base with a recycled plastic bag protects wooden window sills from moisture drips, while the slatted wooden sides keep the cardboard pots aligned vertically and shielded from direct drying drafts.
To build this windowsill nursery, take a clean, empty wooden Clementine or mandarin citrus box, lightly sanding any rough wood splinters. Cut an upcycled heavy-duty plastic shopping bag or feed sack to fit the interior bottom of the crate, bringing the plastic two inches up the inner sidewalls and securing it with waterproof tape or staples to create a built-in waterproof catchment liner. Prepare fifteen to eighteen toilet paper rolls with folded origami bases, packing them upright inside the lined wooden crate until the box is completely filled. Fill all pots with damp seed-starting medium, sow kitchen garden seeds like sweet peppers, cherry tomatoes, and culinary herbs, and position the entire wooden crate on a warm, south-facing windowsill to germinate. The wooden frame insulates the soil against cold glass drafts, promoting warm, steady root growth.
Idea 10: Slit-and-Interlocked Dual Tube Long-Season Root Pots
Step-by-Step Guide

Slit-and-interlocked dual tube long-season root pots join two toilet paper rolls end-to-end to create an extra-tall, eight-inch cardboard root column designed for long-season seedlings that require extended indoor growth periods before the last spring frost. Plants like indeterminate heirloom tomatoes, eggplants, and sweet peppers often outgrow standard two-to-four-inch seed pots weeks before outdoor garden soil warms up, leading to root-bound plants that stall after planting. Joining two cardboard rolls vertically doubles the available soil volume and root depth, allowing gardeners to bury leggy tomato stems deep inside the tube where they develop strong adventitious root systems along the entire buried stem.
Begin construction by selecting two clean toilet paper rolls. On tube one, create a four-flap folded bottom base to seal the bottom end. On tube two, make four half-inch vertical cuts around the bottom rim, bending the four cardboard tabs slightly inward so the base diameter narrows. Slide the narrowed bottom of tube two into the open top of tube one, pushing it down one inch until the two cylinders interlock firmly into a single eight-inch tall cardboard cylinder. Wrap a strip of natural paper masking tape around the exterior center seam to reinforce the vertical joint. Fill the double-tall pot halfway with soil mix, sow your tomato seed, and as the seedling grows tall, gradually add more potting soil up the length of the cardboard cylinder over several weeks to encourage roots to sprout all along the buried stem. Plant the entire eight-inch tube deep into your garden bed once the weather warms.
Common Beginner Mistakes and How to Avoid Them
The most critical and frequent mistake beginners make with cardboard tube seedling pots is allowing white surface mold to flourish due to poor air circulation and chronic overwatering. Cardboard is organic cellulose; when kept in a warm, stagnant room with saturated soil and no airflow, fungal spores naturally colonize the wet paper walls. To prevent mold, always set up a small oscillating desk fan on its lowest setting near your seedling trays to maintain continuous, gentle air movement, which keeps the outer cardboard walls dry while the soil inside retains moisture. Another common error is letting the top edges of the cardboard pot protrude above the garden soil line during outdoor transplanting. If exposed to the sun and wind, the protruding dry cardboard rim acts as a moisture wick, drawing water out of the root zone and dehydrating the young seedling. Always bury the cardboard pot completely so the top rim sits at least a half-inch below the garden soil surface, or tear off the exposed top paper collar before burying the pot. Additionally, many beginners over-compact their soil mix by pounding it into the tubes with wooden dowels, creating dense, concrete-like plugs that starve roots of oxygen. Always fill tubes loosely, settling the soil with a gentle tap on the table and light watering rather than heavy pressure.
Practical Tips for Better Results
Achieving healthy, vigorous seedlings with DIY toilet paper roll pots relies on bottom watering, proper lighting, and gradual seedling hardening. Always practice bottom watering rather than overhead pouring; pouring water into the bottom drip tray allows the cardboard and soil to absorb moisture from the base upward via capillary action, keeping the delicate stem foliage dry and preventing damping-off disease. When placing your cardboard seed trays under indoor grow lights, keep full-spectrum LED or fluorescent bulbs suspended just two to three inches above the top of the seedlings, raising the light fixtures gradually as the plants grow to prevent tall, weak, leggy stems. Label your cardboard pots directly on the outer paper walls using a soft graphite pencil or waterproof garden marker before filling them with soil, ensuring you can track plant varieties and sowing dates accurately. Finally, begin hardening off your seedlings one to two weeks before garden transplant day by setting the cardboard pots outdoors in a shaded, sheltered porch area for an hour on day one, gradually increasing daily exposure to outdoor sunlight, wind, and ambient temperatures to build strong, resilient plant tissues.
Styling, Presentation, or Organization Ideas
Styling and organizing your upcycled cardboard seedling nursery turns functional garden propagation into a neat, visually appealing springtime display in your home. Arrange your cardboard pots inside matching vintage enamel baking dishes, galvanized steel seedling trays, or shallow wooden seed flats to give your indoor propagation station an organized, farmhouse aesthetic. Group your seed pots systematically by plant family and harvest timeline—such as clustering nightshades (tomatoes and peppers) in one tray, brassicas (kale and cabbage) in a second, and trailing vines (cucumbers and squash) in a third—to simplify watering and lighting schedules. Insert handwritten wooden birch craft sticks or cut copper plant labels into the soil of each pot, detailing the plant cultivar, germination date, and outdoor planting window. If sharing homegrown seedlings with friends, neighbors, or community plant swaps, bundle sets of four companion pots together with a wrap of natural jute twine and a personalized kraft paper care tag, creating a sustainable, plastic-free gardening gift ready for planting.
Budget or Time Planning
Crafting upcycled toilet paper roll seedling pots is an exceptionally economical, zero-waste gardening project that saves significant money on seasonal seed-starting supplies. Because the primary potting containers come directly from everyday household paper recycling, your structural container cost is zero dollars. A basic starter supply kit—including a sixteen-quart bag of organic seed-starting mix, a reusable plastic drip tray, and a variety pack of non-GMO vegetable and flower seeds—typically costs between ten and twenty dollars, providing enough materials to raise fifty to one hundred healthy seedlings for your entire garden. In terms of time investment, measuring, slitting, and folding the bases of twenty cardboard pots takes roughly fifteen to twenty minutes. Packing the tubes with soil and sowing seeds requires an additional twenty minutes of hands-on gardening work. Dedicating a single weekend morning in early spring allows you to prep, fill, and sow dozens of custom biodegradable seedling pots, setting your garden up for months of productive, sustainable growth.
Creative Expansion and Advanced Inspiration
Once you have mastered foundational cardboard tube seedling pots, you can explore advanced permaculture and microgreen expansions to push your sustainable indoor gardening even further. Consider using cut-down one-inch cardboard tube rings packed with dense coco coir as shallow microgreen grow pucks, harvesting fresh, nutrient-dense broccoli and radish microgreens directly from kitchen windowsill trays throughout the winter months. Another exciting expansion is constructing indoor mushroom fruiting plugs, packing cardboard tube cylinders with pasteurized hardwood sawdust and edible oyster mushroom grain spawn to cultivate miniature countertop mushroom clusters. You can also experiment with companion seed-starting blocks, planting deep-rooted climbing beans in the center of an eight-inch double tube surrounded by shallow-rooted sweet alyssum in two-inch micro-pots, growing ready-made companion plant guilds that can be transplanted together into garden beds. Integrating these creative, advanced additions transforms simple household paper tubes into high-performance, eco-friendly propagation tools that nurture vibrant plants and celebrate the rewarding craft of sustainable gardening.
