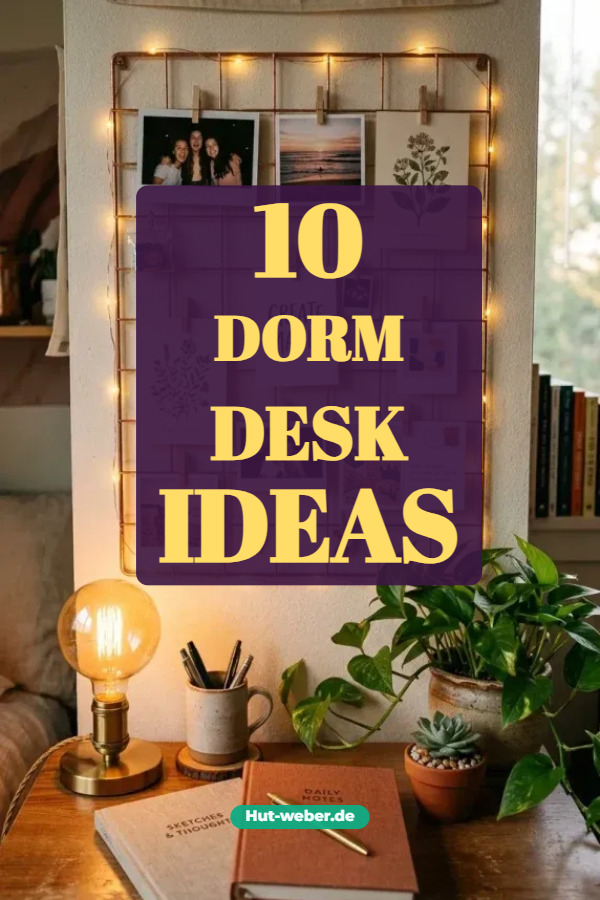
10 Dorm Desk Ideas

Spread the love

A dorm room desk is far more than just a place to type up essays—it serves as your primary study hub, vanity station, dining nook, and personal charging depot all in one. However, standard residence hall desks are notoriously basic, usually consisting of a plain wooden surface with minimal built-in storage. Without strategic organization and spatial planning, textbooks, tech cables, stationery, and personal accessories can quickly turn the desk into a cluttered, stressful space.

The key to creating an efficient dorm desk setup relies on vertical spatial zoning, damage-free organizational hardware, and ergonomics. By building upward with desktop hutches, utilizing clamp-on accessories, keeping cables contained, and introducing personalized task lighting, you can turn a basic university desk into a high-productivity, aesthetically pleasing workstation. This guide details 10 creative dorm desk ideas tailored for tight footprints and varied study styles.

Key Rules for Dorm Desk Optimization

Before purchasing desk hutches, organizers, or task lights, keep these essential spatial and functional rules in mind:

  • Build Upward, Not Outward: Footprint area on a dorm desk is precious. Use vertical desktop hutches, monitor risers, and tall book bins to utilize air space above the desk.
  • Keep Cable Management Hidden: Power cords from laptops, phone chargers, desk lamps, and monitors create immediate visual chaos. Use under-desk cable management trays, Velcro straps, and adhesive cord clips to route cables out of sight.
  • Prioritize Task Lighting: Dorm overhead fluorescent lights are harsh and uninviting. Add a dimmable LED task lamp with adjustable color temperatures (2700K to 4000K) to reduce eye strain during late-night study sessions.
  • Protect the Wood Surface: Avoid damaging university furniture by using a large, washable leatherette or felt desk pad. This protects the desktop from ink marks, coffee spills, and laptop scratches.

Idea 1: The Multi-Tier Wooden Hutch & Study Tower

Concept and Design Overview

Adding a freestanding wooden or steel-frame desktop hutch directly onto the back of your dorm desk immediately doubles your functional storage capacity without taking up extra floor space.

The upper shelves of the hutch hold heavy textbooks, binders, and storage baskets, while the open space underneath accommodates your laptop screen or computer monitor. Incorporating small acrylic bins on lower hutch shelves keeps pens, sticky notes, and highlighters organized and within arm’s reach. The color palette features natural light oak or white wood, cream storage bins, and brushed gold or matte black accents.

+-------------------------------------------------------------+
|              FREESTANDING DESK HUTCH FRAME                  |
|                                                             |
|   +--------------------------+  +-----------------------+   |
|   | TEXTBOOKS & BINDERS      |  | FABRIC STORAGE BIN    |   |
|   +--------------------------+  +-----------------------+   |
|   | ACRYLIC PEN DIVIDERS     |  | DESK LAMP / CLOCK     |   |
|   +--------------------------+  +-----------------------+   |
|                                                             |
|   [ LAPTOP / MONITOR CLEARANCE ZONE ]                       |
|   +-----------------------------------------------------+   |
|   | LARGE WASHABLE DESK PAD (Keyboard & Mouse Zone)     |   |
|   +-----------------------------------------------------+   |
+-------------------------------------------------------------+

Step-by-Step Implementation Method

  1. Measure Desk Surface: Measure the exact width and depth of your assigned dorm desk to ensure the hutch fits flush without overhanging edges.
  2. Position Hutch Base: Place the freestanding hutch against the back wall edge of the desk surface.
  3. Organize Vertically by Weight: Store heavy textbooks and binders on lower or middle hutch shelves; place lightweight decorative items and bins on top tiers.
  4. Incorporate Task Light: Clip an adjustable LED reading light or place a slim task lamp on a middle shelf to illuminate the main desk pad area below.

Idea 2: Minimalist Tech Setup with Monitor Riser & Cable Tray

Concept and Design Overview

Designed for STEM, coding, design, or business students who rely on dual screens or external monitors, this setup prioritizes ergonomic screen height and clean cable management.

Elevating your external monitor on a wood or acrylic monitor riser aligns the screen with your natural eye level, preventing neck strain. The hollow void beneath the riser provides a sleek sliding compartment to tuck away your keyboard and mouse when studying with physical notebooks. An under-desk adhesive cable tray hides power strips and power bricks completely out of view. The color scheme focuses on matte black, space grey aluminum, and natural timber.

Step-by-Step Implementation Method

  1. Mount Under-Desk Cable Tray: Attach an adhesive or clamp-on wire mesh cable tray beneath the rear edge of the desk to house your power strip.
  2. Set Up Monitor Riser: Place a wooden or aluminum monitor riser in the back-center of the desk.
  3. Route Power Cords: Run laptop, monitor, and phone charging cables down behind the riser directly into the hidden cable tray.
  4. Add a Full-Desk Mat: Lay a wide dark grey felt or black vegan leather desk mat beneath your keyboard and laptop for a unified, clean tech workspace.

Idea 3: Dual-Purpose Study & Makeup Vanity Station

Concept and Design Overview

When dorm rooms lack dedicated vanity space, transforming one side of your study desk into a dual-purpose grooming station eliminates morning routine friction.

Installing a LED vanity mirror featuring adjustable brightness settings allows you to get ready comfortably at your desk. Stacking clear acrylic makeup drawers beside your study supplies keeps cosmetics, hairbrushes, and skincare contained and dust-free. Using a matching aesthetic across both study and beauty items maintains a clean, cohesive look. The color palette pairs crisp white, rose gold, clear acrylic, and soft blush pink.

       +-------------------------------------------------+
       |           DUAL-PURPOSE DESK SURFACE             |
       |                                                 |
       |   +---------------------+  +-----------------+  |
       |   | LED VANITY MIRROR   |  | STUDY MONITOR / |  |
       |   | (Touch Dimmer Light)|  | LAPTOP STAND    |  |
       |   +---------------------+  +-----------------+  |
       |   | ACCRYLIC COSMETIC   |  | NOTEBOOKS &     |  |
       |   | DRAWERS & BRUSHES   |  | PEN HOLDERS     |  |
       |   +---------------------+  +-----------------+  |
       |                                                 |
       +-------------------------------------------------+

Step-by-Step Implementation Method

  1. Divide Desk into Zones: Reserve the left side of the desk for grooming/cosmetics and the right side for laptop/notebook study.
  2. Position LED Mirror: Place a tabletop lighted LED vanity mirror against the back left corner.
  3. Stack Acrylic Drawers: Set clear stackable makeup organizer drawers directly beneath or beside the mirror to store cosmetics vertically.
  4. Decant Makeup Brushes: Store brushes and hair tools upright in matching ceramic or glass tumblers to keep the desk surface tidy.

Idea 4: Pegboard Grid Wall for Hanging Accessories

Concept and Design Overview

Utilizing empty wall space directly above your desk converts a plain cinderblock or drywall surface into a fully customizable vertical storage gallery. Mounting a lightweight plastic or wooden pegboard grid with damage-free Command strips allows you to reconfigure shelves, hooks, and baskets as your study needs evolve.

Hanging small wire baskets, scissor hooks, shelf ledges, and magnetic strips onto the pegboard keeps stationery, headphones, keys, and photos off the main desk surface. The color palette features crisp white, pastel mint, matte black, or natural pine pegboards with brass or colorful peg accessories.

Step-by-Step Implementation Method

  1. Prep Wall Surface: Clean the wall area above your desk with rubbing alcohol and let it dry completely.
  2. Mount Pegboard Panel: Secure a lightweight modular pegboard using heavy-duty adhesive Picture Hanging Command Strips rated for the panel’s combined weight.
  3. Attach Modular Fittings: Insert pegboard shelves for small plants or clocks, cups for pens and scissors, and hooks for over-ear headphones and keys.
  4. Balance Visually: Arrange heavier items near the bottom of the pegboard and lighter photo clips near the top for visual stability.

Idea 5: Cozy Warm Botanical & Aesthetic Photo Gallery Setup

Concept and Design Overview

For students wanting a warm, relaxing, and creative study environment, blending organic botanical elements with a personalized photo wall turns a sterile desk into a cozy sanctuary.

Hanging a grid of fairy lights or a wire photo display panel above the desk allows you to clip print photos, art cards, and motivational quotes. Small low-maintenance indoor plants (like pothos, succulents, or snake plants) in ceramic pots introduce fresh greenery that boosts mood and air quality. The color palette focuses on warm ivory, sage green, terracotta, warm amber light, and natural wood.

       +-------------------------------------------------+
       |           WARM BOTANICAL DESK WALL              |
       |                                                 |
       |   +-----------------------------------------+   |
       |   | WIRE PHOTO GRID / STRING LIGHT GALLERY  |   |
       |   |  [Photo 1]   [Art Card]   [Photo 2]     |   |
       |   +-----------------------------------------+   |
       |   | POTTED TRAILING POTHOS / SUCCULENTS     |   |
       |   +-----------------------------------------+   |
       |                                                 |
       |        [ Warm 2700K Amber Desk Lamp ]           |
       +-------------------------------------------------+

Step-by-Step Implementation Method

  1. Hang Wire Grid Gallery: Mount a lightweight wire grid panel using adhesive hooks, attaching personal photos and art prints with wooden clothespins.
  2. Weave Warm Micro Lights: Weave copper-wire LED fairy lights along the wire grid perimeter for a soft evening glow.
  3. Add Easy-Care Plants: Place small potted pothos or succulents on the desk corners or hutch shelves where they receive ambient room light.
  4. Style with Earthy Stationery: Use linen-bound journals, terracotta pen pots, and warm wooden desk accessories.

Idea 6: Ultra-Organized Color-Coded Drawer Grid System

Concept and Design Overview

While the top surface of a desk catches immediate attention, drawer interiors are where daily clutter often accumulates. Transforming basic dorm desk drawers with modular, clear acrylic grid dividers ensures that every highlighter, flashcard, cable, and paperclip has an exact, dedicated spot.

Categorizing drawer items by daily subject or color creates high visual order that speeds up study routines. Combining shallow drawer dividers for pens and sticky notes with deeper back compartments for cables and calculators keeps drawers functioning smoothly. The color palette features crystal-clear acrylic dividers, white drawer liners, and color-coded stationery.

Step-by-Step Implementation Method

  1. Empty & Line Drawers: Clear out desk drawers completely and lay down a non-slip, washable silicone or felt drawer liner.
  2. Measure Internal Dimensions: Measure exact drawer depth, width, and vertical clearance height.
  3. Mix Modular Acrylic Trays: Interlock narrow rectangular trays for pens and highlighters alongside square bins for sticky notes and binder clips.
  4. Group Systematically: Arrange items by frequency of use—daily pens and highlighters in the front tray, secondary tech cables and calculators in the rear.

Idea 7: Monitor Light Bar & Modern Floating Minimalist Setup

Concept and Design Overview

Traditional desk lamps take up a significant footprint on small desktops. Installing a USB-powered monitor light bar (a slender lamp bar that clips directly onto the top edge of your computer monitor or laptop screen) illuminates your entire desk pad below without taking up a single square inch of desktop space.

Pairing a screen light bar with a floating laptop stand and a wireless keyboard/mouse creates an ultra-clean, modern minimalist aesthetic. Screen light bars direct light downward onto your workspace without causing screen glare or eye fatigue. The color palette features space grey, matte black, and clean white.

+-------------------------------------------------------------+
|              MONITOR LIGHT BAR DESK SETUP                   |
|=============================================================|
|       +---------------------------------------------+       |
|       | SCREEN-CLIPPED LED MONITOR LIGHT BAR        |       |
|       +---------------------------------------------+       |
|       | COMPUTER MONITOR / ELEVATED LAPTOP STAND    |       |
|       +---------------------------------------------+       |
|                                                             |
|   [ 100% CLEAR DESK SURFACE FOR WRITING & NOTEBOOKS ]       |
|   +-----------------------------------------------------+   |
|   | Wireless Keyboard   |   Wireless Precision Mouse    |   |
|   +-----------------------------------------------------+   |
+-------------------------------------------------------------+

Step-by-Step Implementation Method

  1. Clip Light Bar to Monitor: Attach a weighted LED monitor light bar onto the top rim of your computer monitor or external display.
  2. Plug into Monitor USB: Power the light bar directly using a USB port on your monitor or computer to eliminate extra wall plugs.
  3. Elevate Laptop on Stand: Place your laptop on an angled aluminum cooling stand beside the monitor.
  4. Use Wireless Peripherals: Connect a compact wireless keyboard and mouse to keep the desk surface free of cable tangles.

Idea 8: The Corner L-Shaped Desk Extension Setup

Concept and Design Overview

If your dorm room layout permits moving furniture or adding a small secondary table, creating an L-shaped corner desk layout dramatically expands your available workstation.

Placing a small, folding side table or narrow rolling utility cart flush against one side of your main desk creates an “L-zone.” One side handles primary laptop and typing work, while the secondary wing holds textbooks, notebooks, printers, or study snacks. The color palette pairs matching wood tones, neutral metal frames, and clean desk mats.

Step-by-Step Implementation Method

  1. Position Main Desk in Corner: Align your primary dorm desk against a corner wall layout.
  2. Add Flush Extension Table: Set a narrow, same-height folding table or 3-tier cart adjacent to the desk’s side edge to form a 90-degree L-shape.
  3. Assign Functional Wings: Dedicate the main desk face to screen work and typing; use the extension wing for spreading out physical textbooks and binders.
  4. Incorporate Swivel Seating: Ensure your desk chair swivels smoothly between both work zones without hitting bed frames or walls.

Idea 9: High-Density Vertical Grid with Wire Baskets & Clip Boards

Concept and Design Overview

Ideal for visual learners, project planners, and art/design students, this setup utilizes a grid of wall clipboards and hanging metal baskets to display active assignments, project timelines, and study schedules right at eye level.

Hanging wooden clipboards above your desk allows you to swap out weekly schedules, flashcards, and syllabi easily without damaging papers with tape. Hanging deep wire baskets below the clipboards creates accessible wall pockets for notebooks and folders. The color palette features industrial black wire mesh, natural wood clipboards, and crisp white papers.

       +-------------------------------------------------+
       |           VISUAL STUDY PLANNING WALL            |
       |                                                 |
       |   +-----------------------------------------+   |
       |   | CLIPBOARD GRID: WEEKLY SCHEDULE & SYLLABUS|   |
       |   |  [Clipboard 1]  [Clipboard 2] [Clipboard 3]  |   |
       |   +-----------------------------------------+   |
       |   | HANGING WIRE BASKET WALL POCKETS        |   |
       |   |  [Active Folders]  [Notebooks & Papers] |   |
       |   +-----------------------------------------+   |
       |                                                 |
       +-------------------------------------------------+

Step-by-Step Implementation Method

  1. Mount Clipboard Grid: Hang 3 to 4 matching wood clipboards in a horizontal row on the wall using damage-free Command picture hanging strips.
  2. Clip Active Documents: Clip your weekly class schedule, assignment checklists, and key study sheets onto the clipboards.
  3. Attach Metal Wire Pockets: Mount 2 metal mesh wall baskets below the clipboards to hold folders and spiral notebooks.
  4. Keep Desk Surface Clear: Reserve the main desk surface exclusively for current writing and typing tasks.

Idea 10: Compact Snack & Hydration Drawer Integration

Concept and Design Overview

Late-night study sessions often require quick access to water, tea, and healthy snacks. Converting one dedicated desk drawer or lower hutch shelf into an organized “Snack & Hydration Depot” keeps fuel nearby while preventing messy food wrappers from cluttering your workspace.

Using divided acrylic bins inside a deep desk drawer categorizes granola bars, nuts, dried fruit, tea bags, and instant coffee packets. Placing a insulated water tumbler and a compact electric kettle nearby creates a cozy, self-contained study hub. The color scheme highlights clear acrylic containers, colorful snack wrappers, and stainless steel hydration gear.

+--------------------------------------------------------------------------+
|                  DESK DRAWER SNACK & HYDRATION HUB                       |
|                                                                          |
|       Divided Acrylic Bin 1  |  Divided Acrylic Bin 2  |  Hydration Zone |
+--------------------------------------------------------------------------+
                                     |
                                 FEATURED:
                                     v
+------------------+------------------+------------------+-----------------+
| GRANOLA BARS     | TEA BAGS & COFFEE| INSTANT OATMEAL  | STAINLESS WATER |
| & Protein Packs  | Pods & Packets   | & Dried Fruit    | Tumbler / Mug   |
+------------------+------------------+------------------+-----------------+

Step-by-Step Implementation Method

  1. Dedicate a Bottom Drawer: Reserve your lowest desk drawer or a side cart drawer exclusively for food and hydration items.
  2. Insert Divided Acrylic Bins: Place deep, wash-safe acrylic bin dividers inside the drawer footprint.
  3. Unpack Bulk Packages: Remove outer cardboard boxes from snack bars and tea boxes, sorting individual pouches into divider slots.
  4. Keep Liquids Safe: Always keep water bottles and mugs on a rubber coaster or insulated desk pad to protect desk wood from condensation rings.

Common Beginner Mistakes and How to Avoid Them

  • Blocking Desk Power Outlets: Placing heavy hutches or book stacks directly over wall outlets makes plugging in laptop chargers frustrating. Always leave clear access channels for power outlets.
  • Overloading Wall Adhesives: Hanging heavy wooden shelves or metal grids using light-duty tape or low-rated adhesive hooks causes wall damage when items crash down. Always check weight ratings on Command strips and clean walls with alcohol first.
  • Neglecting Ergonomic Eye Height: Staring down at a low laptop screen for hours causes severe neck and back strain. Use a laptop stand or monitor riser to elevate screens to eye level.
  • Creating a Cluttered Desk Surface: Sprawling stationery, beauty products, and snacks across the main desktop leaves no room for typing or writing. Keep at least 70% of the main desk pad surface completely open.
  • Ignoring Cable Routing Early: Waiting until the setup is finished before organizing cords results in a messy tangle of wires. Route and clamp cables as you install each electronic device.

Practical Tips for Sustainable Dorm Desk Maintenance

  • The 5-Minute Nightly Reset: Spend 5 minutes at the end of every evening clearing coffee mugs, putting pens back into acrylic trays, and wiping down your desk pad so you wake up to a clean workspace.
  • Use Multi-Port USB Charging Stations: Consolidate multiple phone, watch, and laptop chargers into a single multi-port USB desktop charging station to occupy only one wall outlet.
  • Keep Disinfectant Wipes Nearby: Keep a canister of cleaning wipes inside a desk drawer to quickly wipe down keyboards, mice, and desk surfaces weekly.
  • Use Foldable Book Stands: When reading heavy textbooks, use an angled metal book stand to hold pages open vertically while keeping your desk surface free for writing notes.
  • Rotate Seasonal Decor: Keep desktop personal items minimal by swapping photos and small decor accents once a semester to keep the study space feeling fresh.

Leave a Reply

Your email address will not be published. Required fields are marked *