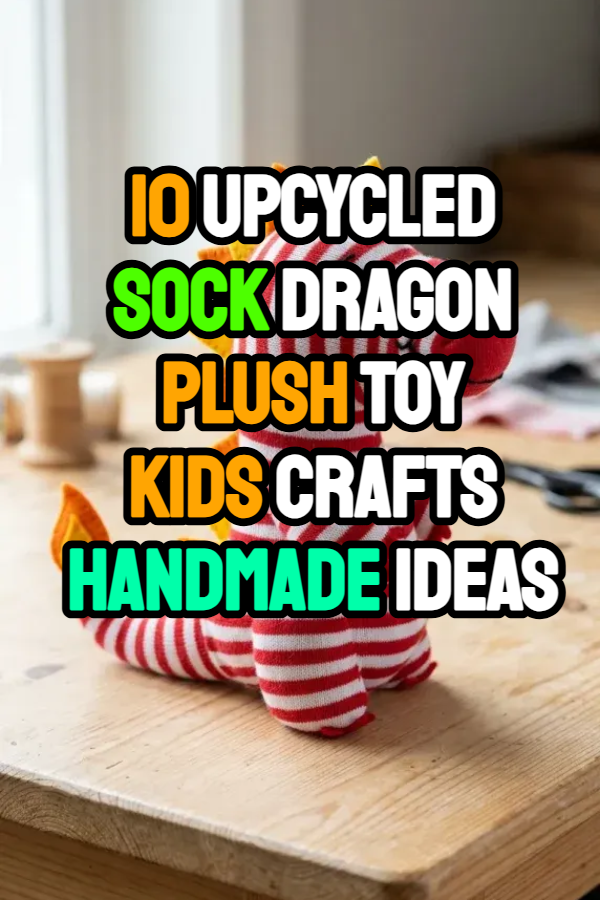
10 Upcycled Sock Dragon Plush Toy Kids Crafts Handmade Ideas

Spread the love

Transforming lone, outgrown, or mismatched socks into whimsical stuffed dragons turns discarded clothing into playful heirloom toys. The natural elasticity, softness, and knitted texture of crew and tube socks make them an ideal textile medium for plush sculpture. The heel curve naturally forms a dragon’s snout or seated hip, while the ribbed cuff shapes long tails or sturdy necks without requiring complex fabric pattern drafting. Instead of purchasing mass-produced plastic toys or expensive synthetic fabric bolts, crafting handmade sock dragons allows crafters to explore zero-waste upcycling, hand-embroidery, felt detailing, and basic sewing techniques. This guide covers ten distinct upcycled sock dragon plush designs, detailing construction mechanics, armature choices, kid-safe facial detailing, and spine attachments to turn your odd sock basket into a fleet of cozy mythical beasts.

Why This Idea Is Trending or Useful

Upcycled sock plushies are a favorite among sustainable crafters, parents, and educators because they combine zero-waste textile reuse with accessible hand-sewing practice. The fast fashion industry generates millions of tons of fabric waste annually; repurposing mismatched cotton, wool, and chenille socks keeps textiles out of landfills while teaching children the fundamentals of circular design. Sock dragons offer an inviting entry point into hand-stitching, basic ladder stitches, and button-sewing without the intimidation of large sewing machines. Furthermore, their soft, huggable form provides comforting sensory support for toddlers and school-age children alike. The combination of minimal startup costs, creative flexibility, durability, and charming handmade character makes sock dragon crafting a timeless, rewarding project.

Materials and Preparation

Crafting durable, child-safe sock dragons requires gathering clean socks, resilient stuffing, felt sheets, and basic sewing notions. Essential materials include clean crew socks, fuzzy chenille socks, or striped tube socks (cotton or wool blend), polyester fiberfill or upcycled fabric scrap stuffing, sheets of stiff craft felt in contrasting colors (for wings, horns, and spines), safety eyes or non-toxic embroidery floss, and heavy-duty polyester sewing thread. Useful extras include pipe cleaners or cotton armature wire for poseable wings, a fabric marking pen, and non-toxic fabric glue. Required tools include sharp fabric shears, hand-sewing needles, straight pins, and a wooden chopstick for stuffing narrow tail tips. Begin preparation by washing and thoroughly drying your socks. Turn each sock inside out and inspect the toe and heel areas for wear or thinning before cutting and marking your dragon anatomy templates.

Idea 1: Classic Striped Crew Sock Fire-Drake

Setup Method

The classic striped crew sock fire-drake utilizes a single bold striped crew sock to create a cheerful, vibrant dragon complete with felt back spines and a fiery tail flame. The sock’s ribbed leg section forms the upright neck and body, while the pre-formed heel serves as the dragon’s rounded snout. Striped knit patterns naturally accentuate the contours of the plush body, giving the finished toy a retro hand-knit aesthetic.

To construct this dragon, turn a striped crew sock inside out and lay it flat with the heel facing upward. Cut a straight vertical slit down the center of the ribbed cuff toward the heel to form two leg segments. Stitch the raw edges of both leg segments closed with a tight backstitch, leaving a small opening between the legs for stuffing. Turn the sock right side out and fill it firmly with polyester fiberfill, using a wooden chopstick to push stuffing deep into the toe (which forms the back end) and heel (which forms the snout). Cut a strip of triangular felt spines and a small teardrop-shaped flame from yellow and red felt. Insert the flat spine strip along the dragon’s back seam, pin it in place, and hand-stitch the opening closed using an invisible ladder stitch. Sew on two black safety eyes or embroider satin-stitch eyes, and add two tiny French knots for nostrils.

Idea 2: Fuzzy Chenille Sock Soft Baby Dragon

How to Create

A fuzzy chenille sock soft baby dragon transforms plush microfiber winter socks into an ultra-soft, sensory-friendly cuddle companion. Chenille knit completely hides hand stitches, making this design forgiving for beginner sewers and younger crafters. The thick, cloud-like texture pairs well with rounded, stubby dragon limbs and oversized, sleepy embroidered eyes.

To make this soft dragon, take a pair of pastel fuzzy socks. Use the first sock for the main body: stuff the toe firmly to form a round head, pinch the neck area, and wrap heavy thread tightly around it to define the head from the body. Stuff the remaining foot section and sew the base closed. From the second sock, cut four matching cylindrical sections to form short, stubby legs, plus two triangular ear horns. Stuff the legs lightly and attach them to the base of the body with sturdy whipstitches. Cut a set of curved, scalloped wings from soft wool felt and stitch them securely between the shoulder blades. Use dark embroidery floss to stitch closed crescent-shaped sleeping eyes directly onto the fuzzy face.

Idea 3: Posable Wing Wire-Armature Wyvern

Step-by-Step Guide

The posable wing wire-armature wyvern features broad, bendable wings and a sinuous neck supported by an internal chenille pipe cleaner or padded craft wire framework. Wyverns feature two sturdy hind legs and large wings that double as forelimbs, creating an athletic, predatory dragon silhouette suited for older kids and fantasy collectors.

Begin by shaping a continuous piece of heavy craft wire or braided pipe cleaners into a “T” framework that outlines both wing spans and runs down into the dragon’s spine. Slide the vertical wire into a long gray or charcoal tube sock, surrounding the wire with fiberfill stuffing to prevent sharp ends from poking through the knit. Cut two large, bat-like wing panels from double-layered felt, sandwiching the horizontal wire arms between the felt layers and securing them with running stitches along the simulated wing finger bones. Attach two large felt claws to the wing joints and sew two padded hind legs to the lower body. Finish the head with sharp triangular horns and menacing slit-pupil safety eyes.

Idea 4: Polka Dot Knee-High Long Neck River Serpent

Execution Process

A polka dot knee-high long neck river serpent uses an extra-long knee-high or over-the-knee sock to create a winding, serpentine water dragon. The extended length allows the dragon to coil, wrap around bedposts, or rest across shoulders like a playful scarf puppet.

Execute this design by flattening an extra-long patterned sock. To give the serpent an undulating, curved posture, stitch small interior tucks (darts) along one side of the sock before stuffing. Fill the length evenly with soft stuffing, alternating between fiberfill and small pouches of weighted poly-pellets to give the long body a pleasant, grounding heft. Sew the cuff end closed into a tapered tail point, attaching a fringed felt aquatic fin. Cut a continuous strip of wavy, scalloped dorsal fins from glitter craft felt and hand-stitch them along the entire spine from head to tail. Add large, expressive button eyes and an embroidered smiling mouth.

Idea 5: Mismatched Scrappy Patchwork Dragon

How to Create

The mismatched scrappy patchwork dragon celebrates zero-waste crafting by combining contrasting heels, toes, and cuffs from several discarded socks into a colorful, eclectic plushie. Using one floral sock for the torso, a polka-dot sock for the head, and striped socks for the limbs creates a folk-art aesthetic that highlights the handmade nature of the craft.

To assemble this scrappy dragon, collect three or four clean single socks with complementary colors. Cut the head from one sock, the main body from another, and use the remaining cuffs and toes to construct four mismatched limbs and a long tail. Sew the head and body pieces together right-sides-facing, turn right side out, and stuff firmly. Stitch each limb closed, stuff them, and ladder-stitch them onto the patchwork body. Cut mismatched felt patches in contrasting hues, sewing them over seams with visible, decorative blanket stitches in bright embroidery floss. Finish by sewing on mismatched vintage buttons for eyes and attaching a pair of asymmetrical quilted felt wings.

Idea 6: Pocket-Sized Baby Ankle Sock Hatchling in an Egg

Step-by-Step Guide

The pocket-sized baby ankle sock hatchling fits into the palm of a hand and nests inside a felt or fabric-lined cardboard eggshell. This quick craft uses miniature toddler or infant ankle socks, creating an adorable, portable companion with oversized proportions.

Start with a single infant or toddler ankle sock. Stuff the round toe tightly with a golf-ball-sized ball of fiberfill to create an oversized baby head, wrapping thread beneath it to cinch the neck. Stuff a smaller amount into the heel to form a chubby body, cutting away excess cuff fabric and gathering the opening with a running stitch pulled tight into a flat base. Cut tiny rounded felt wings, miniature horns, and a micro tail, hand-sewing them onto the miniature body. Use fine embroidery floss to stitch two simple French knots for eyes and tiny pink blushes on the cheeks. Craft a small cracked eggshell from white craft felt or a hollowed plastic egg container lined with fleece for the hatchling to rest inside.

Idea 7: Two-Headed Twin Hydra Sock Monster

Setup Method

The two-headed twin hydra sock monster features a single shared torso that branches into two independent, expressive dragon heads. This design uses two matching crew socks joined at the lower waist, allowing kids to manipulate both heads like an interactive dual hand puppet or dynamic display plush.

Set up the hydra by taking two identical socks. On each sock, cut off the bottom toe area up to the mid-foot. Place the two socks side-by-side with their open foot edges touching, and sew the inner sides together from waist to tail to merge them into a single wide torso with two long necks. Turn right side out and stuff both necks and the unified body firmly. Insert two flexible pipe cleaners into the necks so both heads can be posed independently. Cut out two sets of contrasting horns, spines, and wings from stiff felt, sewing them onto each respective head and back. Use different eye colors for each head to give the twin hydra distinct personalities.

Idea 8: Weighted Sensory Calming Lap Dragon

Execution Process

The weighted sensory calming lap dragon incorporates non-toxic ceramic beads or poly-pellets inside a long, heavy wool-blend sock to create a comforting, weighted lap pad for quiet time, reading nooks, or sensory regulation. The soothing weight and soft textile texture help provide calming deep pressure input for children.

Execute this design by selecting a heavy-knit adult crew or boot sock. Sew a strong inner liner pouch from cotton scrap fabric, filling it with one to two pounds of smooth glass or plastic weighted pellets. Insert the weighted pouch into the center of the sock body, packing soft fiberfill around it so the exterior remains soft and plush. Stitch the tail and neck closed securely with reinforced double seams to prevent bead leakage. Add a soft fleece belly panel, flat felt wings, and wide embroidered sleepy eyes. The finished plushie drapes comfortably across a child’s lap or shoulders.

Idea 9: Steampunk Winged Mechanical Sock Dragon

How to Create

The steampunk winged mechanical sock dragon blends rustic brown, olive, or tweed boot socks with metallic felt, vintage brass gears, and faux-leather harness accents. This industrial-fantasy design introduces mixed-media elements, appealing to older kids and fantasy hobbyists who enjoy intricate customization.

To create this steampunk dragon, start with a dark tweed or ribbed brown wool sock as the base body. Construct a multi-layered pair of mechanical wings using metallic bronze and copper craft felt, cutting out distinct structural gear teeth and riveted strut segments. Hand-sew small metal or plastic clockwork gears onto the wing joints and along the dragon’s spine. Use small brass grommets or shiny metal buttons for the eyes, and stitch a faux-leather strap across the chest with tiny buckle details. Add sharp bronze felt horns and a spade-shaped metallic tail tip to complete the inventor’s dragon look.

Idea 10: Friendly No-Sew Sock Dragon Finger Puppet

Step-by-Step Guide

The friendly no-sew sock dragon finger puppet provides a fast, needle-free crafting option for younger children and classroom groups. Using pre-cut felt shapes and child-safe non-toxic fabric glue, this project converts the toe of a bright ankle sock into an animated hand or finger puppet in minutes.

Begin with a clean, brightly colored ankle sock. Insert a piece of cardboard into the sock to prevent glue from soaking through both layers. Cut out felt dragon components: a pair of scalloped wings, two triangular horns, a row of zigzag back spines, two large white felt circles with black pupils for eyes, and red/yellow felt ribbons for fire breath. Using generous dabs of fast-drying non-toxic fabric glue, adhere the eyes and horns to the top of the toe, the zigzag spines down the back, and the wings to the sides. Glue the red and yellow felt flame ribbons directly inside the toe seam or beneath the snout. Let the glue set for thirty minutes, remove the cardboard insert, and slide fingers inside to animate the puppet.

Common Beginner Mistakes and How to Avoid Them

The most common mistake when making sock plushies is over-stretching the knit fabric during stuffing. Stuffing too aggressively distorts the sock’s knit weave, causing visible gaps where white fiberfill peeks through the dark threads. Pack stuffing in small, golf-ball-sized tufts, distributing it evenly with gentle pressure to maintain a smooth, uniform silhouette. Another frequent error is using standard thin sewing thread for structural joints; energetic play can snap thin thread at the limb and wing connections. Always use heavy-duty polyester thread, dental floss, or double-stranded embroidery floss when attaching high-stress appendages like wings and limbs. Additionally, many beginners use plastic safety eyes on loose, stretchy knit socks without backing reinforcements. On loose knits, safety eyes can easily pull through the woven loops, creating a choking hazard for young children. Always back safety eyes with a small square of dense felt on the inside of the sock, or opt for hand-embroidered satin stitches for toys intended for toddlers.

Practical Tips for Better Results

Achieving clean, professional results with handmade sock dragons relies on proper seam finishing, crisp felt preparation, and invisible ladder stitching. When cutting sock pieces, apply a small dab of clear fray-check glue or clear-drying craft glue along raw knitted edges to prevent the yarn loops from unraveling while you sew. To attach limbs, tails, and heads seamlessly, master the blind ladder stitch: take small, alternating horizontal stitches on the body and the limb, pulling the thread tight every three stitches to draw the seam inward invisibly. When creating felt wings and horns, use stiffened craft felt or fuse two layers of standard felt together with heat-activated fusible webbing; double-layered felt keeps wings standing upright rather than flopping limply against the body. Finally, use contrasting embroidery floss colors for facial expressions to give your dragon an engaging, animated personality.

Styling, Presentation, or Organization Ideas

Handmade sock dragons make charming decorative accents and personalized gifts when paired with imaginative accessories. Display a completed collection of sock dragons in a children’s bedroom by resting them along open book ledges, nesting them inside small wicker baskets filled with shredded kraft paper “nests,” or hanging flying dragons from the ceiling using clear monofilament illusion cord. If gifting a handmade sock dragon, package the plushie inside a decorated cardboard “dragon adoption box” complete with a personalized adoption certificate, feeding guide, and a small felt gemstone for the dragon to guard. For craft rooms, store clean spare socks sorted by color in clear glass jars alongside jars of colorful buttons and pre-cut felt spines, turning craft storage into a colorful maker station.

Budget or Time Planning

Crafting upcycled sock dragons is one of the most economical, high-reward DIY plush crafts available, delivering boutique-style handmade toys for under five dollars. Because the primary body material is an upcycled odd sock, your main textile expense is already covered. A basic starter supply kit—including a bag of polyester fiberfill, a multi-pack of assorted craft felt sheets, embroidery floss, and needles—typically costs between ten and fifteen dollars, providing enough notions to construct six to ten complete dragon plushies. In terms of time, simpler designs like the no-sew puppet take roughly fifteen to twenty minutes, while a classic hand-stitched striped dragon takes forty-five to seventy-five minutes. Dedicating a rainy weekend afternoon allows parents and kids to stitch, customize, and name a pair of mythical companions ready for years of imaginative play.

Creative Expansion and Advanced Inspiration

Once you have mastered basic sock dragon construction, explore advanced mixed-media and interactive expansions to elevate your plush creations. Consider installing a low-profile squeaker or rattle insert inside the belly cavity to create an interactive sensory toy for infants. Another exciting expansion is adding glow-in-the-dark or metallic accents: use glow-in-the-dark embroidery thread to outline wing bones and facial features, making the dragon glow gently in dark bedrooms. You can also craft removable plush accessories, such as tiny knitted scarves, felt dragon saddles for mini action figures, or hook-and-loop detachable felt fireballs that tuck inside the dragon’s mouth. These creative additions turn simple discarded socks into magical, heirloom-quality plush characters that inspire endless storytelling.

Similar Posts

Leave a Reply

Your email address will not be published. Required fields are marked *