10 Clay Trinket Dish Crafts DIY Projects Ideas

Spread the love

Handmade clay trinket dishes have become one of the most accessible, versatile, and satisfying DIY home decor crafts. Acting as stylish catchalls for everyday jewelry, rings, keys, and loose coins, these small-scale vessels combine functional utility with endless artistic expression. Moving far beyond plain flat plates, modern clay crafting techniques replicate the look of high-end ceramic stoneware, polished marble, organic raw-edge pottery, and glazed porcelain—all without needing an expensive pottery wheel or kiln.

The magic of clay trinket dish crafting lies in the flexibility of air-dry and oven-bake polymer clays. By mastering simple forming techniques—such as rolling even slabs, slump-molding inside everyday kitchen bowls, creating marbled color ribbons, pressing fresh botanicals, and painting with gloss varnishes and liquid gold leaf—crafters can produce boutique-quality accent pieces in an afternoon.
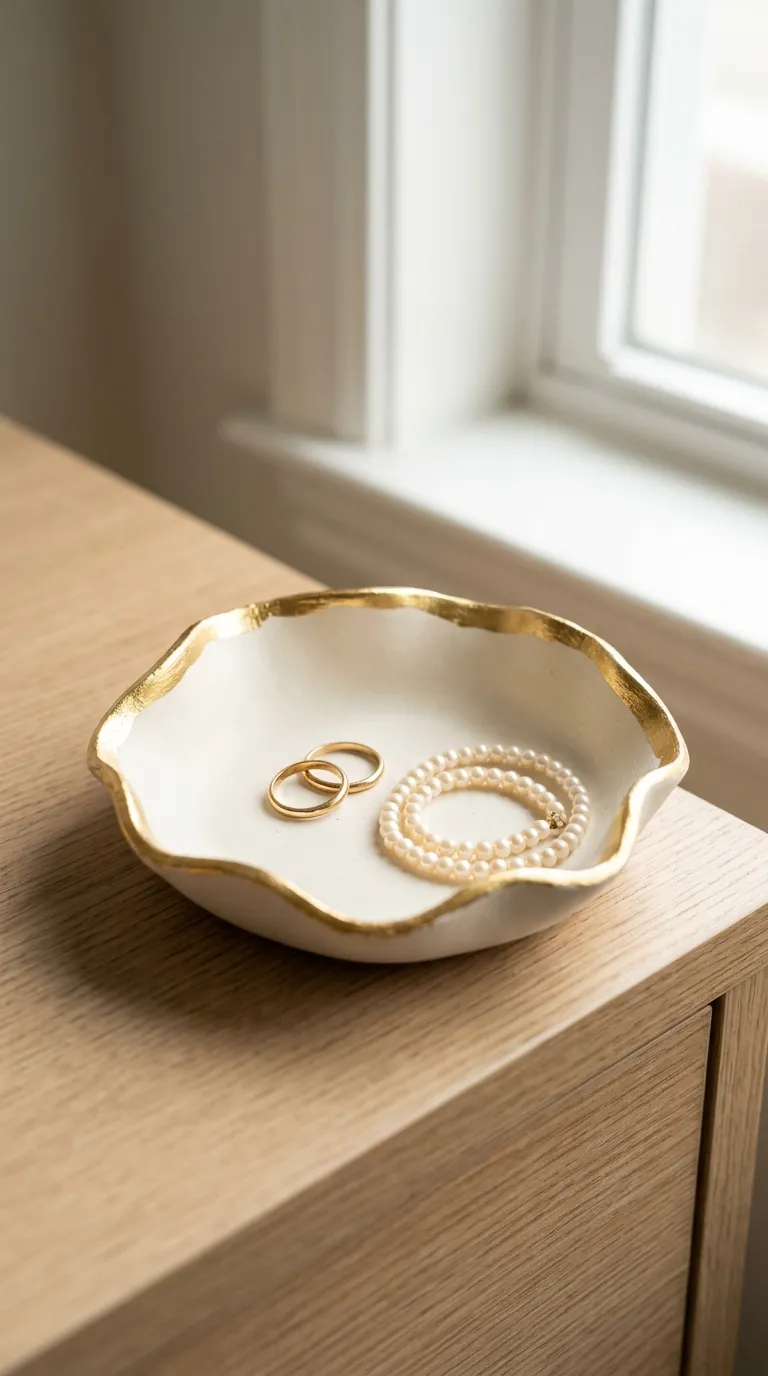
Whether you are crafting handmade gifts, curating your bedside nightstand, or styling a vanity tray, these ten curated DIY trinket dish projects provide step-by-step shaping blueprints, finishing techniques, and production-ready visual prompts.

Why This Idea Is Trending & Flattering

  • Accessible, Low-Barrier Crafting: Requires minimal investment in tools—basic air-dry clay or polymer clay, rolling pins, kitchen bowls, and craft paints are all you need to start.

  • Bespoke Vanity & Nightstand Organization: Keeps rings, earrings, and delicate accessories organized and scratch-free in dedicated, aesthetically pleasing catchalls.

  • Endless Aesthetic Adaptability: Easily customized to match any interior style—from Japandi minimalism and French vintage to playful checkered pastels and earthy terracotta.

  • High-End Ceramic Dupe Potential: Combining matte acrylic washes with high-gloss liquid varnishes mimics the texture, weight, and glaze of kiln-fired pottery.

  • Quick, Gratifying Creative Turnaround: Most projects take under an hour of active hands-on sculpting time, making them ideal for weekend crafting sessions or party activities.

Materials, Clay Types & Crafting Toolkit Guide

Selecting the appropriate clay body and finishing glaze is critical to ensuring your dishes dry crack-free, remain structurally durable, and resist daily wear.

Clay Mediums Compared

  • Air-Dry Clay (DAS, Crayola Air-Dry, Activa Plus): An earthy, mineral-based clay that hardens at room temperature over 24 to 48 hours. It yields a porous, stone-like texture that takes acrylic paint and sealers beautifully.

  • Polymer Clay (Sculpey Premo, Fimo, Kato Polyclay): A versatile, plastic-based compound baked in a home oven at low temperatures ($275^circtext{F} / 135^circtext{C}$). It bakes completely waterproof, remains slightly flexible (resisting drops), and comes in vibrant pre-mixed colors.

Essential Sculpting Tools & Supplies

  • Non-Stick Acrylic Rolling Pin & Depth Guide Rings: To roll uniform slabs (aim for $1/4$-inch thickness to prevent warping or cracking).

  • Slump Molds (Oven-Safe Ramekins, Glass Prep Bowls, Tart Pans): Everyday curved kitchen vessels used to drape and shape curing clay into shallow dishes.

  • Precision Craft Scalpel / X-Acto Knife: For cutting crisp, clean geometric borders and organic silhouettes.

  • Fine-Grit Sandpaper (220 to 400 Grit): For smoothing rough edges and surface imperfections after drying/baking.

  • Finishing Paints & Liquid Leaf: Acrylic craft paints, watercolor washes, and metallic oil-based liquid gold leaf for edge gilding.

  • Protective Glaze / Varnish: High-gloss or satin polyurethane sealer (such as Mod Podge Triple Thick, Liquitex Gloss Varnish, or UV resin) to create a protective, water-resistant ceramic-like shine.

1. The Gilded Raw-Edge Organic Catchall

1

Project Overview & Aesthetic Design

A luxury minimalist design celebrating wabi-sabi imperfections. An asymmetrical, hand-pinched air-dry clay dish features an organic, wavy perimeter finished with a gleaming rim of liquid gold leaf over a matte off-white ceramic wash.

Step-by-Step DIY Execution Guide

  • Roll a ball of off-white air-dry clay into a $1/4$-inch thick slab using an acrylic roller.

  • Cut an asymmetrical, irregular circular shape (approx. 5 inches wide) using an X-Acto knife, intentionally avoiding perfect circles.

  • Gently curl and pinch the outer perimeter upward with damp fingers to form a shallow rim with soft organic waves.

  • Rest the dish inside a small curved bowl lined with plastic wrap to support the curved edges while drying for 48 hours.

  • Once fully cured, sand any sharp burrs lightly with 400-grit sandpaper.

  • Paint the inner surface with a matte cream chalk paint. Using a fine-detail brush, apply metallic liquid gold leaf along the top rim edge.

  • Seal with a coat of clear satin varnish.

Pro Crafter Tip

Dip your fingertips in water sparingly while smoothing air-dry clay; excess water weakens the clay binder and can cause hairline shrinkage cracks during drying.

2. Pressed Botanical & Wildflower Imprint Dish

2

Project Overview & Aesthetic Design

A romantic nature-inspired dish capturing the delicate textures of real leaves, ferns, or fresh wildflowers pressed into the clay, highlighted with a subtle watercolor wash.

Step-by-Step DIY Execution Guide

  • Roll out a $1/4$-inch slab of white air-dry clay.

  • Harvest fresh, textured botanical clippings (like fern fronds, lavender sprigs, or Queen Anne’s lace).

  • Lay the botanicals flat on the clay surface and roll over them firmly with a rolling pin to emboss the leaf veins deeply into the clay.

  • Carefully peel the plant matter away using craft tweezers.

  • Cut a 4.5-inch circle around the impression using a round cookie cutter.

  • Drape the clay circle inside an oven-safe ramekin to curve the edges, letting it cure completely.

  • Dilute green, blush, or terracotta watercolor paint with water and wash it into the embossed crevices, immediately wiping the top surface with a damp sponge to leave color only in the grooves.

  • Seal with high-gloss glaze to mimic porcelain tile.

Pro Crafter Tip

Use freshly picked, flexible botanicals rather than dried flowers; dried stems are brittle and will crumble into the wet clay.

3. Faux Marble Swirl Polymer Ring Cone & Dish

3

Project Overview & Aesthetic Design

A high-end vanity centerpiece combining a shallow dish with an integrated, upright ring cone. Crafted from polymer clay swirled with white, slate gray, and subtle veins of metallic gold clay to mimic Carrara marble.

Step-by-Step DIY Execution Guide

  • Take 3 parts white polymer clay, 1 part light gray clay, and a thin thread of metallic gold polymer clay.

  • Roll each color into long snakes, twist them together tightly, fold in half, and roll again into a single log.

  • Roll the clay into a flat $1/4$-inch slab to reveal the marbled veins.

  • Cut a 4-inch circle for the dish base and drape it inside an oven-safe glass bowl.

  • Use a small portion of the remaining marbled clay to roll a 2-inch tall tapered cone.

  • Press the flat bottom of the cone firmly into the center of the raw dish base, smoothing the joint seam underneath.

  • Bake in a preheated oven at $275^circtext{F}$ ($135^circtext{C}$) for 30 minutes. Let cool completely in the oven before handling.

Pro Crafter Tip

Do not over-knead the clay ropes after twisting, or the colors will blend into a solid gray rather than retaining crisp marble striations.

4. Checkerboard Pastel Wave Trinket Tray

4

Project Overview & Aesthetic Design

A playful, modern aesthetic featuring a square trinket tray with a hand-painted pastel checkerboard pattern (sage green and buttercup yellow) framed by a scrunched, wavy clay border.

Step-by-Step DIY Execution Guide

  • Roll out a flat $5times5$-inch square slab of white polymer or air-dry clay.

  • Roll a thin snake of clay, gently curving it into an undulating serpentine wave pattern around the perimeter of the square to act as a raised border.

  • Smooth the underside seam to fuse the border to the base.

  • Cure/bake according to your clay type and sand the surface flat.

  • Using low-tack painter’s tape and a ruler, grid off $0.5times0.5$-inch squares on the tray bed.

  • Paint alternating squares with pastel sage green and soft yellow acrylic paint.

  • Apply two coats of high-gloss polyurethane glaze to achieve a glossy ceramic tile appearance.

Pro Crafter Tip

Seal your base paint with a light matte spray before applying painter’s tape to prevent the tape from pulling up the underlying paint layer.

5. Terracotta Speckled Stone Sunburst Dish

5

Project Overview & Aesthetic Design

An earthy, desert-modern catchall made from warm terracotta clay, stamped with a geometric radiating sunburst motif and flecked with natural white mineral speckles.

Step-by-Step DIY Execution Guide

  • Roll out a $1/4$-inch slab of natural terracotta air-dry clay.

  • Cut a 4.5-inch circle and use the edge of a plastic ruler or wooden clay tool to indent radiating sunburst lines originating from one side of the rim.

  • Gently curve the outer edges upward using your palms.

  • Dip an old stiff-bristle toothbrush into watered-down white acrylic paint, running your thumb across the bristles to splatter fine white speckles over the dish.

  • Allow the dish to dry thoroughly for 48 hours.

  • Finish with a completely matte varnish to maintain the raw, unglazed terracotta pottery look.

Pro Crafter Tip

Test your toothbrush splattering technique on a piece of scrap paper first to control the droplet size before flicking paint onto your finished dish.

6. Sculptural Hand-Shaped Ring & Palm Catchall

6

Project Overview & Aesthetic Design

An artistic dish sculpted in the silhouette of a gently cupped open palm, ideal for holding delicate rings in the fingers and loose change or crystals in the palm hollow.

Step-by-Step DIY Execution Guide

  • Roll out a slab of white air-dry clay to $1/4$-inch thickness.

  • Place your own hand flat on the clay and gently trace the outline using a needle tool or craft knife (or use a printable paper palm template).

  • Smooth the cut edges with a damp sponge.

  • Drape the clay hand over a curved ball of aluminum foil or inside a bowl so the fingers curl upward naturally and the palm forms a shallow recess.

  • Let dry completely over 2 to 3 days until rigid.

  • Paint with a soft alabaster white or terracotta wash, and seal with a protective satin glaze.

Pro Crafter Tip

Reinforce the narrow finger joints underneath with an extra ribbon of wet clay before drying to prevent thin fingers from snapping when handled.

7. Scalloped-Edge French Vintage Shell Dish

7

Project Overview & Aesthetic Design

Inspired by classic French coastal decor, this project features a half-shell silhouette with delicate fluted ridges and a scalloped fan rim, painted in a soft gloss oyster-white.

Step-by-Step DIY Execution Guide

  • Roll out a ball of polymer clay into an oval slab.

  • Using a fluted pastry cutter or clay scallop punch, cut a semi-circular scallop pattern along the upper edge.

  • Use a rounded modeling tool to press straight grooves radiating from the bottom base outward to each scallop peak, creating shell ridges.

  • Curve the dish slightly upward inside a shallow ceramic prep bowl.

  • Bake according to polymer clay package instructions.

  • Once cooled, paint with an iridescent or pearlized acrylic craft paint, followed by a coat of high-gloss UV resin or gloss varnish.

Pro Crafter Tip

A thin layer of UV resin cured under a UV nail lamp creates an ultra-thick, glass-like finish that mirrors authentic glazed porcelain.

8. Terrazzo Mosaic Chip Polymer Dish

8

Project Overview & Aesthetic Design

A colorful, mid-century modern tray featuring a clean white background embedded with multi-colored geometric clay chips resembling authentic Italian terrazzo flooring.

Step-by-Step Execution Guide

  • Bake thin, flat sheets of polymer clay in various accent colors (terracotta, mustard, black, blush, and sage) for 15 minutes.

  • Once cool, chop the baked colored clay sheets into tiny, irregular geometric confetti flakes using a craft knife.

  • Roll out a fresh slab of raw white polymer clay. Scatter the colorful baked chips across the raw white surface.

  • Roll over the slab firmly with an acrylic roller to press the chips flush into the white base.

  • Cut into an oval or round dish shape and curve inside a slump bowl.

  • Bake the entire assembled dish at $275^circtext{F}$ ($135^circtext{C}$) for 30 minutes, sand the surface completely smooth with wet sandpaper, and apply a satin sealer.

Pro Crafter Tip

Wet-sanding the terrazzo dish with 400-grit sandpaper under running water reveals ultra-crisp chip borders without creating airborne dust.

9. Celestial Zodiac Constellation Moon Dish

9

Project Overview & Aesthetic Design

A nighttime celestial catchall featuring a circular black-painted dish with a gold-leaf crescent moon rim and hand-drilled/painted star constellation maps.

Step-by-Step Execution Guide

  • Roll out a 4-inch circle of black polymer clay or white air-dry clay, forming shallow curved edges.

  • Using the tip of a fine needle tool, pierce tiny indentations in the clay surface forming your personal zodiac constellation pattern.

  • Cure or dry the dish completely.

  • Paint the base with deep matte midnight-black or navy acrylic paint.

  • Fill the constellation puncture dots with metallic gold paint, connecting the stars with ultra-fine gold line-work.

  • Paint a delicate crescent moon along one edge in liquid gold leaf.

  • Seal with a protective high-gloss glaze.

Pro Crafter Tip

Use a fine-point metallic gold gel pen or acrylic paint marker for drawing clean, straight constellation lines instead of a paintbrush.

10. Monogram Initial Wax-Seal Trinket Plate

10

Project Overview & Aesthetic Design

A personalized, vintage-inspired jewelry dish featuring a crisp wax-seal-style monogram crest embossed in the center, bordered by a delicate beaded clay pearl rim.

Step-by-Step DIY Execution Guide

  • Roll out a 4-inch circular slab of white clay and smooth the perimeter.

  • Roll dozens of tiny, uniform pea-sized clay spheres between your fingertips.

  • Line the tiny spheres in an unbroken row along the top outer rim of the dish, pressing gently so they fuse into a beaded pearl border.

  • Press an engraved metal wax seal stamp or antique brass button firmly into the center of the wet dish to leave a raised monogram crest.

  • Slump-mold the dish inside a shallow bowl and let cure completely.

  • Paint the dish in soft ivory, highlighting the raised monogram and beaded border with dry-brushed gold or bronze paint.

  • Apply a protective gloss sealer.

Pro Crafter Tip

Lightly dust the metal seal stamp with cornstarch before pressing into the clay to ensure a clean release without sticking or distortion.

Comparison & Craft Project Overview

DIY Trinket Dish Project Best Clay Medium Signature Shaping Method Finish & Glaze Style Difficulty
Gilded Raw-Edge Catchall Air-Dry Clay Hand-pinched organic rim Matte cream + Liquid gold leaf Beginner
Pressed Botanical Imprint Air-Dry Clay Real leaf rolling-pin deboss Watercolor wash + High-gloss Beginner
Faux Marble Ring Cone Dish Polymer Clay Twisted multi-color clay ropes Natural baked sheen + Satin seal Intermediate
Pastel Checkerboard Tray Polymer / Air-Dry Slab base + rolled wavy border High-gloss grid tile glaze Intermediate
Terracotta Sunburst Dish Terracotta Clay Ruler indent + toothbrush flick Raw matte finish Beginner
Sculptural Hand Catchall Air-Dry Clay Hand outline trace + foil drape Satin stone finish Advanced
Scalloped French Shell Dish Polymer Clay Pastry cutter scallop + ridges Pearlized gloss / UV Resin Intermediate
Terrazzo Mosaic Chip Tray Polymer Clay Pre-baked chip embedding Sanded flush + Satin glaze Advanced
Celestial Constellation Dish Polymer / Air-Dry Needle point star punctures Matte black + Gold linework Beginner
Monogram Beaded Seal Plate Air-Dry Clay Beaded rim + Metal wax stamp Antique ivory + Dry-brush gold Intermediate

Common Beginner Mistakes & How to Avoid Them

  • Rolling Slabs Too Thin: Slabs rolled thinner than $3/16$ inch tend to warp, curl at the edges, or crack during drying and baking. Solution: Maintain a uniform thickness between $1/4$ inch and $3/8$ inch using rolling pin depth guide rings.

  • Skipping the Protective Topcoat: Leaving air-dry clay unsealed leaves it vulnerable to moisture, staining from makeup, and chipping. Solution: Always apply at least two coats of water-resistant varnish, polyurethane, or UV resin to seal the clay porous surface.

  • Baking Polymer Clay at Excessive Temperatures: Overheating polymer clay scorches the pigment and releases noxious fumes. Solution: Use an inexpensive standalone oven thermometer to verify your oven holds a steady $275^circtext{F}$ ($135^circtext{C}$).

  • Drying Air-Dry Clay Unevenly: Placing wet clay directly near heaters or in direct sunlight causes the top surface to dry faster than the bottom, leading to severe warping. Solution: Let air-dry clay cure slowly at room temperature, flipping the piece over after 24 hours to let the base dry evenly.

Care & Maintenance for Handmade Clay Dishes

Care Routine Method & Recommendation
Daily Cleaning Wipe gently with a dry or slightly damp microfiber cloth (never submerge in water)
Food & Liquid Safety Decorative use only; not food-safe, microwave-safe, or dishwasher-safe
Jewelry Compatibility Safe for rings, earrings, watches, and keys; avoid resting wet jewelry directly on painted surfaces
Scratch Prevention Affix small self-adhesive felt pads to the underside base to protect delicate furniture surfaces

Similar Posts

  • 10 Empty Pill Bottle Crafts Ideas Handmade

    Spread the love

    Spread the loveUpcycling everyday household items into practical, aesthetic objects is an impactful way to reduce waste while introducing functional organization solutions to your home environment. Empty prescription and supplement bottles offer durable, moisture-resistant, and compact plastic structures that are ideal for creative repurposing projects. This comprehensive guide explores foundational craft techniques, step-by-step methods, and…

  • 10 Small Space DIY

    Spread the love

    Spread the loveSmall spaces often feel challenging, but they hold incredible potential when designed with intention. Whether you are decorating a studio apartment, refreshing a bedroom corner, or trying to make a narrow hallway feel larger, DIY projects can completely transform your environment. The beauty of small space DIY decor is that it does not…

  • 10 Glitter Nail Ideas

    Spread the love

    Spread the loveGlitter nails are the perfect way to add a little sparkle and shine to your everyday look. Whether you are getting ready for a holiday party, a wedding, or just want your nails to look fabulous, glitter polish is always a good choice. The best part about glitter nails is that they can…

  • 10 Modern Gray and Brown Living Room

    Spread the love

    Spread the loveWhen it comes to designing a living room that feels both modern and inviting, few color combinations work as beautifully as gray and brown. The cool tones of gray paired with the warmth of brown create a balanced, sophisticated, and cozy atmosphere that suits almost any style—from minimalistic city apartments to rustic family…

  • 10 Outside Christmas Decorations

    Spread the love

    Spread the loveDecorating the outside of your home for Christmas is one of the most joyful ways to celebrate the holiday season. Before guests even step inside, your exterior decorations set the mood, spread cheer, and turn your home into a welcoming winter wonderland. Whether you live in a cozy apartment, a suburban house, or…

  • 10 Cute Swag Outfits

    Spread the love

    Spread the loveIf you love fashion that balances comfort, confidence, and a hint of street attitude, swag outfits are the perfect choice. These looks combine everyday essentials with bold accessories, oversized fits, and trendy layers to create a style that’s effortlessly cool and uniquely yours. Whether you are heading out with friends, going to class,…

Leave a Reply

Your email address will not be published. Required fields are marked *