10 Chunky Knit Throw Crafts DIY Projects Ideas

Spread the love

Chunky knit blankets are the hallmark of cozy home decor, adding instant tactile richness, warmth, and modern luxury to any sofa, reading nook, or bed. Moving far beyond traditional, time-consuming needle knitting, modern chunky knit throws rely on ultra-thick chenille, roving, or tube yarn worked entirely with your hands or arms.

The beauty of hand and arm knitting lies in its speed and accessibility. Without needing giant wooden needles, you can complete a full-sized lap blanket in just two to three hours. By mastering simple stitch variations—such as classic stockinette, reversible garter stitch, textured moss stitch, and dramatic braided cables—crafters can produce boutique-quality throws tailored to any color scheme.
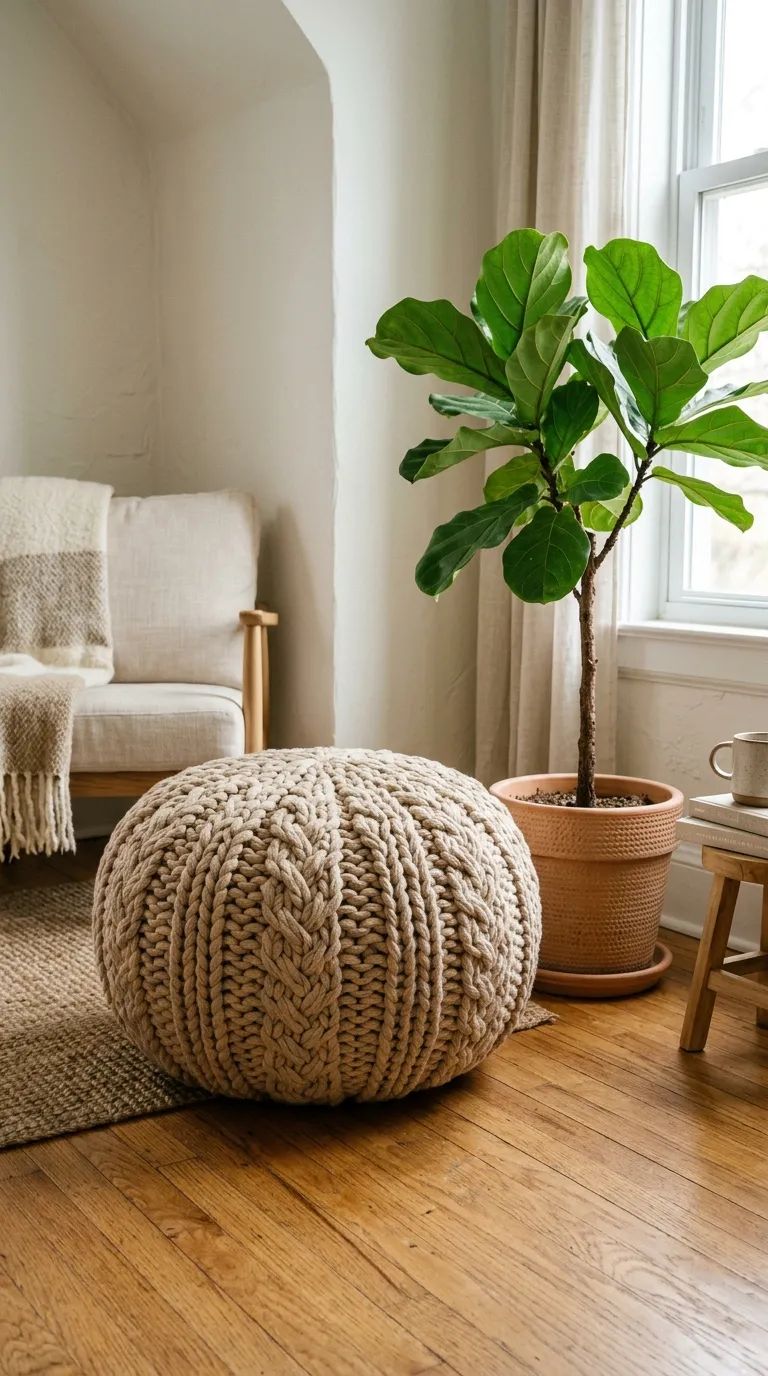
Whether you want a cloud-like oversized bed runner, an earthy color-blocked lap throw, or a machine-washable chenille everyday blanket, these ten curated DIY projects deliver step-by-step assembly guides, yarn calculations, and production-ready visual prompts.

Why This Idea Is Trending & Flattering

  • Ultra-Fast Turnaround: Hand knitting with jumbo yarn works up rapidly; an entire throw blanket can be finished in a single afternoon.

  • No Specialized Tools Required: Hand and arm knitting require zero needles or hooks—your hands, forearms, and a flat tabletop or floor are your only tools.

  • Instant Tactile Warmth: Oversized chunky loops add visual texture, softening clean-lined modern furniture and enhancing Japandi, Scandinavian, and Boho spaces.

  • Beginner-Friendly Stitch Control: Large stitches make it simple to spot, correct, and prevent dropped loops or tension mistakes.

  • Bespoke Luxury Gift Appeal: High-end retailers sell chunky knit throws at steep prices; DIY versions deliver identical luxury at a fraction of the retail cost.

Materials, Yarn Types & Sizing Calculator Guide

Selecting the right yarn fiber determines how soft, heavy, durable, and washable your finished chunky throw will be.

Jumbo Yarn Types Compared

  • Chunky Jumbo Chenille Yarn (Size 7 Jumbo): Fluffy, velvety polyester yarn with a braided inner core. It is lightweight, non-shedding, highly durable, and 100% machine-washable.

  • Tubular Cotton/Velvet Yarn (“Stay-Dry” Filled Tube): Cotton or velvet seamless tubes stuffed with springy polyfill. It holds crisp stitch definition, never pills or sheds, and has a sleek, modern look.

  • Unspun Merino Wool Roving: Pure luxury wool fibers that create iconic, cloud-like blankets. It is delicate, dry-clean only, and prone to shedding/pilling with heavy friction.

Sizing & Yarn Yardage Breakdown

  • Standard Lap Throw ($40times50text{ inches}$): Requires roughly $5text{ to }6text{ lbs}$ ($100text{ to }140text{ yards}$) of jumbo yarn / approx. 5–6 skeins of jumbo chenille.

  • Medium Couch Throw ($50times60text{ inches}$): Requires roughly $7text{ to }8text{ lbs}$ ($150text{ to }180text{ yards}$) of jumbo yarn / approx. 7–8 skeins.

  • Full / Queen Bed Runner ($50times70text{ inches}$): Requires roughly $9text{ to }10text{ lbs}$ ($200text{ to }220text{ yards}$) of jumbo yarn / approx. 9–10 skeins.

Basic Hand-Knitting Setup

  • Flat Working Surface: Work on a large clean floor, dining table, or wide bed to keep stitches flat and evenly spaced.

  • Loop Size Standard: Aim for loops roughly $1.5text{ to }2text{ inches}$ in height (about the width of two to three fingers) to maintain consistent tension without loose gaps.

10 Chunky Knit Throw DIY Craft Projects

101

1. The Classic Hand-Knitted Chenille Stockinette Throw

Project Overview & Aesthetic Design

The foundational classic: a smooth, cloud-like throw in creamy oatmeal or ivory, featuring clean vertical V-shaped stockinette columns on the front and textured purl bumps on the reverse.

Step-by-Step DIY Execution Guide

  • Lay out your first skein of jumbo chenille yarn on a flat table. Make a slipknot with a 4-inch tail.

  • Cast on 24 to 28 chain stitches to establish a 40-inch wide base.

  • To knit Row 1: Working from right to left, pull a loop of working yarn from back to front through each chain stitch, keeping loops 1.5 inches tall.

  • To knit Row 2: Working back from left to right, pull a new loop through each existing loop.

  • Repeat alternating left-to-right and right-to-left rows until your blanket reaches 50 inches.

  • To bind off: Take the first two loops on the open edge; pull the second loop through the first loop. Continue passing each subsequent loop through the previous loop across the edge. Tie off the final loop and tuck the tail inside.

Pro Crafter Tip

Keep your loop heights consistent by testing them against the width of two fingers as you pull each stitch.

2. Double-Sided Reversible Garter Stitch Blanket

2

Project Overview & Aesthetic Design

A deeply textured, springy throw blanket that looks identical on both sides, featuring dense horizontal ridges that trap extra warmth and provide a heavy, weighted feel.

Step-by-Step DIY Execution Guide

  • Cast on 26 chain loops using 3-ply tubular velvet yarn.

  • To create garter ridges via hand knitting: Knit Row 1 pulling loops from back to front.

  • For Row 2, reverse your action: push loops from front to back through the stitches.

  • Continue alternating pulling forward and pushing backward on every row.

  • Work until 8 skeins are incorporated, creating thick horizontal ribbing.

  • Cast off using the standard chain-link bind-off method, weaving the final yarn tail seamlessly into the corner rib.

Pro Crafter Tip

Garter stitch creates a squishy, thicker blanket than stockinette, using roughly 10% more yarn for the same dimensions.

3. Modern Terracotta & Oatmeal Color-Block Throw

3

Project Overview & Aesthetic Design

A modern, two-tone throw blanket featuring a bold split design: the lower two-thirds in warm terracotta and the top one-third in creamy oatmeal.

Step-by-Step DIY Execution Guide

  • Cast on 28 stitches using warm terracotta jumbo chenille yarn.

  • Work in stockinette stitch for 28 rows (roughly 35 inches of length).

  • When ending the terracotta yarn, join the new oatmeal yarn by tying an invisible square knot, trimming the fringe ends to 0.5 inches and tucking them into the center of the stitch.

  • Continue hand knitting with the oatmeal yarn for another 14 rows (roughly 18 inches).

  • Bind off the top edge using oatmeal yarn and weave in loose ends.

Pro Crafter Tip

Join new yarn skeins exclusively at the outer edges of the blanket rather than mid-row to keep the face of the throw seamless.

4. Chunky Diamond Cable-Knit Bed Runner

4

Project Overview & Aesthetic Design

An architectural luxury runner designed to drape across the foot of a queen or king bed, featuring raised, braided cable crosses running down the center.

Step-by-Step Execution Guide

  • Cast on 20 stitches with structured tubular cotton yarn.

  • Designate stitches 1–4 and 17–20 as outer border stockinette, and the central 12 stitches as the cable section.

  • Every 4th row, perform a hand-knit cable cross: cross loop 7 over loop 8 before pulling the working yarn through, and cross loop 13 over loop 14.

  • Continue this crossing sequence to form braided diamonds down the center of the runner.

  • Work until the runner reaches 75 inches in length, then bind off and steam lightly.

Pro Crafter Tip

Tubular cotton yarn is ideal for cable patterns because its internal polyfill core holds crisp 3D structure without collapsing.

5. Ribbed Moss Stitch Textured Blanket

5

Project Overview & Aesthetic Design

A tactile, checkerboard-like texture created by alternating knit and purl stitches within the same row, producing a modern grid finish that resists edge curling.

Step-by-Step DIY Execution Guide

  • Cast on an even number of stitches (e.g., 26 stitches) using sage-green jumbo chenille.

  • Row 1: Alternate pulling 1 loop back-to-front (knit), then pushing 1 loop front-to-back (purl) across the row.

  • Row 2: Reverse the pattern—purl over the knits and knit over the purls.

  • Repeat this alternating sequence to build a dense, non-curling moss-stitch grid.

  • Bind off loosely once you reach 60 inches of length.

Pro Crafter Tip

Moss stitch naturally lies flat without edge curling, making it ideal if you dislike wavy borders.

6. Jumbo Arm-Knitted Merino Wool Roving Cloud

6

Project Overview & Aesthetic Design

The iconic, oversized statement blanket made using unspun merino wool roving, knitted directly on your forearms to create massive, cloud-like 3-inch loops.

Step-by-Step DIY Execution Guide

  • Unroll a 6-lb bump of unspun 23-micron merino wool roving on a clean sheet.

  • Slipknot the yarn onto your right wrist.

  • Cast on 18 stitches directly onto your right forearm, sliding each loop onto your arm.

  • To knit Row 1: Hold working yarn in your right hand, slip the loop off your wrist over the yarn to form a new loop, and slide the new loop onto your left arm.

  • Continue transferring loops from arm to arm until the blanket reaches desired length.

  • Cast off by binding two loops together across your arm and tucking the fluffy end inside.

Pro Crafter Tip

Draft or gently pull the wool roving before knitting to maintain even strand thickness, and avoid wearing jewelry that could snag delicate wool fibers.

7. Chunky Waffle-Knit Grid Throw

7

Project Overview & Aesthetic Design

A structured, dimensional blanket featuring deep recessed squares resembling a waffle weave, creating pockets that trap body heat for winter warmth.

Step-by-Step Execution Guide

  • Cast on a multiple of 3 stitches plus 2 (e.g., 26 stitches) using charcoal gray jumbo chenille.

  • Row 1: Knit all stitches.

  • Row 2: Knit 1, Purl 2, Knit 1, repeat between asterisks to the end.

  • Row 3: Purl 1, Knit 2, Purl 1, repeat to the end.

  • Repeat this 3-row sequence to build deep, geometric waffle squares.

  • Bind off and lightly pat the edges flat.

Pro Crafter Tip

Waffle stitch contracts horizontally; cast on 4 to 6 extra stitches if you want to maintain a wide throw width.

8. Fringed Boho Chunky Knit Lap Blanket

8

Project Overview & Aesthetic Design

A cozy, relaxed throw blanket finished with thick, 8-inch chunky tassels along both short ends, combining minimalist stockinette with bohemian fringe details.

Step-by-Step DIY Execution Guide

  • Cast on 22 stitches with warm almond-toned jumbo chenille yarn.

  • Work 36 rows of classic stockinette stitch until the blanket measures $38times48text{ inches}$.

  • Bind off the live edge securely and weave in corner tails.

  • Cut 44 pieces of yarn, each 16 inches long.

  • Fold two strands in half to create a loop; insert the loop through a bottom edge stitch using your fingers, then pull the four raw ends through the loop to lock a Lark’s Head tassel.

  • Repeat across both the top and bottom borders, spacing tassels evenly.

  • Trim the tassel ends straight with fabric shears.

Pro Crafter Tip

Dip or dab the cut tips of jumbo chenille tassels with a dot of clear fabric glue to prevent the chenille fibers from fraying over time.

9. Multi-Strand Marled Ombré Hand-Knit Throw

9

Project Overview & Aesthetic Design

A heavy, variegated throw created by holding two strands of medium-chunky yarn together simultaneously (e.g., slate blue and cream), shifting colors to create a gradual ombré fade.

Step-by-Step Execution Guide

  • Hold two strands of size 6 chunky yarn together as one double-strand.

  • Start with 2 strands of Cream; cast on 24 stitches and knit 12 rows.

  • Drop 1 strand of Cream and join 1 strand of Slate Blue; knit 16 rows to create a marled transition.

  • Drop the remaining Cream strand and join a second strand of Slate Blue; knit 12 rows in solid blue.

  • Bind off using both blue strands and weave in ends.

Pro Crafter Tip

Holding two strands together creates a denser, heavier weave that mimics high-end woven wool blankets.

10. Giant Chunky Knit Floor Pouf / Ottoman

Project Overview & Aesthetic Design

A functional 3D companion piece to your throw blankets: a round, spherical chunky knit floor cushion stuffed firmly with polyfill or foam inserts.

Step-by-Step Execution Guide

  • Cast on 16 stitches using durable tubular cotton yarn.

  • Work in garter stitch for 24 rows to create a long, ribbed rectangle ($20times36text{ inches}$).

  • Bind off, leaving a 4-foot tail.

  • Use the tail to sew the cast-on and bind-off edges together, forming an open-ended tube.

  • Weave yarn through the bottom edge loops, pull tight like a drawstring, and knot securely.

  • Stuff the interior firmly with high-density polyfill or an existing round cushion insert.

  • Cinch the top edge closed with working yarn, tie off, and bury the knot inside the pouf.

Pro Crafter Tip

Stuff the pouf slightly firmer than desired; chunky knit stitches stretch over time with regular sitting.

Comparison & Project Overview

DIY Chunky Project Recommended Yarn Fiber Technique Skill Level Est. Time Best Placement
Classic Stockinette Throw Jumbo Chenille (Size 7) Table Hand-Knit Beginner 2 Hours Living room sofa
Reversible Garter Blanket Tubular Velvet Table Hand-Knit Beginner 2.5 Hours Accent armchair
Terracotta Color-Block Jumbo Chenille Color Switch Join Beginner 2.5 Hours Reading nook
Diamond Cable Bed Runner Tubular Cotton Stitch Crossing Advanced 4 Hours Foot of queen/king bed
Ribbed Moss Stitch Throw Jumbo Chenille Knit/Purl Alternation Intermediate 3 Hours Modern guest room
Arm-Knitted Merino Cloud Merino Wool Roving Forearm Knitting Intermediate 1.5 Hours Master bedroom decor
Waffle-Knit Grid Throw Jumbo Chenille Multi-Row Texture Intermediate 3.5 Hours Deep lounge seating
Fringed Boho Lap Throw Jumbo Chenille Stockinette + Tassels Beginner 2 Hours Porch rocker / Daybed
Multi-Strand Marled Ombré Dual Size 6 Yarn Double-Strand Feed Intermediate 3 Hours Cozy nursery
Chunky Knit Floor Pouf Tubular Cotton Flat to 3D Cinch Intermediate 2.5 Hours Floor lounge / Footrest

Common Beginner Mistakes & How to Avoid Them

  • Pulling Loop Tension Unevenly: Making some loops 1 inch and others 3 inches creates wavy, lumpy blanket edges. Solution: Check loop height against your fingers regularly (aim for 2 to 3 finger widths per loop).

  • Twisting Live Loops During Rows: Twisting the base of a loop before pulling working yarn through creates tight knots that break vertical stitch lines. Solution: Keep loops facing forward and untwisted on your work surface before pulling through.

  • Selecting Wool Roving for High-Traffic Everyday Use: Unspun wool roving pills, sheds, and tears when exposed to pets and daily couch use. Solution: Use braided jumbo chenille or filled tubular cotton yarn for machine-washable everyday durability.

  • Binding Off Too Tightly: Cinching bind-off stitches too tightly causes the top edge to curl inward into an hourglass shape. Solution: Keep your bind-off loops slightly looser than your body stitches to ensure a straight edge.

Care & Cleaning Guide for Chunky Knits

Yarn Type Washing Method Drying Protocol Maintenance Tip
Jumbo Chenille Machine wash cold, gentle cycle inside a duvet cover Tumble dry low or air-dry flat Snip any loose thread snags with scissors
Tubular Cotton/Velvet Spot clean or machine wash gentle Air-dry flat on clean towels Highly durable; resist stretching while wet
Merino Wool Roving Dry clean only or gentle spot wipe Lay flat away from direct heat Lightly trim surface pills with fabric s

Similar Posts

  • 10 Workbench Designs DIY

    Spread the love

    Spread the loveA workbench is the heart of any workshop. Whether you are a beginner woodworker, a weekend DIYer, or a professional builder, having the right workbench makes every project smoother and more enjoyable. The good news is that you do not need to buy an expensive ready-made workbench. With the right plans, some tools,…

  • 10 Unique Wall Art

    Spread the love

    Spread the loveWhen it comes to designing a home that feels warm, inviting, and filled with personality, wall art is often the element that makes the biggest impact. Walls are like blank canvases waiting to tell a story. Whether you live in a small apartment or a spacious home, the right art can transform your…

  • 10 Room Makeover Ideas for Teens

    Spread the love

    Spread the loveDesigning a room makeover for teens can be both fun and challenging. A teenager’s bedroom is more than just a place to sleep, it is their personal sanctuary where they study, relax, and express themselves. Unlike childhood bedrooms, a teen’s room should reflect their personality, interests, and lifestyle while still being functional and…

  • 10 Pothos Climbing Ideas

    Spread the love

    Spread the lovePothos is one of the most loved houseplants in the world and for good reason. It is beautiful forgiving fast growing and incredibly versatile. While many people let pothos trail from shelves or hanging baskets its true magic is revealed when it is encouraged to climb. In nature pothos is a climbing vine…

  • 10 Cute Dorm Rooms

    Spread the love

    Spread the loveMoving into a dorm room is one of the most exciting parts of college life. It is the first space that truly feels like your own, even if it is small, shared, or temporary. A cute dorm room can completely change your college experience. It can make studying more enjoyable, help you relax…

Leave a Reply

Your email address will not be published. Required fields are marked *