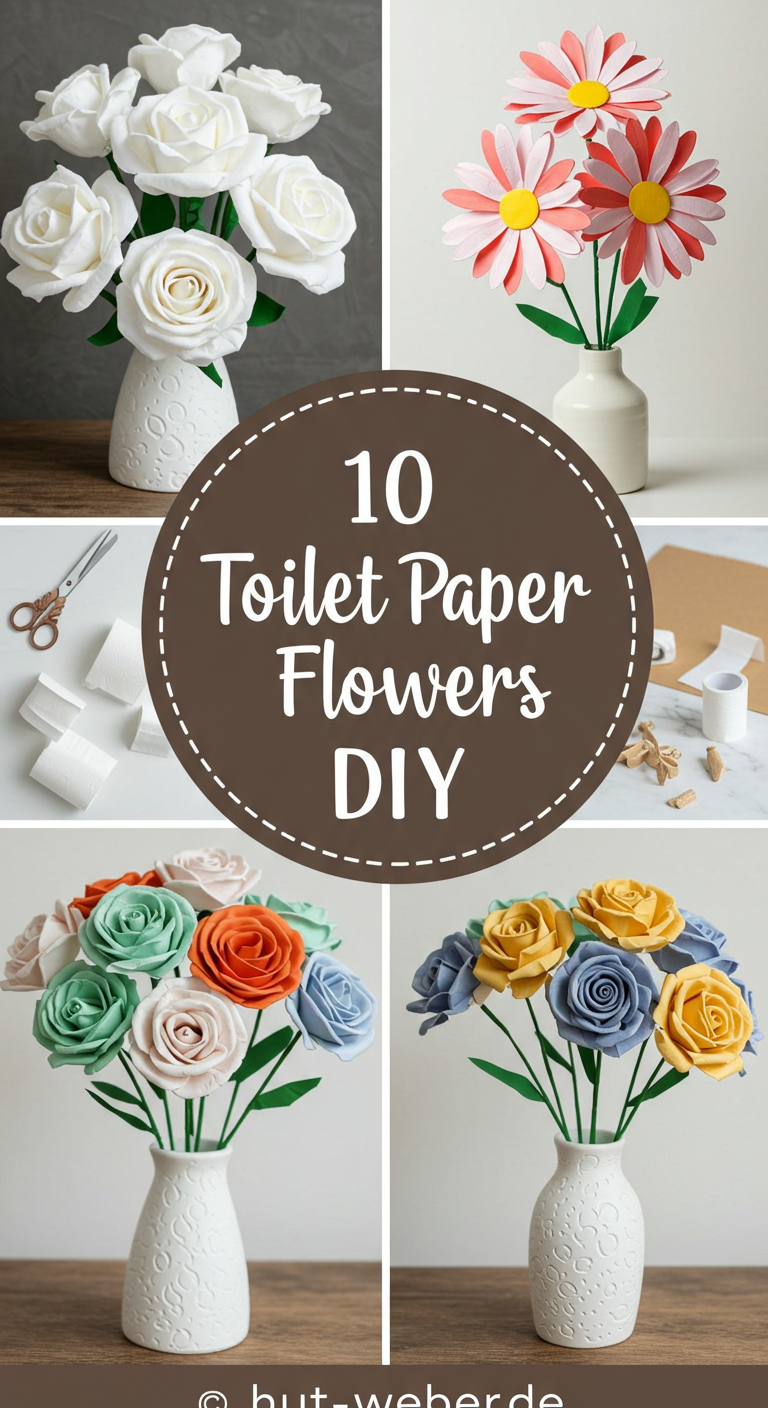
10 Toilet Paper Flowers DIY
Crafting with everyday items can be surprisingly fun and rewarding. One of the most creative and budget friendly materials you can use is toilet paper. Yes, you read that right. Toilet paper is soft, flexible, and easy to shape which makes it a fantastic medium for creating delicate and beautiful flowers. Whether you want to decorate your home, add handmade touches to your party decor, or create a unique DIY gift, toilet paper flowers are a simple yet impressive craft project to try.
In this blog post, we will explore ten toilet paper flower ideas that you can make at home. Each idea is beginner friendly, requires only a few supplies, and can be adapted to your personal style. With a little creativity, these DIY toilet paper flowers can look as lovely as real blooms while costing next to nothing.

1. Classic Toilet Paper Roses
Roses are timeless symbols of beauty and love. Making roses from toilet paper is easier than you might think. All you need is a few sheets of toilet paper, scissors, and glue.
Start by layering several sheets of toilet paper, then fold them into an accordion style. Cut the folded paper into petal shapes. Roll the first petal tightly to form the bud, and then gradually add more petals around it, gluing them as you go. Fluff out the edges slightly to mimic the natural softness of rose petals.
These toilet paper roses can be made in different sizes. You can dye them with watercolor or food coloring to create red, pink, or yellow roses. They look wonderful in a vase or as part of a homemade bouquet.

2. Toilet Paper Carnations
Carnations are known for their full and frilly petals, which can be replicated perfectly using toilet paper. To make carnations, stack several sheets of toilet paper and cut them into circles. Pile them together and staple or tie the center.
Once secured, gently separate each layer by pulling it upward toward the center, creating a fluffy texture. The result is a bloom that resembles a real carnation.
These are perfect for centerpieces or even for decorating gift boxes. You can dip the edges of the petals in colored water for a two tone effect.

3. Toilet Paper Daisies
If you want a cheerful and simple flower, daisies are a great choice. For daisies, cut toilet paper into long strips and fold them. Then cut petal shapes from the folded strips. Gather the petals in a circular shape and secure them at the base with tape or glue.
Add a small circle of yellow construction paper or felt at the center of the flower to complete the daisy look. Daisies made from toilet paper look lovely when strung together into a garland or used as wall art.

4. Toilet Paper Lilies
Lilies are elegant and graceful, making them a beautiful addition to any craft project. To create a lily, cut toilet paper into large petal shapes with pointed tips. Use a pencil to curl the edges slightly.
Arrange the petals around a small cone of paper to form the center. You can add a piece of pipe cleaner painted yellow or green to serve as the stamen. Glue everything together and let it dry.
Lilies look especially beautiful when used in wreaths or table centerpieces. White toilet paper already resembles the natural color of lilies, but you can add a light wash of pastel paint for variation.

5. Toilet Paper Sunflowers
Sunflowers bring warmth and brightness to any space. To make toilet paper sunflowers, cut out wide oval shaped petals from toilet paper. Color them with yellow paint or food coloring.
For the center of the sunflower, cut a small round piece of cardboard and cover it with dark brown paint or crushed coffee grounds for texture. Attach the yellow petals around the circle to complete the sunflower.
These make excellent wall decorations and can be framed for rustic style home decor.

6. Toilet Paper Peonies
Peonies are lush and romantic flowers that can be crafted beautifully from toilet paper. Layer multiple sheets of toilet paper and cut them into wide petal shapes. Stack the petals in a circular pattern, starting from small in the center to larger at the edges.
Secure them with glue at the base, then gently pull the layers upward to create volume. Peonies look stunning in pastel shades. Lightly brushing the edges of the petals with watercolor can make them look more realistic.
These are ideal for wedding decor, bridal showers, or spring themed crafts.

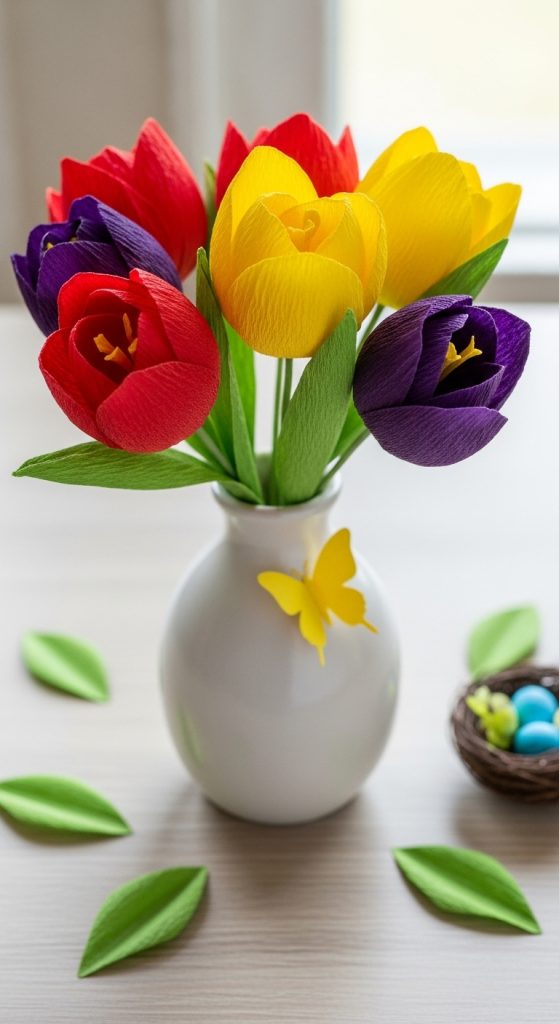
7. Toilet Paper Tulips
Tulips are elegant flowers that are easy to recreate with toilet paper. Cut out long oval petals and glue them around a rolled up piece of toilet paper to form the bud. Shape the petals so they overlap slightly, just like a real tulip.
Add a green straw or skewer as the stem. Tulips made from toilet paper can be arranged in small vases to add charm to your home. Dye them in red, pink, yellow, or purple to resemble the real thing.
8. Toilet Paper Hydrangeas
Hydrangeas are known for their clusters of small flowers, and you can replicate this look with toilet paper. Cut out tiny flower shapes, each with four or five petals. Make dozens of these small blooms.
Next, glue them closely together onto a small foam ball or crumpled paper base. The result is a full, round flower cluster.
Hydrangeas look impressive when displayed in a vase. You can also use them as decorative accents for photo backdrops or large craft projects.

9. Toilet Paper Poppies
Poppies are delicate flowers with striking petals. To make poppies, cut toilet paper into large round petal shapes. Lightly color them red or orange with paint. Arrange them around a black paper or felt circle for the center.
Add a pipe cleaner or wire stem to complete the look. Toilet paper poppies can be used for memorial displays, art projects, or simple home decorations.

10. Toilet Paper Orchids
Orchids are exotic flowers that add elegance to any decor. To make orchids from toilet paper, cut out elongated petal shapes and arrange them in threes. Add a uniquely shaped center petal with a folded piece of toilet paper for the orchid’s lip.
Glue the petals together carefully and attach them to a stem made from wire or pipe cleaner. Light pastel shades like purple, pink, or white will make them look realistic.
Orchids crafted from toilet paper look beautiful as single stem arrangements or as part of a decorative wall hanging.

Tips for Crafting Toilet Paper Flowers
- Use multiple layers: Layering adds volume and makes the flowers look realistic.
- Experiment with color: Watercolor, food coloring, or diluted acrylic paint can be used to add natural shades to the flowers.
- Choose sturdy toilet paper: Softer paper works well for delicate flowers, while thicker paper is better for structured blooms.
- Add stems and leaves: Use green straws, pipe cleaners, or sticks for stems and cut green paper for leaves.
- Preserve your flowers: Lightly spray with clear sealant to keep the flowers intact for longer.
Creative Uses for Toilet Paper Flowers
Once you have created your flowers, you might be wondering how to display them. Here are some fun ideas:
- Bouquets: Combine different types of flowers into a handmade bouquet for decoration or gifting.
- Centerpieces: Use toilet paper flowers to create table centerpieces for parties or gatherings.
- Wall Art: Attach the flowers to a canvas or frame for unique wall decor.
- Gift Wrapping: Add small toilet paper flowers to wrapped presents for a personal touch.
- Garlands: String multiple flowers together to create a garland for events or seasonal decorations.
Final Thoughts
Making toilet paper flowers is a wonderful way to turn a simple household item into something creative and beautiful. These DIY projects are affordable, easy to learn, and customizable to suit any style or occasion. Whether you want to make roses, tulips, or exotic orchids, toilet paper flowers can brighten up your home and impress your guests.
With a little practice, you can master the art of toilet paper flower crafting and even create your own unique designs. So gather your supplies and start experimenting with these ten ideas. Your handmade blooms will not only look stunning but also give you the joy of creating something beautiful with your own hands.