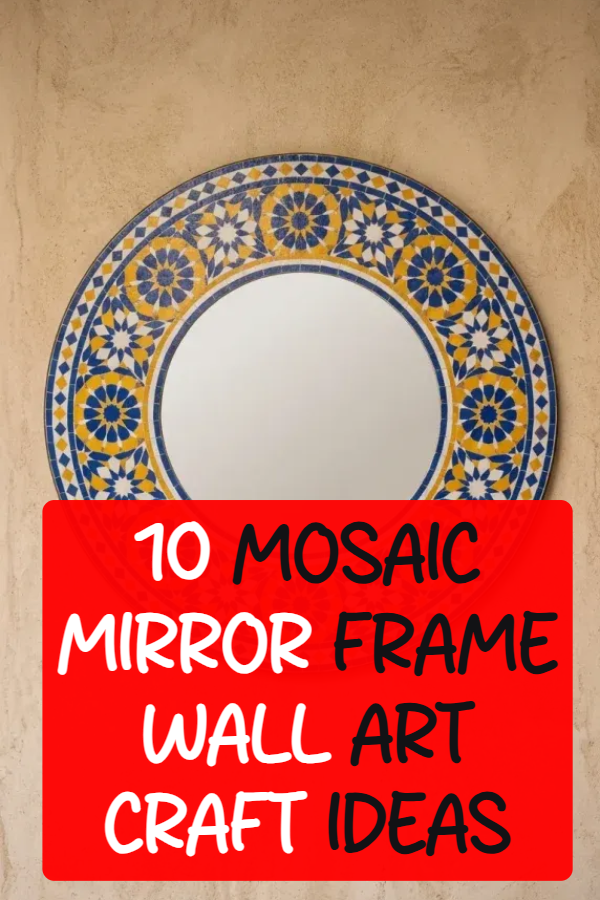
10 Mosaic Mirror Frame Wall Art Craft Ideas

Introduction
Transforming plain mirrors with mosaic tiling turns basic wall decor into reflective architectural focal points. Applying glass tesserae, ceramic shards, sea glass, mother-of-pearl, or mirror tiles onto a wooden substrate allows you to frame functional reflective glass with rich color, texture, and light refraction. Instead of buying generic, mass-produced framed mirrors, crafting your own mosaic mirror frames lets you tailor palettes and geometric motifs to match any interior aesthetic. This guide details ten distinct mosaic mirror frame designs, complete with substrate choices, tesserae cutting techniques, adhesive selection, and grouting mechanics to help you build durable, heirloom-quality mosaic wall art for your home.
Why This Idea Is Trending or Useful
Mosaic mirror frames are a staple in contemporary interior styling, biophilic spaces, and maximalist home decor because they blend ambient light reflection with rich surface texture. Glass and glazed ceramic tesserae catch and scatter both natural sunlight and evening lighting, making narrow hallways, bathrooms, and small entryways feel brighter and more open. Mosaic craft is also an exceptional avenue for creative upcycling: chipped antique porcelain plates, sea glass collected from beach trips, broken stained glass scraps, and leftover bathroom tiles can be repurposed into functional art. Furthermore, sealed mosaic framing is water-resistant and durable, holding up well in humid environments like powder rooms and covered patios. The combination of sustainable material reuse, reflective light play, and custom styling makes mosaic mirror framing an enduring, high-reward DIY craft.
Materials and Preparation
Building safe, long-lasting mosaic mirror frames requires gathering a sturdy backing board, mirror glass, tile tesserae, specialized adhesives, and grout before starting. Essential crafting materials include half-inch exterior-grade plywood or MDF cut to your desired frame dimensions, a frameless beveled or flat mirror insert, assorted mosaic tesserae (stained glass sheets, vitreous glass tiles, glazed ceramic shards, or iridescent smalti), silicone adhesive or thin-set mortar, and sanded or unsanded cementitious grout. Required tools include dual-wheeled glass nippers, tile nippers, safety goggles, rubber grout floats, heavy-duty nitrile gloves, a tile sponge, painter’s tape, and a dust mask. Begin preparation by sanding the wood substrate lightly to promote adhesive bonding, then trace your mirror insert and border patterns onto the wood with a pencil. Protect the central mirror glass by taping heavy kraft paper over its face with painter’s tape, leaving only the frame border exposed for tiling and grouting.
Idea 1: Classic Moroccan Zellige Geometric Sunburst Frame
Setup Method
The Moroccan Zellige sunburst frame uses geometric, interlocking glazed ceramic tiles arranged in radiating starburst patterns around a central circular mirror. Traditional Moroccan tilework relies on sharp geometric angles, featuring saturated cobalt blues, warm safran yellows, and crisp whites that frame the reflective center with vibrant Mediterranean energy.

To set up this frame, cut a thirty-inch circular plywood base and securely bond a fourteen-inch round mirror in the center using neutral-cure mirror silicone. Using dual-wheeled nippers, trim square glazed ceramic tiles into diamond and chevron shapes. Lay out an eight-point star pattern around the mirror circumference, alternating cobalt blue and brilliant white diamond tiles. Fill the outer perimeter with radiating triangular tiles in saffron and turquoise, maintaining uniform one-eighth-inch grout gaps throughout. Once the adhesive cures for twenty-four hours, apply a pure white sanded grout across the tile matrix using a rubber float. Sponge the tile faces clean after fifteen minutes, and buff off any remaining grout haze with a microfiber cloth once dry.
Idea 2: Iridescent Vitreous Glass Ocean Wave Mosaic

How to Create
An iridescent vitreous glass ocean wave mosaic layers translucent aqua, teal, deep sapphire, and seafoam green tiles into sweeping, curvilinear wave bands around a rectangular or oval mirror. The metallic, shimmering sheen of vitreous glass reflects ambient light alongside the main mirror, creating a dynamic watery shimmer suited for coastal powder rooms and serene spa bathrooms.
To create this ocean wave frame, sketch fluid wave contours radiating outward from the inner mirror edge to the outer frame rim using a permanent marker on a rectangular wooden substrate. Use wheeled nippers to cut iridescent glass tiles into curved keystones and organic slivers. Adhere the tiles along your drawn wave lines with clear silicone adhesive, transitioning smoothly from deep navy and cobalt at the bottom corners up through shimmering aqua, seafoam, and translucent clear glass at the top. Grout the cured mosaic with a soft silver-gray unsanded grout to accentuate the wave curves without scratching the glossy glass surfaces.
Idea 3: Vintage Broken China & Antique Porcelain Pique Assiette
Step-by-Step Guide
The pique assiette technique breathes new life into chipped antique porcelain plates, floral teacups, and ceramic heirlooms by arranging the broken shards into a romantic cottagecore mosaic frame. The varying thicknesses, embossed rims, and delicate floral transfers of vintage china give the frame a three-dimensional, tactile relief that frames vanity mirrors with timeless nostalgic charm.

Begin by collecting mismatched vintage porcelain plates featuring floral transferware and gilded edges. Wrap the plates in a heavy canvas drop cloth and tap them firmly with a rubber mallet to break them into manageable one-to-two-inch shards; refine the shard shapes using tile nippers while wearing safety goggles. Mount an oval mirror to an oval plywood backer. Butter the backs of the porcelain shards with thick white thin-set mortar, placing embossed plate rim fragments around the outer frame perimeter to create a scalloped border. Fill the inner sections with flat floral fragments, angling colorful blooms toward the mirror. Allow the mortar to set for twenty-four hours, then apply an ivory-tinted sanded grout, carefully wiping the grout flush with the varied tile contours to reveal the raised floral details.
Idea 4: Matte Black & Metallic Gold Mid-Century Arch Frame

Execution Process
A matte black and metallic gold mid-century arch frame pairs minimalist geometric lines with high-contrast luxury. This design uses an arched mirror glass silhouette surrounded by matte unglazed black ceramic tiles and polished metallic gold glass smalti, creating a sophisticated accent suited for entryway consoles, modern bedrooms, and minimalist dressing rooms.
Execute this design by cutting an arched plywood backer twenty-four inches wide by thirty-six inches tall, mounting an arched mirror centered with a four-inch border. Trace straight vertical grid lines along the sides and a radiating fan pattern across the top arch. Adhere matte black porcelain square tiles in clean, straight soldier rows along the side borders using dark thin-set mortar. Intersperse slender strips of polished metallic gold mirror glass or gold-leaf smalti at rhythmic intervals, radiating the gold accents out around the top arch curve. Grout the completed piece with charcoal-black grout, which blends seamlessly with the matte black tiles while making the gleaming gold accents pop dramatically.
Idea 5: Frosted Sea Glass & Mother-of-Pearl Coastal Driftwood Frame

How to Create
A frosted sea glass and mother-of-pearl frame brings organic, weathered coastal textures indoors. Combining soft tumbled sea glass in shades of cobalt, olive, and seafoam with iridescent flat mother-of-pearl shell tiles creates a tactile, luminous frame that catches natural sunlight effortlessly.
To build this coastal frame, mount a circular mirror onto a raw, reclaimed driftwood plank or weathered wood round. Arrange flat mother-of-pearl shell squares around the immediate inner border of the mirror to create a shimmering transition ring. Outward from the shell border, cluster genuine or tumbled sea glass shards in organic, non-linear groupings using clear waterproof silicone adhesive. Keep the natural frosted texture of the sea glass intact by using an unsanded, bone-white grout applied carefully between the crevices, taking care not to smear heavy grout over the textured sea glass faces. Finish the outer edge with a wrap of natural twisted manila rope for an authentic maritime finish.
Idea 6: Mirrored-on-Mirror Fractured Diamond Disco Wall Art

Step-by-Step Guide
The mirrored-on-mirror fractured diamond frame creates a dynamic, multi-faceted optical illusion by using hand-cut mirror tiles set at slight, microscopic angles around a large central mirror. When ambient room light or chandelier illumination hits the angled mirror tesserae, the frame scatters brilliant, dancing light beams across surrounding walls like a refined modern disco ball.
Start with a sturdy square plywood backer board and mount a high-quality square mirror in the center. Cut sheets of silver mirror glass into uniform one-inch diamond and triangle tiles using a pistol-grip glass cutter and running pliers. Apply flexible neutral-cure clear mirror mastic to the frame border. Place the mirror diamonds in an interlocking harlequin pattern, occasionally propping one edge of a tile onto a tiny dab of extra mastic to vary the angle of light reflection slightly across the surface. Once fully cured, apply a light pewter-gray unsanded grout between the mirror seams, buffing the entire surface with glass cleaner and a lint-free microfiber cloth until every facet shines with crystal clarity.
Idea 7: Bohemian Turquoise & Terracotta Talavera Frame
Setup Method
A bohemian turquoise and terracotta Talavera frame brings the warmth and energy of Mexican folk art to wall decor. Combining hand-painted ceramic Talavera tile fragments with warm, unglazed terracotta pottery shards creates an earthy, tactile frame that enlivens southwest, bohemian, and rustic Mediterranean interiors.

Set up this frame by securing a rectangular mirror to a broad wooden backer board. Cut hand-painted cobalt, turquoise, and marigold Talavera tiles into geometric quarters and triangles using tile nippers. Alternate these decorative glazed pieces with rough, porous terracotta pottery shards to create a vibrant border pattern. Adhere all pieces with standard tile thin-set mortar, allowing the rustic, irregular heights of the clay to show. Grout the frame using a warm sand-colored sanded grout to mimic traditional adobe mortar, sponging the tile faces clean to reveal the hand-painted glazes.
Idea 8: Botanical Pressed Flora Stained Glass Leaf & Petal Frame
Execution Process
A botanical pressed flora stained glass frame arranges translucent, leaf-shaped stained glass tesserae and pressed flower glass cabochons into climbing ivy and floral vine motifs. This design brings the restorative calm of a garden conservatory inside, using emerald, olive, and chartreuse glass leaves that appear to grow organically around the mirror glass.

Execute this design by drawing winding botanical vines and leaf clusters around an oval mirror backer. Use a glass cutter to hand-cut assorted green stained glass sheets into curved leaf and petal silhouettes. Position smooth glass floral cabochons or clear glass gems holding pressed botanicals at key focal points along the drawn vine lines. Glue the pieces in place with clear silicone adhesive. Once cured, apply an earthy moss-green or charcoal-tinted unsanded grout between the glass leaf seams, sponging carefully to leave the translucent glass leaves clean and crisp against the frame.
Idea 9: Industrial Metallic Copper & Slate Stone Linear Frame
How to Create

An industrial metallic copper and slate stone linear frame merges raw, natural cleft slate with shimmering copper metallic tiles to create an architectural, modern masculine aesthetic. The contrast between rough, matte charcoal slate and polished, warm copper makes this frame an exceptional statement piece for modern lofts, industrial entryways, and contemporary fireplaces.
To create this frame, mount a tall, narrow full-length or rectangular mirror onto an MDF backer board. Cut natural dark charcoal slate into long, linear rectangular strips using a tile saw or heavy-duty nippers. Interleave these matte slate bars with slender strips of polished solid copper mosaic tiles or metallic copper glass tesserae in horizontal, staggered brick-bond patterns down the length of the frame. Adhere with high-strength thin-set mortar. Seal the joints with a deep charcoal sanded grout, and apply a matte stone enhancer sealer over the slate portions to deepen their rich, dark cleft texture.
Idea 10: Celestial Moon Phase Black Onyx & Mother-of-Pearl Frame
Step-by-Step Guide

The celestial moon phase frame transforms a round mirror into a cosmic art piece, surrounding the central glass with eight distinct lunar phases crafted from luminous white mother-of-pearl set into a dense background of black onyx glass tiles. This design balances deep midnight black negative space with radiant, iridescent lunar silhouettes.
Begin by mounting a round mirror on an oversized circular wooden substrate. Trace eight evenly spaced circular moon phase outlines around the perimeter: new moon, waxing crescent, first quarter, waxing gibbous, full moon, waning gibbous, third quarter, and waning crescent. Cut shimmering white mother-of-pearl shell tiles and arrange them to fill each illuminated moon shape accurately. Fill the surrounding background space with tumbled black glass, black vitreous tiles, and tiny metallic gold star-shaped tesserae. Adhere all pieces firmly with black-tinted mortar. Apply pitch-black grout across the entire mosaic matrix, wiping the mother-of-pearl moons thoroughly clean to let the iridescent lunar cycle shine against the dark night sky.
Common Beginner Mistakes and How to Avoid Them
The most critical mistake beginners make when creating mosaic mirror frames is using the wrong adhesive behind the mirror itself. Standard construction adhesives and acidic silicone caulks contain chemicals that eat through the silver reflective backing on the mirror glass over time, causing unsightly black desilvering spots (mirror rot) across the glass. Always use dedicated, neutral-cure mirror mastic or solvent-free mirror silicone to bond your central mirror to the substrate. Another frequent error is using sanded grout on delicate, scratch-prone materials such as mirror tiles, mother-of-pearl, and soft vitreous glass. Sanded grout contains coarse silica quartz that permanently scratches and dulls high-gloss surfaces when scrubbed; always use smooth, unsanded grout for glass and mirror mosaics with joint gaps under one-eighth of an inch. Additionally, many crafters fail to seal porous wooden substrates before tiling. Raw wood rapidly absorbs moisture from wet thin-set and grout, causing the wood to warp, bow, and pop tiles off the frame as it dries. Always apply two coats of waterproof wood primer or diluted PVA sealant to all wooden surfaces before gluing tiles.
Practical Tips for Better Results
Achieving clean, professional results with DIY mosaic mirror frames relies on consistent surface leveling, precise grout timing, and safety precautions. When cutting glass and ceramic tesserae, always wear ANSI-approved safety goggles and work inside a shallow cardboard box to catch flying glass shards; use dual-wheeled glass nippers with gentle, consistent squeezes rather than crushing force to achieve clean geometric cuts. When laying out tiles of varying thicknesses—such as combining thick ceramic shards with thin mirror tiles—adjust the bed depth by adding extra mortar beneath thinner tiles so the entire top mosaic surface remains flat and comfortable to clean. When grouting, allow the grout to firm up for fifteen to twenty minutes until it reaches a clay-like consistency before starting cleanup; wiping too early with a dripping-wet sponge will wash out pigment and hollow out grout joints. Finally, always install heavy-duty D-ring hanging brackets rated for at least twice the total weight of the finished mirror, securing them directly into wall studs with heavy-duty anchors.
Styling, Presentation, or Organization Ideas
Styling handcrafted mosaic mirror frames involves coordinating tile finishes, lighting placement, and wall backdrops to showcase the frame’s reflective depth. Mount a large mosaic mirror directly opposite a window or beneath a decorative wall sconce; the focused light will catch the facets of glass and metallic tesserae, casting warm, dancing reflections throughout the room. In entryways, pair an arched or rectangular mosaic mirror with a slim floating wooden console table and simple ceramic pottery, allowing the intricate tilework to serve as the primary artistic statement. For bathrooms, match the accent colors in your mosaic frame—such as turquoise, cobalt, or copper—with your vanity hardware, towels, and bath accessories to establish a cohesive color scheme. When organizing your mosaic studio, store sorted tesserae by color and material in clear stackable plastic bins or glass jars, keeping glass nippers, safety gear, and grout floats within easy reach on dedicated tool pegboards.
Budget or Time Planning
Crafting custom mosaic mirror frames is a budget-friendly way to achieve high-end artisanal home decor on an accessible budget. A basic starter supply kit—including an unframed mirror glass, a half-inch plywood backer round, an assortment of vitreous glass tiles, a bottle of silicone adhesive, and a two-pound tub of unsanded grout—typically costs between thirty and forty-five dollars, while delivering a finished wall art piece comparable to retail designer mirrors costing hundreds of dollars. Upgraded projects utilizing antique porcelain, genuine mother-of-pearl, or stained glass sheets generally require an investment of fifty to seventy-five dollars. In terms of time, planning your geometric design and nipping tile shapes takes two to three hours. Gluing the mosaic layout onto the frame requires two to three hours of focused, therapeutic craft time. After a twenty-four-hour adhesive cure, the grouting, sponging, and polishing process takes roughly one hour. Dedicating a single weekend to the project allows you to construct, grout, and mount a custom mosaic mirror frame that will bring handcrafted charm to your walls for decades.
Creative Expansion and Advanced Inspiration
Once you have mastered foundational flat tiling and basic grouting mechanics, you can explore advanced structural and mixed-media expansions to push your mosaic art further. Consider integrating warm, battery-operated LED strip backlighting along the rear outer perimeter of your wooden substrate, casting a soft ambient halo that illuminates your wall and highlights the outer tile contours at night. Another exciting expansion is three-dimensional sculptural mosaic framing, layering polymer clay relief carvings, sculpted resin cabochons, and raised tile peaks that rise dynamically off the frame plane. You can also experiment with custom color-blended grouts, mixing metallic mica powders or glow-in-the-dark pigments into your grout mixture to create luminous joints that gleam in dim lighting. Integrating these creative, advanced additions transforms everyday reflective glass into museum-grade functional art that celebrates architectural geometry, color harmony, and handmade craftsmanship.