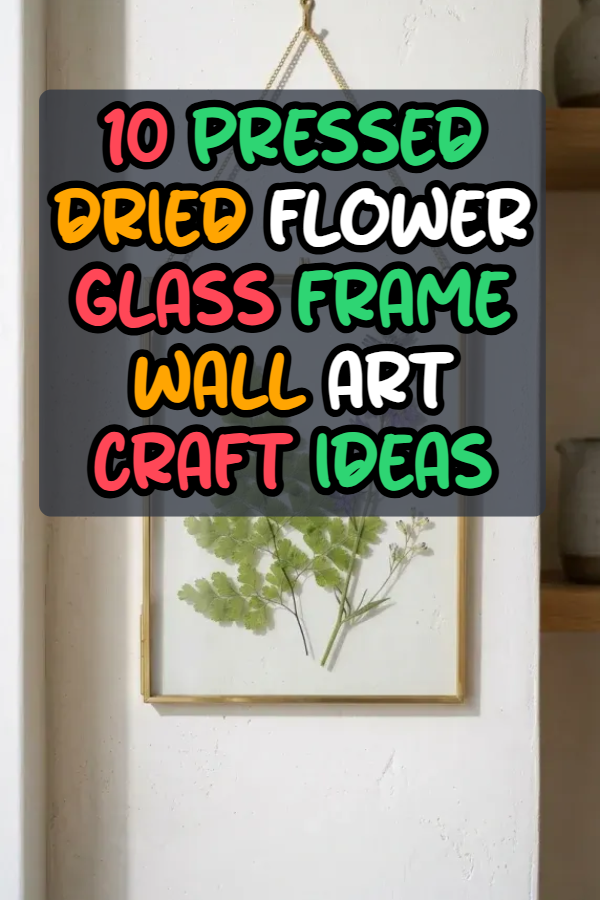
10 Pressed Dried Flower Glass Frame Wall Art Craft Ideas

Introduction
Transforming fresh garden blooms into pressed dried flower glass frame wall art preserves the delicate beauty of botanicals inside modern floating displays. Enclosing real pressed petals, ferns, and wild grasses between two panes of clear glass creates a suspended, translucent effect that catches natural light and reveals fine petal veins and organic leaf contours. Instead of relying on printed botanical posters, crafting handmade herbarium frames allows you to preserve meaningful garden harvests, wedding bouquets, and seasonal wild clippings with archival longevity. This comprehensive guide details the foundational mechanics of botanical pressing, moisture extraction, glass layout composition, and adhesive-free mounting across ten unique design styles. You will explore critical techniques for selecting colorfast floral specimens, choosing between traditional wooden press books and silica gel, sealing double-glass frames, and preventing UV sun bleaching. Master botanical anatomy, geometric spacing, color preservation, and frame mechanics to turn delicate garden clippings into heirloom-quality framed art for your home.
Why This Idea Is Trending or Useful
Pressed dried flower glass frame wall art has become a favorite across modern interior design, biophilic decor, and sustainable crafting communities because it bridges natural botanical beauty with minimalist framing. Transparent floating glass frames eliminate heavy paper backings, allowing the underlying wall color and room light to shine directly through the negative space around each pressed petal. This lightweight, see-through aesthetic complements a wide range of interior styles—from organic Scandinavian living rooms and Japandi spaces to dark academia libraries and minimalist entryways. Crafting pressed floral frames also provides an eco-friendly, zero-waste outlet for preserving sentimental flora: wedding florals, memorial garden blossoms, graduation bouquets, and travel wildflowers can be immortalized rather than discarded. Furthermore, flat-pressed botanical framing requires minimal wall depth, making it ideal for narrow hallways, stairwells, and small apartment alcoves. The combination of zero-footprint transparency, sentimental preservation value, low craft startup costs, and timeless organic charm makes pressed flower glass framing an essential creative project.
Materials and Preparation
Building crisp, archival-quality pressed flower glass frames requires collecting colorfast botanical specimens, moisture-absorbent pressing supplies, clear floating frames, and precision handling tools before arranging your artwork. Essential crafting materials include assorted fresh garden flowers and foliage (such as pansies, cosmos, larkspur, delphiniums, baby’s breath, and maidenhair ferns), archival blotting paper or non-glossy phonebook pages, a heavy wooden flower press or stack of heavy hardcover books, double-pane floating glass frames with brass, black metal, or natural wood borders, and archival clear floral glue or micro-glue dots. Required tools include precision craft tweezers, a sharp utility knife, an artist brush with soft bristles, lint-free microfiber glass cloths, and isopropyl alcohol. Begin preparation by harvesting fresh blooms in the late morning after dew has completely evaporated but before hot midday sun wilts the petals; dry surface petals prevent mold growth during pressing. Inspect blossoms for flat facial profiles, trimming thick stem backs or separating multi-layered petals (such as thick roses or dahlias) into individual petal layers. Place flowers face down between sheets of archival blotting paper inside your wooden press, tighten the straps firmly, and let them dry undisturbed in a warm, dark, well-ventilated room for two to three weeks until the petals are paper-thin, crisp, and moisture-free.
Idea 1: Minimalist Floating Fern and Wildflower Herbarium Specimen
Setup Method
The minimalist floating fern and wildflower herbarium specimen showcases individual pressed botanical clippings suspended cleanly in clear glass, inspired by historical 19th-century naturalist archives. This design highlights the natural silhouette of a single graceful botanical—such as a vibrant green maidenhair fern frond, a slender stem of purple larkspur, or a delicate sprig of wild chamomile. Floating the single stem in the center of an oversized glass frame emphasizes negative space, turning fine leaf serrations and delicate stem curves into a refined botanical study. Finished in a slender brass or black metal floating frame, this piece brings clean botanical elegance to modern living rooms, bathrooms, and study spaces.

To set up this herbarium frame, thoroughly clean both sides of two floating glass panes using isopropyl alcohol and a lint-free microfiber cloth to remove all dust, smudges, and fingerprints. Select a pristine, fully dried pressed fern frond or slender larkspur stem. Using fine-tipped craft tweezers, gently lift the botanical specimen and place it in the exact geometric center of the bottom glass pane. If needed, apply a microscopic dot of clear archival glue with a toothpick to the back of the central stem to prevent slipping. Carefully align and lower the top glass pane directly over the specimen, pressing firmly to sandwich the flower without sliding the glass. Fasten the outer metal frame clasps or slide the glass sandwich into a wooden floating frame channel. Attach a delicate brass hanging chain to the top frame loops and hang the piece where soft, indirect daylight can backlight the botanical silhouette.
Idea 2: Symmetrical Radial Floral Mandala Floating Frame
How to Create

A symmetrical radial floral mandala floating frame arranges concentric rings of pressed petals, small flower heads, and delicate tendrils around a central blossom to create a balanced, kaleidoscope-style pattern. This design utilizes radial eight-fold symmetry, repeating rings of colorful pansy petals, yellow buttercup heads, cosmos rays, and tiny baby’s breath blossoms outward from a vibrant center core. The precise geometric repetition combined with organic petal textures creates a soothing, meditative wall accent that draws the viewer’s eye into the center of the frame. The transparent glass background allows the floating mandala pattern to cast intricate shadows against the wall behind it.
To create this floral mandala, place a clean square glass pane over a printed circular mandala grid guide on your work table. Place a single vibrant pressed flower—such as a deep purple pansy or orange cosmos—in the exact center point. Using tweezers, arrange eight identical pressed yellow petals evenly around the central bloom, checking the printed grid beneath the glass to maintain uniform radial angles. Build a second concentric ring using sixteen delicate sprigs of pressed baby’s breath, followed by a third outer ring of thirty-two pointed green fern leaflets or slender pressed daisy petals radiating toward the glass borders. Once the geometric layout is balanced and complete, carefully remove the paper guide from beneath the glass. Lower the second glass pane straight down over the petals, lock the frame brackets firmly in place, and display the completed mandala on a prominent feature wall.
Idea 3: Vintage Brass Octagonal Locket Frame with Pressed Pansies
Step-by-Step Guide
A vintage brass octagonal locket frame with pressed pansies captures the antique charm of Victorian botanical jewelry in a decorative wall-hanging format. This design uses small, eight-sided or diamond-shaped double-glass frames bound in tarnished antique brass with an integrated swivel latch and delicate hanging chain. The faces of pressed pansies and violas naturally resemble painted watercolor portraits, featuring rich velvet purples, buttery yellows, and deep indigo whiskers that hold their color remarkably well after pressing. Grouping several small octagonal frames together creates an intimate, antique gallery wall suited for vintage bedrooms, reading alcoves, and vanity spaces.

Begin by selecting two or three fully pressed pansies with contrasting color patterns—such as a deep royal purple pansy paired with a soft lavender-and-yellow viola. Unlatch the vintage octagonal brass frame and wipe both interior glass surfaces clean with a microfiber cloth. Using tweezers, place the larger pansy slightly off-center in the lower half of the bottom glass, positioning the smaller viola and a tiny clover leaf overlapping gently beside it to create an organic, clustered bouquet. Ensure that no petal edges extend beyond the rubber sealing gasket of the frame. Close the hinged top glass pane slowly over the arrangement, securing the brass swing latch tightly to lock the glass panes together. Tie a length of frayed-edge velvet ribbon to the top brass chain loop, and hang the octagonal frame on an antique brass picture hook.
Idea 4: Wild Meadow Wildflower Gradient Rainbow Horizon
Execution Process

The wild meadow wildflower gradient rainbow horizon arranges an extensive spectrum of pressed blossoms in a horizontal color-blocked transition across a wide panoramic glass frame. This design flows from deep reds and corals on the left, moving smoothly through golden yellows, meadow greens, and cornflower blues, to rich purples and soft ivories on the right. The long, horizontal format mimics a vibrant wildflower field at sunset, displaying dozens of distinct botanical species in a cohesive, modern rainbow gradient. The continuous sweep of colors creates high visual impact across wide living room sofas, dining room sideboards, and bed headboards.
Execute this design by measuring and cleaning the glass panes of a wide twelve-by-thirty-six-inch panoramic floating frame. Sort your pressed floral collection into distinct color families across shallow trays: red poppies, coral geranium petals, orange marigolds, yellow buttercups, green fern leaflets, blue forget-me-nots, and purple violas. Starting at the far left edge of the bottom glass pane, place your red and coral petals in a dense, natural upward-branching pattern using tweezers. Gradually transition your floral placements into orange and golden-yellow blooms across the first third of the glass, blending the color borders naturally. Continue across the panoramic glass, placing greens, blues, and purples in sequence, finishing with white Queen Anne’s lace and baby’s breath at the far right. Lower the top panoramic glass pane carefully, clamp the frame corners, and mount the horizontal botanical horizon on your wall using heavy-duty wall anchors.
Idea 5: Dark Academia Pressed Fern and Moth Silhouette Shadow Box
How to Create
A dark academia pressed fern and moth silhouette shadow box pairs rich, pressed woodland foliage with paper-cut insect silhouettes against clear glass to evoke the atmosphere of an antique Victorian naturalist study. This design uses deep forest-green bracken ferns, dried sheet moss fragments, and delicate pressed lichen twigs surrounding an intricate black cardstock Luna moth or Death’s-head hawk moth silhouette. The combination of dark, moody botanical greens and crisp paper-cut entomology silhouettes creates a dramatic, scholarly aesthetic that complements dark wood bookshelves, leather furniture, and candlelit rooms.

To build this dark academia piece, cut an intricate four-to-six-inch moth silhouette from dense, matte black cardstock using a precision craft knife, carving delicate filigree patterns into the wing sections. Clean the double panes of an eight-by-ten-inch deep-set floating frame or shallow shadow box with black wooden molding. Position the black paper moth silhouette in the center of the bottom glass pane. Using tweezers, arrange dark pressed bracken ferns, autumn-toned oak leaves, and slender pressed hemlock sprigs curving gracefully around the moth, framing the insect like an arched botanical wreath. Add tiny fragments of pressed golden lichen along the bottom border to anchor the composition. Carefully place the top glass pane over the arrangement, clamp the frame edges, and mount the framed piece beside dark-stained bookshelves or antique brass desk lamps.
Idea 6: Monochromatic Ivory and Bleached Botanical Bridal Keepsake
Step-by-Step Guide

A monochromatic ivory and bleached botanical bridal keepsake preserves wedding bouquet blooms—such as white garden roses, ivory hydrangeas, baby’s breath, and silver dollar eucalyptus—in a timeless, elegant floating frame. This design deconstructs thick bridal flowers into individual pressed petals and flat-profile florets, reassembling them into an artistic reconstruction of the original bridal bouquet. The soft, neutral palette of chalky white, cream, champagne, and muted sage green creates a romantic heirloom art piece that captures wedding memories while blending effortlessly with modern, neutral home decor.
Begin by disassembling the bridal bouquet immediately after the event, selecting the freshest white rose petals, hydrangea florets, ranunculus layers, and eucalyptus leaves for pressing between sheets of archival blotting paper under heavy pressure for three weeks. Once the petals are fully dried, clean a sixteen-by-twenty-inch brass floating glass frame. In the lower center of the bottom glass pane, arrange the pressed eucalyptus leaves and olive branches to form the greenery base. Layer the pressed ivory rose petals and hydrangea florets over the foliage using tweezers, recreating the shape and flow of the original bridal bouquet. Intersperse delicate sprigs of pressed baby’s breath and astilbe throughout the petals to add airy texture. Slide a small calligraphed cardstock slip with the wedding date and couple’s names into the lower corner, seal the glass sandwich with the top frame clamps, and hang the keepsake frame in a bedroom or living space away from direct sunlight.
Idea 7: Geometric Gold Honeycomb Hexagon Cluster Frames
Setup Method

A geometric gold honeycomb hexagon cluster groups several individual six-sided floating glass frames together into a modular wall installation that mimics a natural beehive pattern. Each hexagonal frame houses a distinct, complementary botanical arrangement—such as one frame featuring pressed golden chamomile heads, an adjacent frame holding pressed honeycomb-patterned leaves, and another containing delicate pressed blue forget-me-nots. The modular nature of hexagonal frames allows you to expand the cluster over time as you collect and press new seasonal blooms, creating an interactive, evolving botanical gallery on your wall.
To set up this hexagon cluster, acquire three to five matching six-inch hexagonal floating glass frames with polished gold metal edges. Plan your botanical theme across the frames: frame one features golden coreopsis and yellow clover; frame two features green maidenhair fern leaflets; frame three features pressed white sweet alyssum; and frame four features purple lavender spikes. Clean all glass panes thoroughly with isopropyl alcohol. Arrange the respective pressed flowers inside each bottom glass hexagon, keeping layouts minimal and centered to emphasize the geometric borders. Seal each hexagonal frame with its top glass pane and metal locking pins. Mount the finished frames on your wall in an interlocking honeycomb cluster with uniform half-inch gaps between frame borders, creating a cohesive, geometric botanical statement.
Idea 8: Pressed Autumn Foliage and Golden Seed Pod Tapestry
Execution Process

A pressed autumn foliage and golden seed pod tapestry captures the rich, warm colors of fall by combining pressed maple leaves, fiery sweetgum stars, golden ginkgo fans, and flat-pressed ornamental seed pods inside a large wooden floating frame. This design layers varied leaf textures and rich harvest hues—ranging from deep burgundy and burnt orange to saffron yellow and chocolate brown—across the entire glass surface. The organic overlapping of translucent pressed leaves creates rich secondary colors where the foliage intersects, celebrating the natural beauty of autumn foliage in a durable, framed format.
Execute this design by collecting vibrant fallen autumn leaves in late September, wiping them clean and pressing them in a wooden press for two weeks until flat and dry. Clean a large eighteen-by-twenty-four-inch floating frame with a natural blonde oak or walnut wood border. Arrange your pressed leaves across the bottom glass pane, beginning with large golden ginkgo and red maple leaves in the center and working outward with smaller sweetgum stars and serrated beech leaves. Allow the leaf edges to overlap slightly, creating beautiful translucent color blends when light passes through the glass. Intersperse flat-pressed dried honesty seed pods (lunaria) and pressed golden grasses throughout the foliage to introduce pearlescent and linear accents. Lower the top glass pane carefully, clamp the frame securely, and hang the autumn tapestry in a dining room or entryway to welcome the harvest season.
Idea 9: Asymmetrical Crescent Moon Floral Wreath Floating Frame
How to Create

An asymmetrical crescent moon floral wreath floating frame arranges delicate pressed petals and curved botanical tendrils into a graceful lunar crescent across the glass plane. This design leaves two-thirds of the glass completely open and transparent, concentrating all pressed florals in a dense, curving crescent along one side of the frame. Soft pastel petals—such as pink cosmos, blue hydrangeas, yellow alyssum, and wispy maidenhair ferns—taper from a thick center curve down to slender, delicate points at the moon’s horns. The balance between empty glass and dense floral details gives this design a dreamy, celestial quality suited for nurseries, bedrooms, and creative studio spaces.
To build this crescent moon frame, place an eight-by-ten-inch glass pane over a piece of paper with a penciled crescent moon guide. Using fine tweezers, place your largest pressed focal blossoms—such as pink cosmos or blue hydrangea clusters—along the widest center curve of the crescent outline on the glass. Work outward toward the top and bottom tips of the crescent, using progressively smaller petals, baby’s breath florets, and curved fern stems to taper the points into slender, graceful lines. Ensure all flowers stay within the curved guideline before carefully sliding the paper guide out from beneath the bottom glass. Lower the top glass pane directly onto the floral crescent, clamp the frame edges, and hang the finished piece near a window where morning light can illuminate the floating celestial flower moon.
Idea 10: Pressed Herbarium Kitchen Grid with Calligraphed Labels

Step-by-Step Guide
A pressed herbarium kitchen grid with calligraphed labels frames culinary herbs—such as rosemary, thyme, sage, flat-leaf parsley, and purple basil—alongside handwritten botanical names in a clean, multi-frame gallery grid. This design uses identical small square floating glass frames, each preserving a single pressed culinary herb branch accompanied by a small strip of aged paper bearing the herb’s common and Latin botanical names in elegant cursive calligraphy. Arranged in a neat three-by-three grid across a kitchen wall or dining alcove, this project merges practical herbal knowledge with artisanal kitchen decor.
Begin by harvesting fresh culinary herb sprigs from your garden, choosing flat, healthy branches of rosemary, sage, oregano, dill, and thyme. Press the herbs between blotting sheets under heavy books for two weeks until crisp and dry. Prepare nine matching five-by-five-inch floating glass frames with black or natural wood edges, cleaning all glass surfaces with a microfiber cloth. Cut nine small one-by-two-inch strips from aged parchment or deckle-edge watercolor paper, writing the common and Latin names of each herb (e.g., Rosmarinus officinalis) using a black archival calligraphy pen. Place one pressed herb specimen in the center of each frame’s bottom glass pane, positioning the matching name label half an inch below the stem base. Seal each frame with its top glass pane and hanging hardware. Mount the nine frames in a precise three-by-three grid on your kitchen wall, maintaining equal two-inch spacing between frames for a polished, professional culinary herbarium display.
Common Beginner Mistakes and How to Avoid Them
The most critical and frequent mistake beginners make when creating pressed flower glass frames is framing botanicals that are not completely dry. Fresh flowers contain substantial amounts of water within their cellular structures; framing flowers after only a few days of pressing leaves residual moisture trapped inside the airtight glass sandwich, leading to brown rotting, condensation buildup, and fuzzy white mold growth within weeks. Always allow your botanical specimens to dry for a full two to three weeks in a dark, dry environment until the petals feel completely papery and snap lightly when bent. Another common error is using standard chemical glass cleaners containing ammonia immediately before placing flowers on the glass. Residual chemical fumes trapped inside the sealed glass pane will chemically react with delicate plant pigments, causing vibrant colors to bleach into muddy gray or yellow tones. Always clean floating glass panes with pure isopropyl alcohol or warm distilled water, wiping the glass completely dry with a lint-free microfiber cloth before arranging botanicals. Additionally, many crafters place finished pressed flower frames in direct sunlight near south-facing windows. Direct UV sunlight rapidly breaks down natural plant pigments, fading vivid reds, purples, and yellows within months. Always hang your pressed flower frames on interior walls receiving soft, indirect daylight or behind museum-grade UV-filtering glass to ensure years of color retention.
Practical Tips for Better Results
Achieving professional, gallery-quality results with DIY pressed flower glass frames relies on careful specimen selection, delicate handling mechanics, and invisible adhesion methods. When collecting flowers for pressing, choose blossoms with naturally single-layered, flat facial planes—such as pansies, violas, cosmos, buttercups, hydrangeas, and poppies—which press evenly and quickly without thick center stems that crack glass under pressure. When handling paper-thin pressed petals, never use your bare fingers; natural skin oils and moisture transfer onto dried petals, causing discoloration over time. Always use precision, rubber-tipped or fine-point craft tweezers to lift and position delicate flora across the glass. If your floating frame has slightly loose tolerances and pressed petals shift when the frame is tilted upright, do not use thick craft glues that show through clear glass; instead, apply an imperceptible dab of clear-drying archival floral adhesive or a microscopic clear glue dot behind the thickest part of the stem or petal center using the tip of a fine sewing needle. Finally, when lowering the top glass pane onto your completed floral layout, lower the glass straight down horizontally like a press rather than sliding it from the side; sliding the glass pane will push, wrinkle, and misalign delicate petals across the bottom glass surface.
Styling, Presentation, or Organization Ideas
Styling pressed dried flower glass frames involves coordinating frame finishes, wall placements, and room lighting to emphasize the transparent, weightless character of the floating botanicals. Group a series of three coordinating floating frames—such as three tall brass frames featuring varied pressed meadow grasses—in a vertical or horizontal triptych along an entryway wall or dining room alcove to establish a calm, cohesive natural focal point. For gallery walls, mix floating glass botanical frames among solid-framed oil paintings, vintage sketches, and round brass mirrors; the transparent negative space of the floating frames creates visual breathing room that keeps dense gallery walls from feeling cluttered. When selecting frame finishes, match the metal or wood trim to surrounding interior hardware: pair slender polished brass frames with warm mid-century and traditional decor, matte black frames with modern industrial interiors, and raw natural blonde oak frames with Japandi and Scandinavian aesthetics. To enhance the floating illusion during evening hours, position a soft accent picture light or nearby floor lamp to project subtle floral shadows through the clear glass onto the wall behind the frame.
Budget or Time Planning
Crafting custom pressed dried flower glass frames is an exceptionally economical, high-reward DIY home decor project that delivers luxury botanical art on an accessible budget. Because the primary floral specimens can be harvested freely from your own backyard, local parks, or leftover bouquets, your raw botanical material cost is virtually zero. A basic starter supply kit—including a pack of archival blotting paper, precision craft tweezers, and two eight-by-ten-inch metal floating glass frames—typically costs between fifteen and twenty-five dollars, providing enough materials to create two complete framed art pieces. Upgraded projects utilizing large panoramic frames, solid hardwood floating frames, or vintage brass chain lockets generally require a modest investment of thirty to forty-five dollars. In terms of time management, harvesting and loading fresh blooms into a wooden flower press takes roughly twenty to thirty minutes. The passive drying period requires two to three weeks of patience while flowers dry completely. Arranging, cleaning the glass, and sealing a finished floating frame takes thirty to forty-five minutes of relaxing, creative crafting time. Planning a seasonal harvest session in late spring or summer allows you to press a diverse palette of blooms that can be framed into personalized gifts and home decor pieces throughout autumn and winter.
Creative Expansion and Advanced Inspiration
Once you have mastered foundational botanical pressing and glass framing techniques, you can explore advanced mixed-media, metallic, and structural expansions to elevate your pressed flower wall art even further. Consider integrating delicate genuine 24-karat gold leaf or copper foil flecks into the clear glass space surrounding your pressed petals, using a dry artist brush to burnish tiny metallic leaf flakes that catch room light alongside the organic botanicals. Another exciting expansion is combining pressed flowers with hand-painted watercolor calligraphy, writing meaningful poetry verses, wedding vows, or favorite quotes in gold or white gouache ink directly onto the interior glass surface before sandwiching your floral arrangement. You can also experiment with double-exposure botanical depth, placing a background layer of pressed green ferns on the bottom glass pane and floating delicate, colorful pansy petals on a middle acrylic spacer pane before adding the top glass, creating a true three-dimensional floating shadowbox effect. Integrating these creative, advanced additions transforms simple garden clippings into sophisticated, museum-grade botanical art that celebrates the natural world and preserves precious seasonal memories for years to come.
