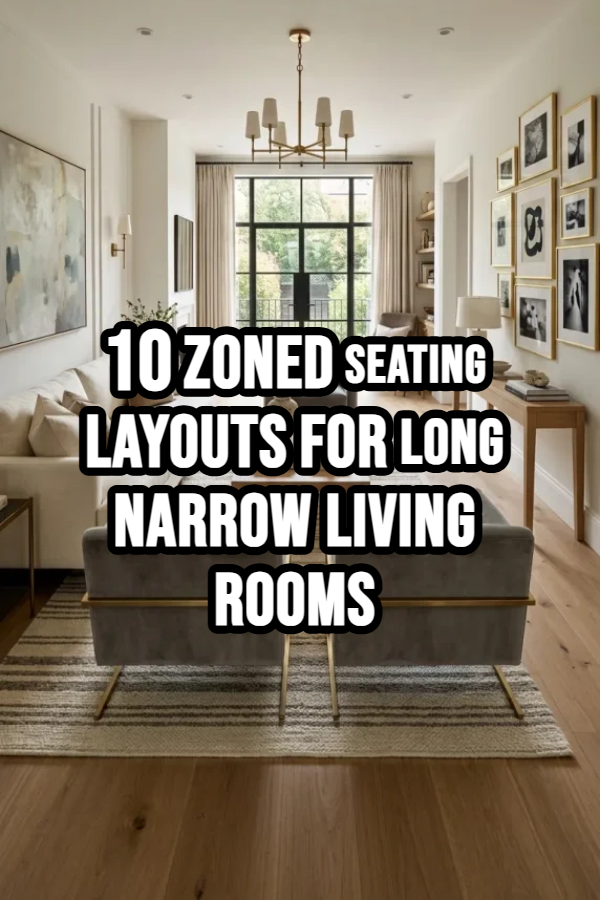
10 Zoned Seating Layouts for Long Narrow Living Rooms

Spread the love

Designing a long, narrow living room—often referred to as a “bowling alley” space—presents a difficult layout puzzle. When a single rectangular room must accommodate primary seating, entryways, a fireplace, perhaps a dining area or home office, and a smooth path of travel, the default arrangement of lining furniture against the longest walls usually fails. This default approach makes the room feel even narrower, disrupts traffic flow, and creates dead space.

The key to unlocking the potential of a narrow footprint relies on intentional spatial zoning and continuous circulation. Rather than attempting to stretch one cohesive seating area across the entire length, you must divide the footprint into distinct functional zones. By keeping furniture pulled away from walls, floating main seating pieces, using varied lighting, and establishing clear pathways (often along one single long wall), you can transform a challenging space into a highly functional, welcoming home. This guide details 10 creative zoned seating layouts specifically tailored for narrow dimensions.

The Critical Rules for Narrow Space Layouts

Before placing furniture, keep these foundational rules of narrow room design in mind:

  • Rule 1: Pull Furniture Away from Walls. Placing all large furniture flat against the long walls creates an empty center aisle and visual “tunnel vision.” Floating a sofa or an armchair just 6 to 12 inches off the long wall allows the eye to perceive space behind it, widening the room visually.
  • Rule 2: Establish One Clear Traffic Pathway. Do not allow walkways to zig-zag between furniture. Dedicate 36 inches along one continuous long wall for unblocked traffic flow.
  • Rule 3: Zones Need Distinct Visual Anchors. Every zone (e.g., primary seating, reading, dining) must be defined by its own area rug, its own direct lighting source (pendant, floor lamp, or sconce), and its own vertical center point (art, mirror, or shelving).
  • Rule 4: Use Horizontal Lines to “Widen” the Room. Use area rugs with stripes running across the narrow width (horizontally) rather than along the length. Place floating console tables or benches across the width as spatial speed bumps.

Layout 1: Primary Sofa & Parallel Armchairs (Floating)

Concept and Design Overview

This is the quintessential layout for modern transitional narrow rooms. Instead of a bulky L-shaped sectional that blocks circulation, this layout uses one standard-length sofa floating slightly off a long wall, paired with two parallel armchairs directly opposite.

By floating both groups, you create a dedicated central path of travel behind the armchairs, keeping the cozy conversation core intact. The color palette focuses on warm greige upholstery, natural light oak wood tones, brass accents, and cream textured rugs.

+-------------------------------------------------------------+
|              LONG NARROW LIVING ROOM (12' WIDE)             |
|                                                             |
|   +--------------------------+                              |
|   | FLOATING SOFA (Cream)    |                              |
|   +--------------------------+                              |
|   | [ Coffee Table - Rect ]  |                              |
|   +--------------------------+                              |
|   | TWO ARMCHAIRS (Grey)     |                              |
|   +----+----------+----------+                              |
|        |          |          |                              |
|   <------------------ Dedicated 36" Main Walkway ---------> |
|   +-----------------------------------------------------+   |
|   | WALL CONSOLE & ART GALLERY                          |   |
|   +-----------------------------------------------------+   |
+-------------------------------------------------------------+

Step-by-Step DIY Assembly

  1. Map the Main Aisle: Mark 36 inches of clear floor space along one long wall as your unblocked passage.
  2. Define Seating Area with Rug: Place a large (approx. 9×12 or 8×10) area rug 1 foot off the opposite long wall.
  3. Float the Primary Sofa: Place your main sofa on the rug, 6 to 12 inches away from the long wall.
  4. Position Armchairs: Align two parallel, matching armchairs directly opposite the sofa, ensuring they do not bleed into the traffic aisle.
  5. Anchor with lighting: Hang a large central pendant or place a tall arched floor lamp near the seating core.

Layout 2: Corner Fireplace L-Shape Sectional with Back Anchor

Concept and Design Overview

A corner fireplace forces a diagonal focal point in an already narrow room. To prevent the room from feeling unbalanced, an L-shaped sectional is used with its long side pushed against a long wall, while the short end extends into the room towards the fireplace.

Crucially, a sturdy console table must be placed directly behind the exposed back of the sectional’s short end. This console functions as a “spatial anchor,” acting as a visual speed bump to define the seating zone and prevent the sofa from looking adrift. The color palette features dark navy velvet upholstery, natural stacked stone fireplace, walnut wood, and warm amber light.

Step-by-Step DIY Assembly

  1. Place Sectional: Align the long back of the L-sectional against the wall opposite the traffic aisle. Extend the short side towards the fireplace.
  2. Anchor the Back: Place a console table or low bookcase tightly against the exposed short side of the sectional.
  3. Define with Lighting & Rug: Place a large horizontal striped area rug beneath the seating. Install an articulating wall sconce on the fireplace wall.
  4. Balance the Entry: On the opposite end of the room (e.g., the “behind-sofa” zone), place a slender entry bench and coat rack.

Layout 3: Central Primary Seating & Split Symmetrical End Zones

Concept and Design Overview

If a narrow living room features a strong central architectural element (like a large fireplace or wall of windows), use it to anchor the primary seating area in the middle of the room. This splits the remainder of the footprint into two smaller, symmetrical functional end zones.

For instance, the central zone is a 3-piece seating cluster, while one end zone becomes a dedicated homework nook (desk/chair) and the opposite end becomes a small bar/reading corner. This highly symmetric approach brings order to the chaotic bowling alley dimensions. The color scheme focuses on soft sage greens, cream linens, black metal hardware, and warm light oak wood.

       +-------------------------------------------------+
       |           LONG SYMMETRICAL NARROW ROOM          |
       |                                                 |
       |   +---------+  +-----------------+  +---------+   |
       |   | ZONE 1  |  | CENTRAL ZONE    |  | ZONE 2  |   |
       |   | (HOME   |  | (PRIMARY SEATING)|  | (READING |   |
       |   |  DESK)  |  | [Sofa & 2 Chairs]|  | NOOK)    |   |
       |   +---------+  +-----------------+  +---------+   |
       |                                                 |
       |   <------ Main Continuous Walkway (Along Wall) --->|
       |                                                 |
       +-------------------------------------------------+

Step-by-Step DIY Assembly

  1. Identify Central Focal Point: Mount the TV or center the main sofa exactly with the central fireplace or window grouping.
  2. Cluster Central Seating: Arrange sofa, rug, and two chairs in a tight cluster in the room’s center.
  3. Define End Zones:
    • Zone 1: Place a slender desk and chair against the far end wall with a task light.
    • Zone 2: Place a comfortable armchair and a small bookshelf with a floor lamp.
  4. Unify with Lighting: Use matching sconces or recessed lighting to span the entire length, with central pendant defining the primary core.

Layout 4: Tonal Color Drenching with Low-Slung Minimalist Seating

Concept and Design Overview

A narrow room often feels claustrophobic. Color drenching (painting the entire wall, trim, ceiling, and built-ins in the exact same color) dissolves architectural boundaries, visually expanding the perception of width.

Combining this with ultra-low-profile, minimalist Italian or Japandi-style furniture keeps the sightlines entirely open, preventing bulky furniture from “heavying” the narrow space. The color scheme highlights monochromatic matte dusty charcoal grey, raw concrete, natural oak, and warm ambient light.

Step-by-Step DIY Assembly

  1. Apply Color Drenching: Select one rich, sophisticated neutral (like dusty charcoal, sage green, or creamy greige). Paint all walls, ceiling, baseboards, door trim, and existing built-ins in this single hue, using matte for walls/ceiling and satin for trim.
  2. Select Low Furniture: Choose a low-to-the-ground 2-seater sofa and two armless chairs (e.g., floor poufs, low-slung oak frames).
  3. Float Seating: Arrange the low-profile pieces slightly off-center on a highly textured monochromatic rug.
  4. Define with Bias Lighting: Install warm LED strip lighting behind a low console or floating shelving, casting soft light upward to widen the walls visually.

Layout 5: Sectional Against Short End Wall (Maximum Traffic)

Concept and Design Overview

When a narrow living room features high traffic (e.g., connecting a kitchen and outdoor space), prioritizing unblocked flow is critical. This layout maximizes the continuous walkway by pushing a standard-length L-shaped sectional tightly into one of the short end walls of the room, turning that far end into a cozy media nook.

This isolates the seating area from the circulation corridor entirely. A slender console table lines the remaining long wall opposite the pathway. The color palette pairs charcoal grey sectional upholstery, black metal console, dark oak wood, and natural jute textures.

+-------------------------------------------------------------+
|              HIGH-TRAFFIC NARROW ROOM (11' WIDE)            |
|                                                              |
|   <--- Dedicated Continuous 36" Walkway (Entire Length) ---->|
|                                                              |
|   +-----------------------------------------------------+   |
|   | SLENDER CONSOLE TABLE & ART GALLERY WALL            |   |
|   +-----------------------------------------------------+   |
|                                                             |
|   +-----------------------------+                           |
|   | SECTIONAL SOFA (PUSHED      |                           |
|   | TIGHT TO SHORT END WALL)    |                           |
|   |  [TV on Media Stand]        |                           |
|   +-----------------------------+                           |
+-------------------------------------------------------------+

Step-by-Step DIY Assembly

  1. Dedicate the Main Aisle: Reserve the full length of one long wall as your 36-inch continuous passage.
  2. Position Sectional: Place an L-shaped sectional in the room’s far short end corner, opposite the entryway and opposite the primary walkway.
  3. Orient toward Media: Place a low media console on the short wall facing the sectional.
  4. Anchor with Rug: Define the seating nook with a square or horizontally-striped area rug beneath the sectional footprint.

Layout 6: Divided Living & Home Office / Hobby Nook

Concept and Design Overview

This is a high-utility layout designed for narrow homes needing multi-use spaces. The long footprint is clearly split 70/30 or 60/40 between a primary seating zone and a dedicated workspace or hobby corner.

The seating zone floats in the larger section, while a slender desk (e.g., a simple ladder desk or console) and an ergonomic chair are placed against the short end wall in the smaller zone. A low room divider (like a bench, console, or open shelving) acts as the physical threshold between the two zones. The color palette features crisp whites, matte blacks, warm birch wood, and soft grey textiles.

Step-by-Step DIY Assembly

  1. Define Zone Splitting: Divide the room visually 60/40 along the length.
  2. Anchor workspace: Place a slender desk and chair against the designated short end wall. Add vertical organization (e.g., floating shelves).
  3. Float Seating: In the larger 60% zone, arrange the primary sofa and rug floating away from the long wall.
  4. Place Threshold Divider: Set a low open console table or a floating bench perpendicular to the long wall, acting as the speed-bump boundary between desk and sofa.
  5. Use Zone-Specific Lighting: Hang a modern pendant over the seating cluster and a dedicated task lamp on the desk.

Layout 7: Cozy Double Armchair Reading Corner & Main Sofa

Concept and Design Overview

If your family reads more than watches TV, or if the room is too narrow for parallel seating clusters, use the far end of the bowling alley for a dedicated reading corner. Instead of another sofa or bulk, place two highly comfortable, contrasting armchairs and a small shared table.

This creates a highly usable “destination zone” at the far end of the room, anchored by its own floor lamp and area rug. The main sofa floats centrally. The color palette features blush pink velvet armchairs, sage green sofa, natural rattan accents, and warm linen light filtering.

       +-------------------------------------------------+
       |           NARROW READING & LOUNGE ZONES         |
       |                                                 |
       |   +-----------------+  +---------+  +---------+   |
       |   | ZONE 2:         |  | MAIN    |  | ZONE 1: |   |
       |   | TWO READING     |  | SEATING |  | ENTRY & |   |
       |   | CHAIRS & LAMP   |  | [Sofa & |  | CONSOLE |   |
       |   |  Destination ZN |  | Ottoman]|  | Nook    |   |
       |   +-----------------+  +---------+  +---------+   |
       |                                                 |
       |   <------ Main Continuous Walkway (Along Wall) --->|
       |                                                 |
       +-------------------------------------------------+

Step-by-Step DIY Assembly

  1. Dedicate the Destination End: Select the short wall farthest from the entry for the reading nook.
  2. Anchor the Nook: Place two comfortable, plush armchairs at a slight angle with a round accent table between them.
  3. Define with Lighting: Add a tall arc floor lamp over the chairs.
  4. Float Main Sofa: Place the primary sofa floating slightly off the central long wall on its own area rug.

Layout 8: Defined Library Lounge (Sofa Floating + Bookshelves)

Concept and Design Overview

In this sophisticated layout, the entire long narrow room is defined by floor-to-ceiling built-in or floating bookshelves that run the entire length of one long wall. This architectural element acts as a unifying continuous anchor.

Instead of fighting the narrow length, the sofa is floated centrally, positioned to face the library wall, creating a defined “Library Lounge” atmosphere. The color scheme focuses on rich espresso-stained wood, cream boucle upholstery, brass hardware, and warm LED strip lighting integrated into the shelving.

Step-by-Step DIY Assembly

  1. Install Full-Length Bookshelves: Line one continuous long wall with floor-to-ceiling floating shelves or semi-custom built-in units.
  2. Integrated Lighting: Install warm LED strip lighting beneath shelves to widen the walls visually and illuminate the books.
  3. Float the Boucle Sofa: Place a comfortable, textured boucle sofa floating centrally in the room, facing the bookshelves (and a wall-mounted TV or large art piece centered within the shelving).
  4. Anchor with Area Rug: Place a large textured jute or patterned area rug horizontally (across the narrow width) to widen the perception of the seating core.

Layout 9: Back-to-Back Floating Dual Zone Anchors

Concept and Design Overview

When a room is exceptionally long (e.g., 25+ feet), attempting to bridge two seating areas across that distance creates a void. Instead, use a tight, intentional “back-to-back” anchoring technique.

A standard primary sofa floats centrally, anchored by a console table behind it. Directly against the back face of that same console table, a second, smaller seating piece (like a settee, a daybed, or two small club chairs) is placed, oriented to face the opposite direction towards its own small destination rug and lamp. This creates a functional multi-use “speed bump” in the room’s center while eliminating dead zones. The color palette features neutral linens, dark iron hardware, tan leather, and natural woven seagrass.

+-------------------------------------------------------------+
|              BACK-TO-BACK FLOATING DUAL ANCHORS             |
|                                                             |
|   +-----------------------------------------------------+   |
|   | ZONE 1 SEATING (Primary)                            |   |
|   |  [TV on Media Stand - Long Wall]                    |   |
|   +-----------------------------------------------------+   |
|   | FLOATING SOFA 1       [ Console ]   FLOATING DAYBED |   |
|   +-----------------------[  Anchor ]-------------------+   |
|   |                       [ (Divider)]                  |   |
|   +-----------------------------------------------------+   |
|   | ZONE 2 SEATING (Reading / Dest)                     |   |
|   |  [Two Armchairs - facing opp direction]             |   |
|   +-----------------------------------------------------+   |
|                                                             |
+-------------------------------------------------------------+

Step-by-Step DIY Assembly

  1. Define Room Split: Find the precise architectural center of the room.
  2. Anchor Primary Sofa (Zone 1): Float the main sofa slightly off the long wall, facing the primary focal point.
  3. Place Consol Anchor ( Divider): Place a sturdy console table tightly against the back of that sofa.
  4. Anchor Secondary Piece (Zone 2): Position a daybed or two small chairs directly against the back face of that console table, oriented 180 degrees to face the far short end wall.
  5. Use Rugs as Thresholds: Define each zone with a large horizontally-striped area rug.

Layout 10: Sectional with Chaise End defining Lounge Threshold

Concept and Design Overview

When a modern sectional is desired in a narrow room, the orientation of the chaise is critical. If traffic flow is the priority, push a sofa-and-chaise sectional against one of the long walls.

However, the chaise must be oriented so its open end extends towards the center of the narrow width, acting as a visual threshold that physically defines the end of the seating lounge. This “stops the eye” from continuing down the alley and defines the lounge zone without requiring a separate divider. The color palette focuses on monochromatic light greys, matte black accents, natural concrete, and warm ambient light.

Step-by-Step DIY Assembly

  1. Map Traffic Aisle: Reserve 36 inches along one continuous long wall as the unblocked walkway.
  2. Align Sectional Base: Push the main body of the sectional against the opposite long wall.
  3. Orient the Chaise Threshold: Ensure the chaise end extends towards the room’s center, defining the threshold boundary.
  4. Anchor with Media: Mount the TV on the long wall opposite the sectional’s main body. Use a low console beneath it.

Essential Sizing and Clearance Guide

To optimize functional efficiency in a long narrow layout, use these standard dimensions:

  • Main Dedicated Aisle: Preserve 36 inches (3 feet) of continuous, unblocked floor space along one single long wall as your primary path of travel.
  • Rug Sizing: Area rugs must be wide enough that all furniture legs or at least the front legs of all seating pieces (sofa and chairs) rest comfortably on the rug to unify the zone. In a 12-foot wide room, a 9-foot horizontal rug leaves correct boundary margins.
  • Coffee Table Clearance: Leave 14 to 18 inches between the sofa/chair edge and the coffee table. Round or oval tables reduce traffic friction better than sharp squares.
  • TV Sizing and Placement: The optimal viewing distance is approximately 1.5 to 2.5 times the diagonal screen measurement. In a 12-foot wide room, a 55- to 65-inch TV is typically correct, mounted at eye level (center of screen approx. 42 inches high).
  • Floating Margin: Leave 6 to 12 inches between a floating sofa’s back/arm and the long wall to widened visual width.

Practical Maintenance and Zoning Tips

  • The Nightly Reset: Spend 5 minutes every night clearing the 36-inch continuous pathway. Put away loose magazines, clear coffee cups from zoned surfaces, and reset zoned lighting to ensure the room feels open and ordered.
  • Use Distinctive Zoned Rug Textures: Differentiate zones by varying rug types. Use a durable jute rug horizontally in the high-traffic entry zone, a plush patterned wool rug horizontally in the primary seating zone, and a soft shag or hide rug in the destination reading nook.
  • Vary Zoned Lighting Clearances: Every zone needs its own light anchor.
    • Central Zone: A central pendant (e.g., 28–32 inches above a central table).
    • Homework Nook: A dedicated task lamp.
    • Reading Zone: A tall floor lamp.
  • Use Temporary Dividers: In rentals, use temporary dividers like tall open shelving units, floor folding screens, or a floating console table placed perpendicular to define a zone threshold (Layout 6) without permanent changes.

Similar Posts

Leave a Reply

Your email address will not be published. Required fields are marked *